Updates in Tag Templates: How Enhanced Conversions for Web Are Now Configured in Google Tag Manager

If you’re setting up enhanced conversion tracking for Google in GTM, congratulations—an update has arrived.
I noticed these changes weeks ago while preparing a training template. I started testing before the official documentation was updated—and when it finally appeared, it confirmed (along with diagnostics in the ads interface) that I’d done everything correctly.
So now, I’m sharing both my test results and the updated official guide—so you can skip the guesswork and implement the changes correctly right away.
Google Ads - Updates in Tag Templates
What’s Changed?
Previously, when creating a conversion tag, you could simply enable the option to pass user data (email, phone, etc.). Now, in new tags, this option... is gone.
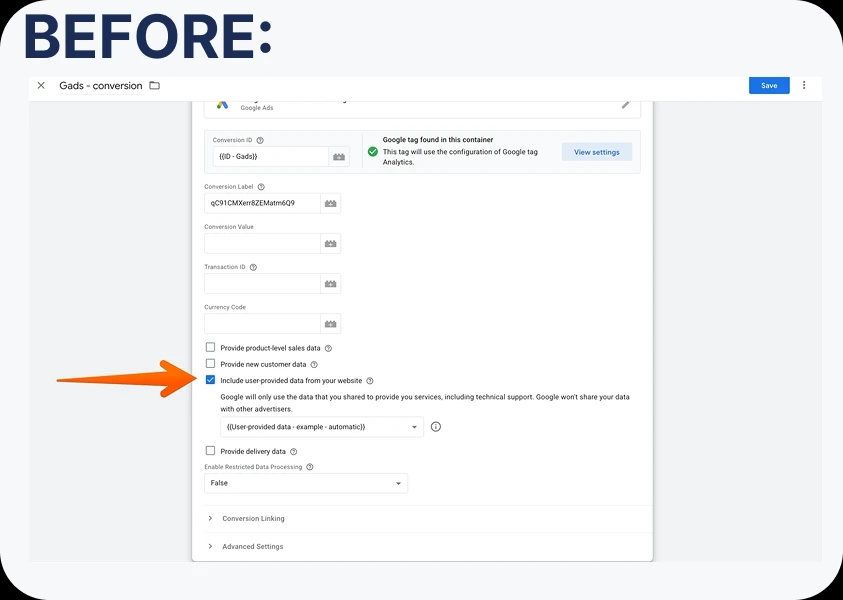
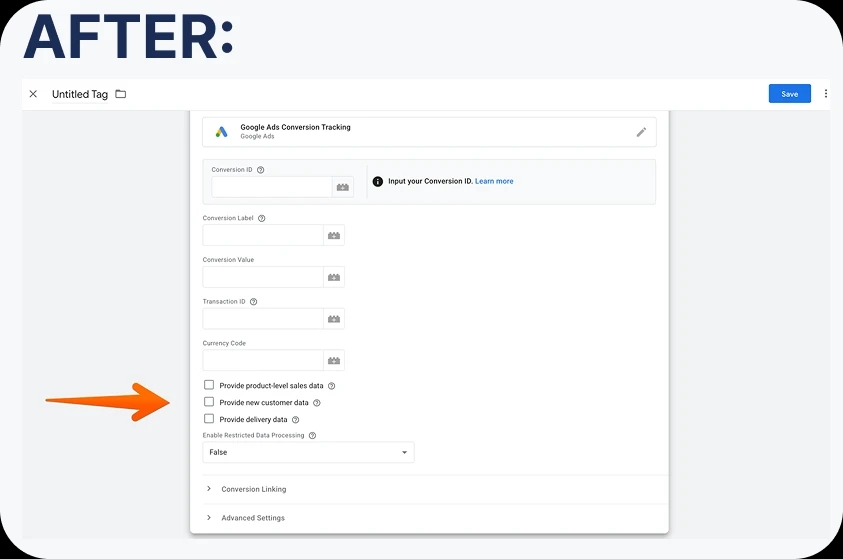
Old tags continue working as before. If you copy or export them, everything configures the same way. But if you create a new tag from scratch (new project, new account, new container)—you’re in for a surprise.
What to Do?
To send user data, you now need to create an additional tag—Google Ads User-provided data event.
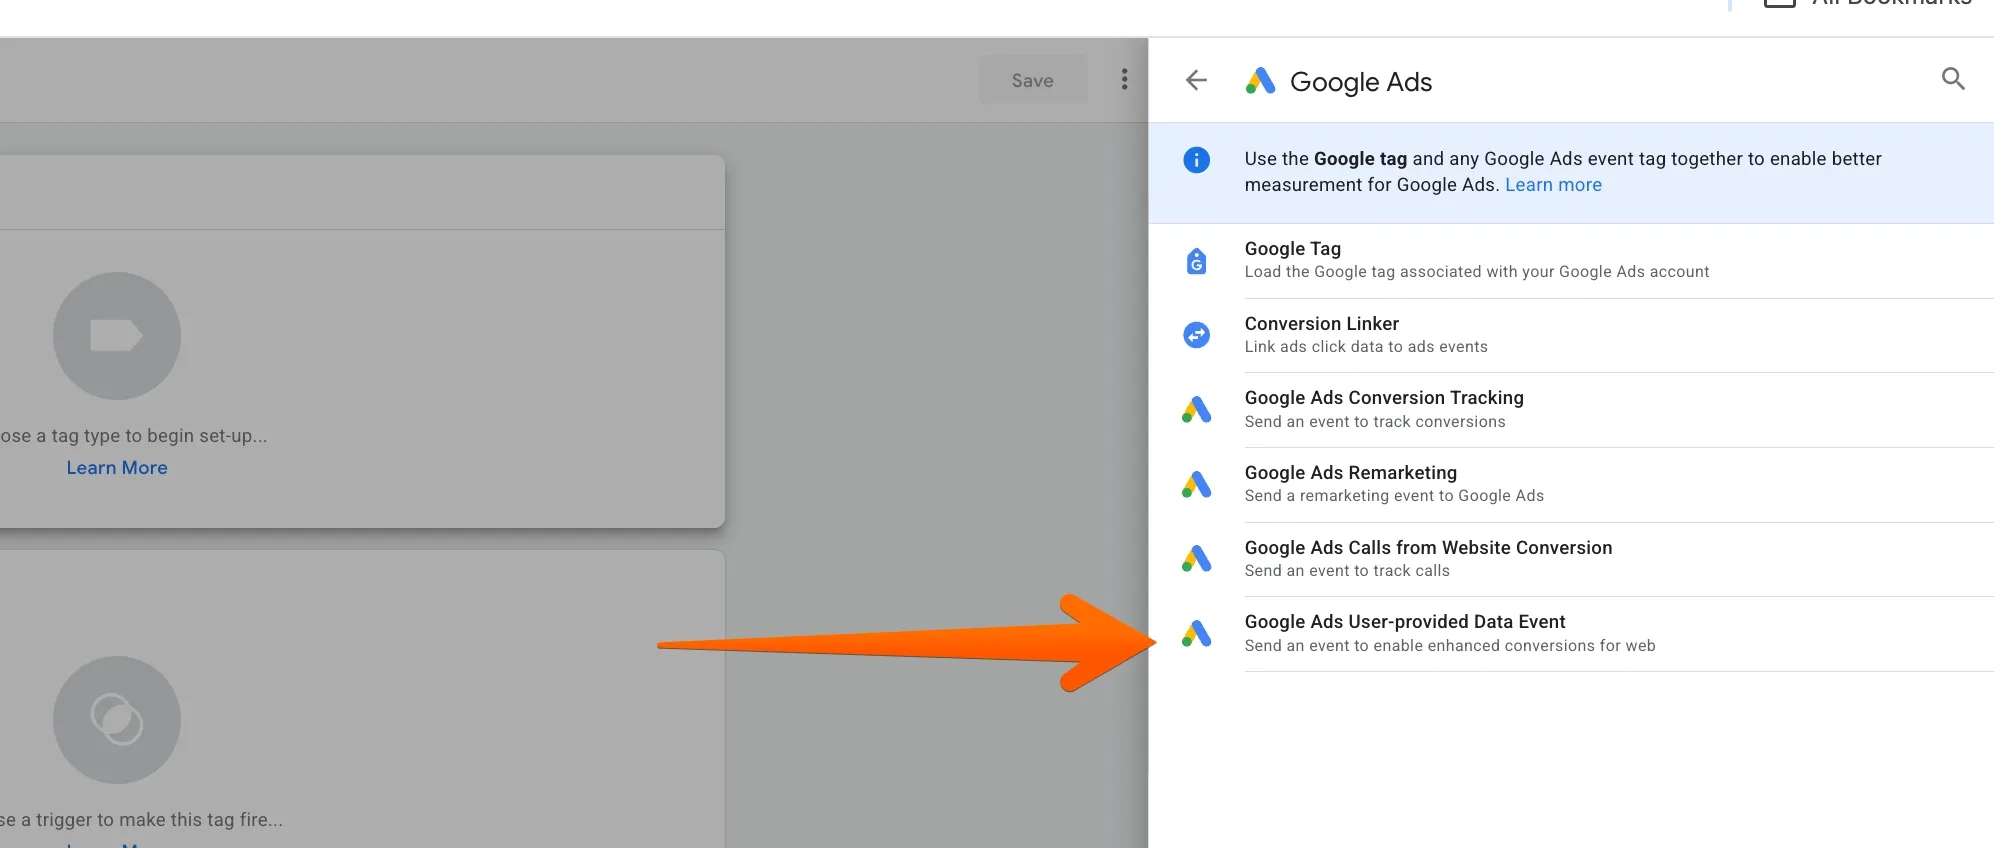
If you’ve worked with enhanced conversions for leads before, this tag will look familiar.
This tag separately sends user data. In its settings, you must specify a variable of the User-provided data type. I won’t dive into explaining this variable here, as the goal is to focus on the changes in the setup.
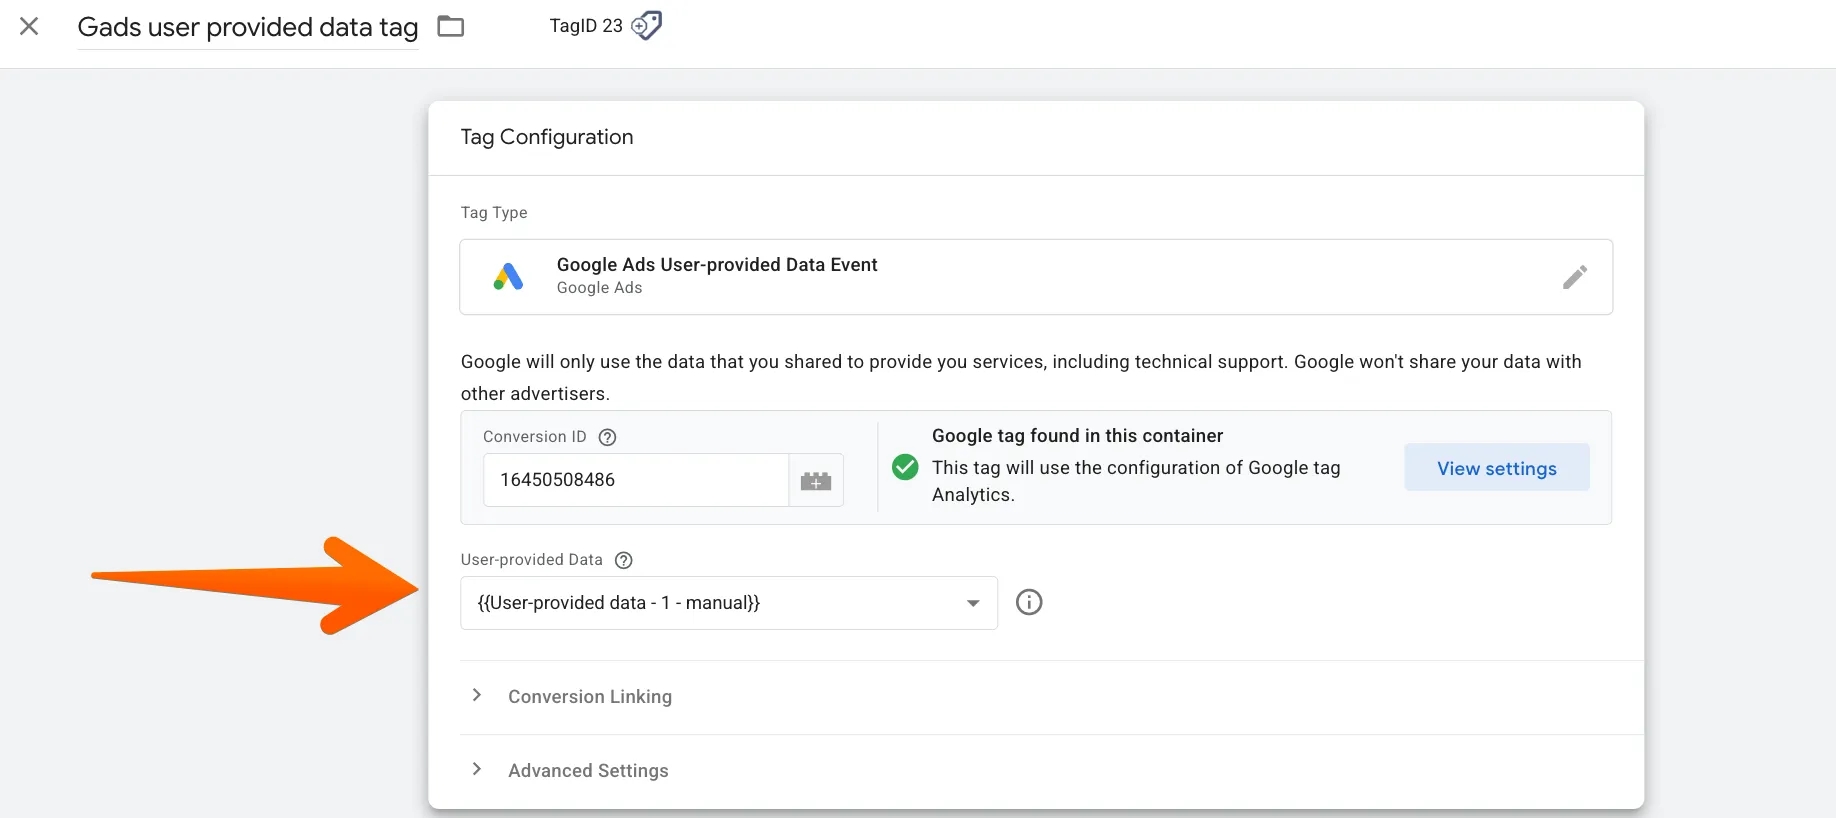
IMPORTANT! The tag must fire before the conversion tag.
Let’s break this down with two examples.
Google Ads - Example 1
If user data is available at the time of the conversion event, the setup might look like this:
Step 1
Create a Google Ads User-provided data event tag—specify the Conversion ID and the User-provided data variable, as shown above. Do not add a trigger yet.
Step 2
Open the settings of the Google Ads Conversion Tracking tag. In the Tag sequencing section, select that the user-data tag (Google Ads User-provided data event) must fire before it.
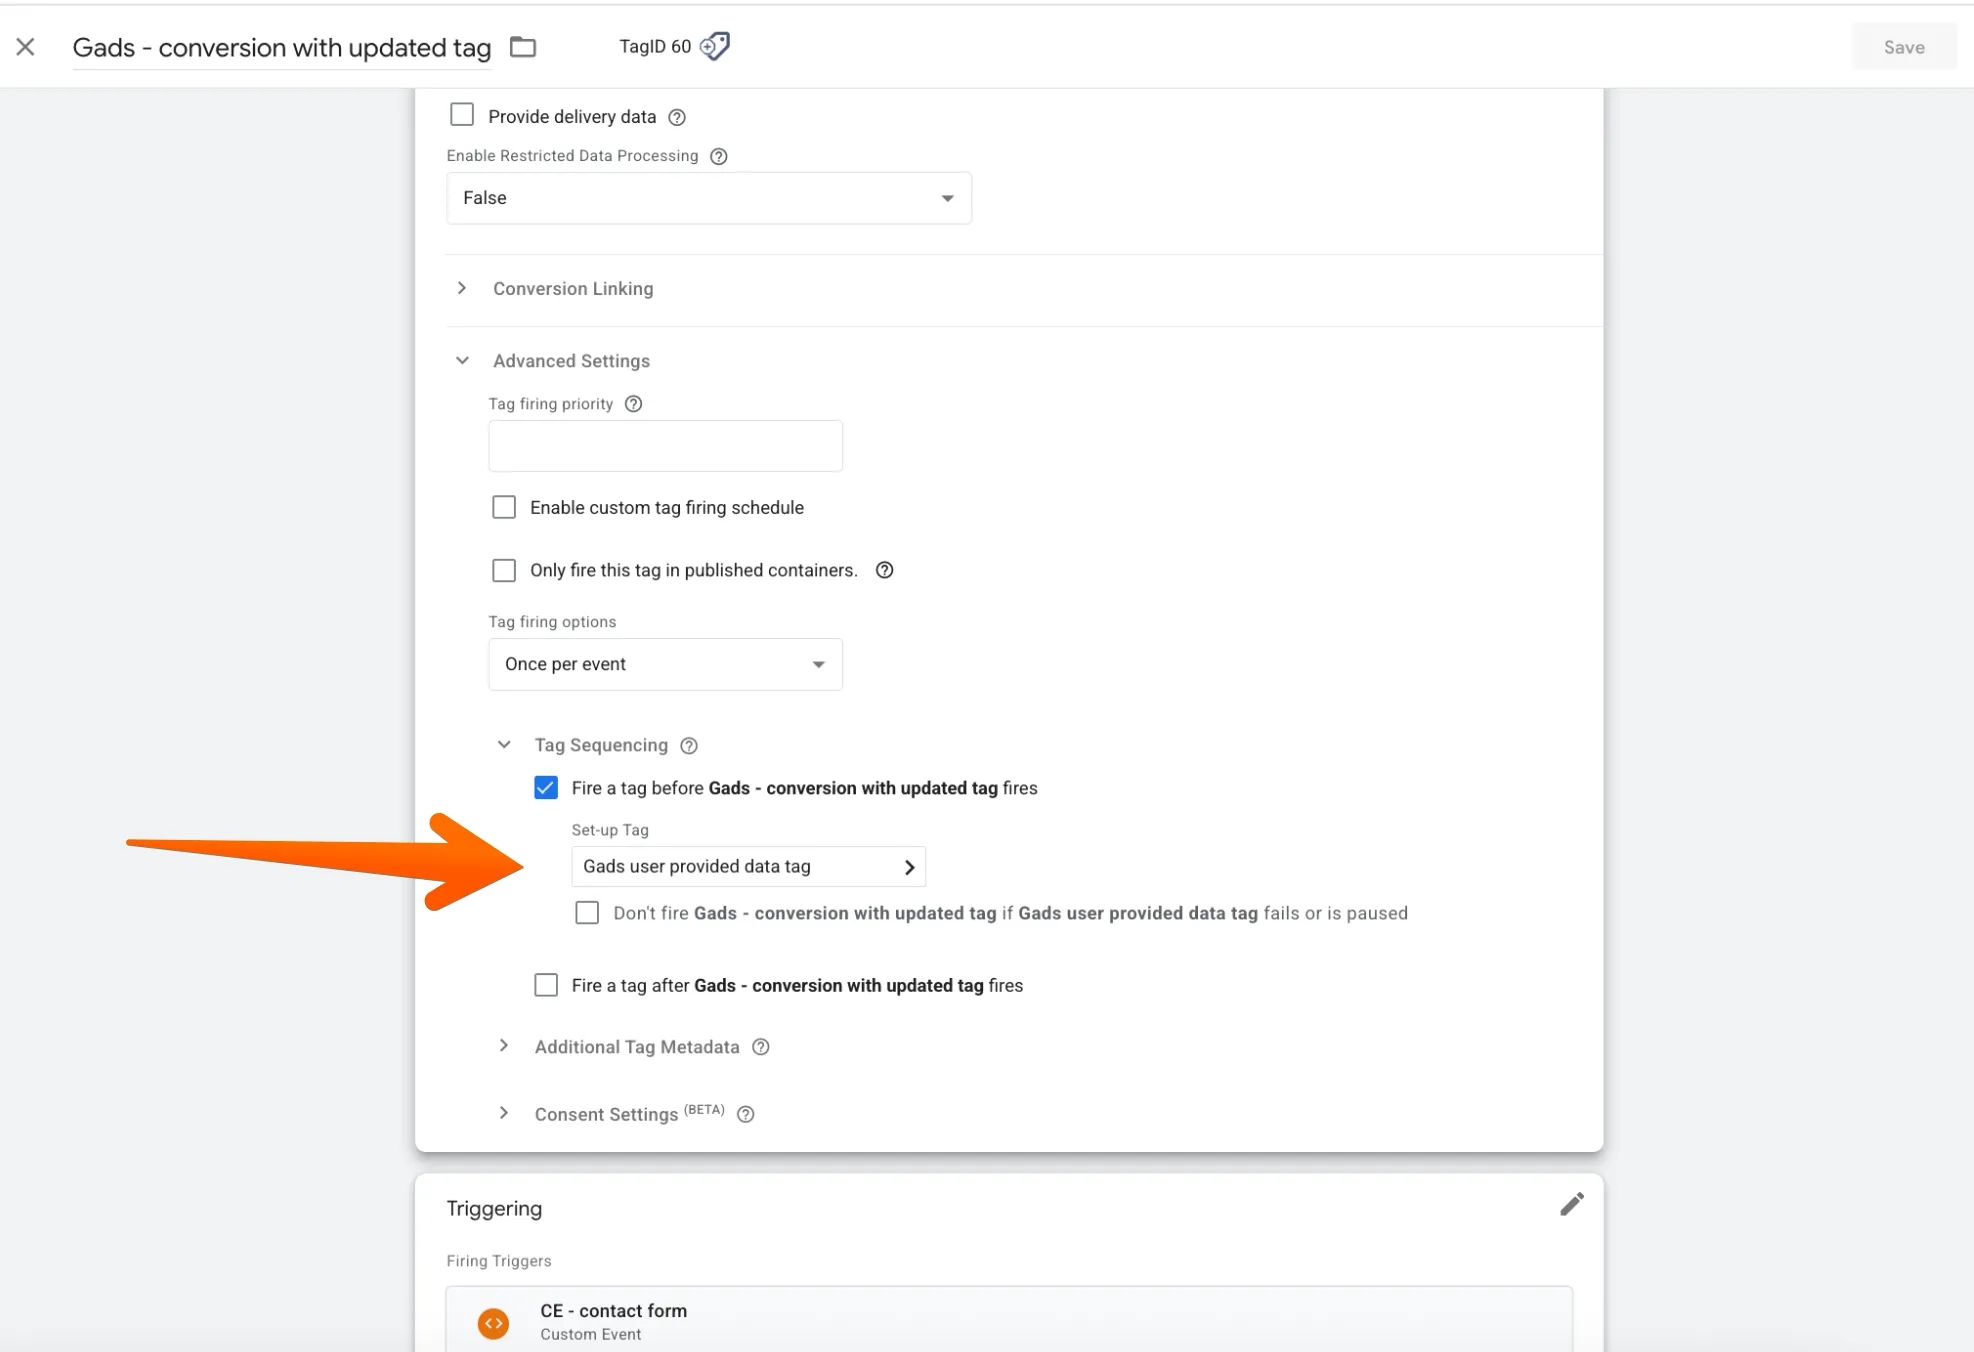
Step 3
Return to the Google Ads User-provided data event tag and check the trigger section.
At this stage, there should be no separate trigger—instead, you’ll see the condition from the tag sequencing we configured in Step 2.
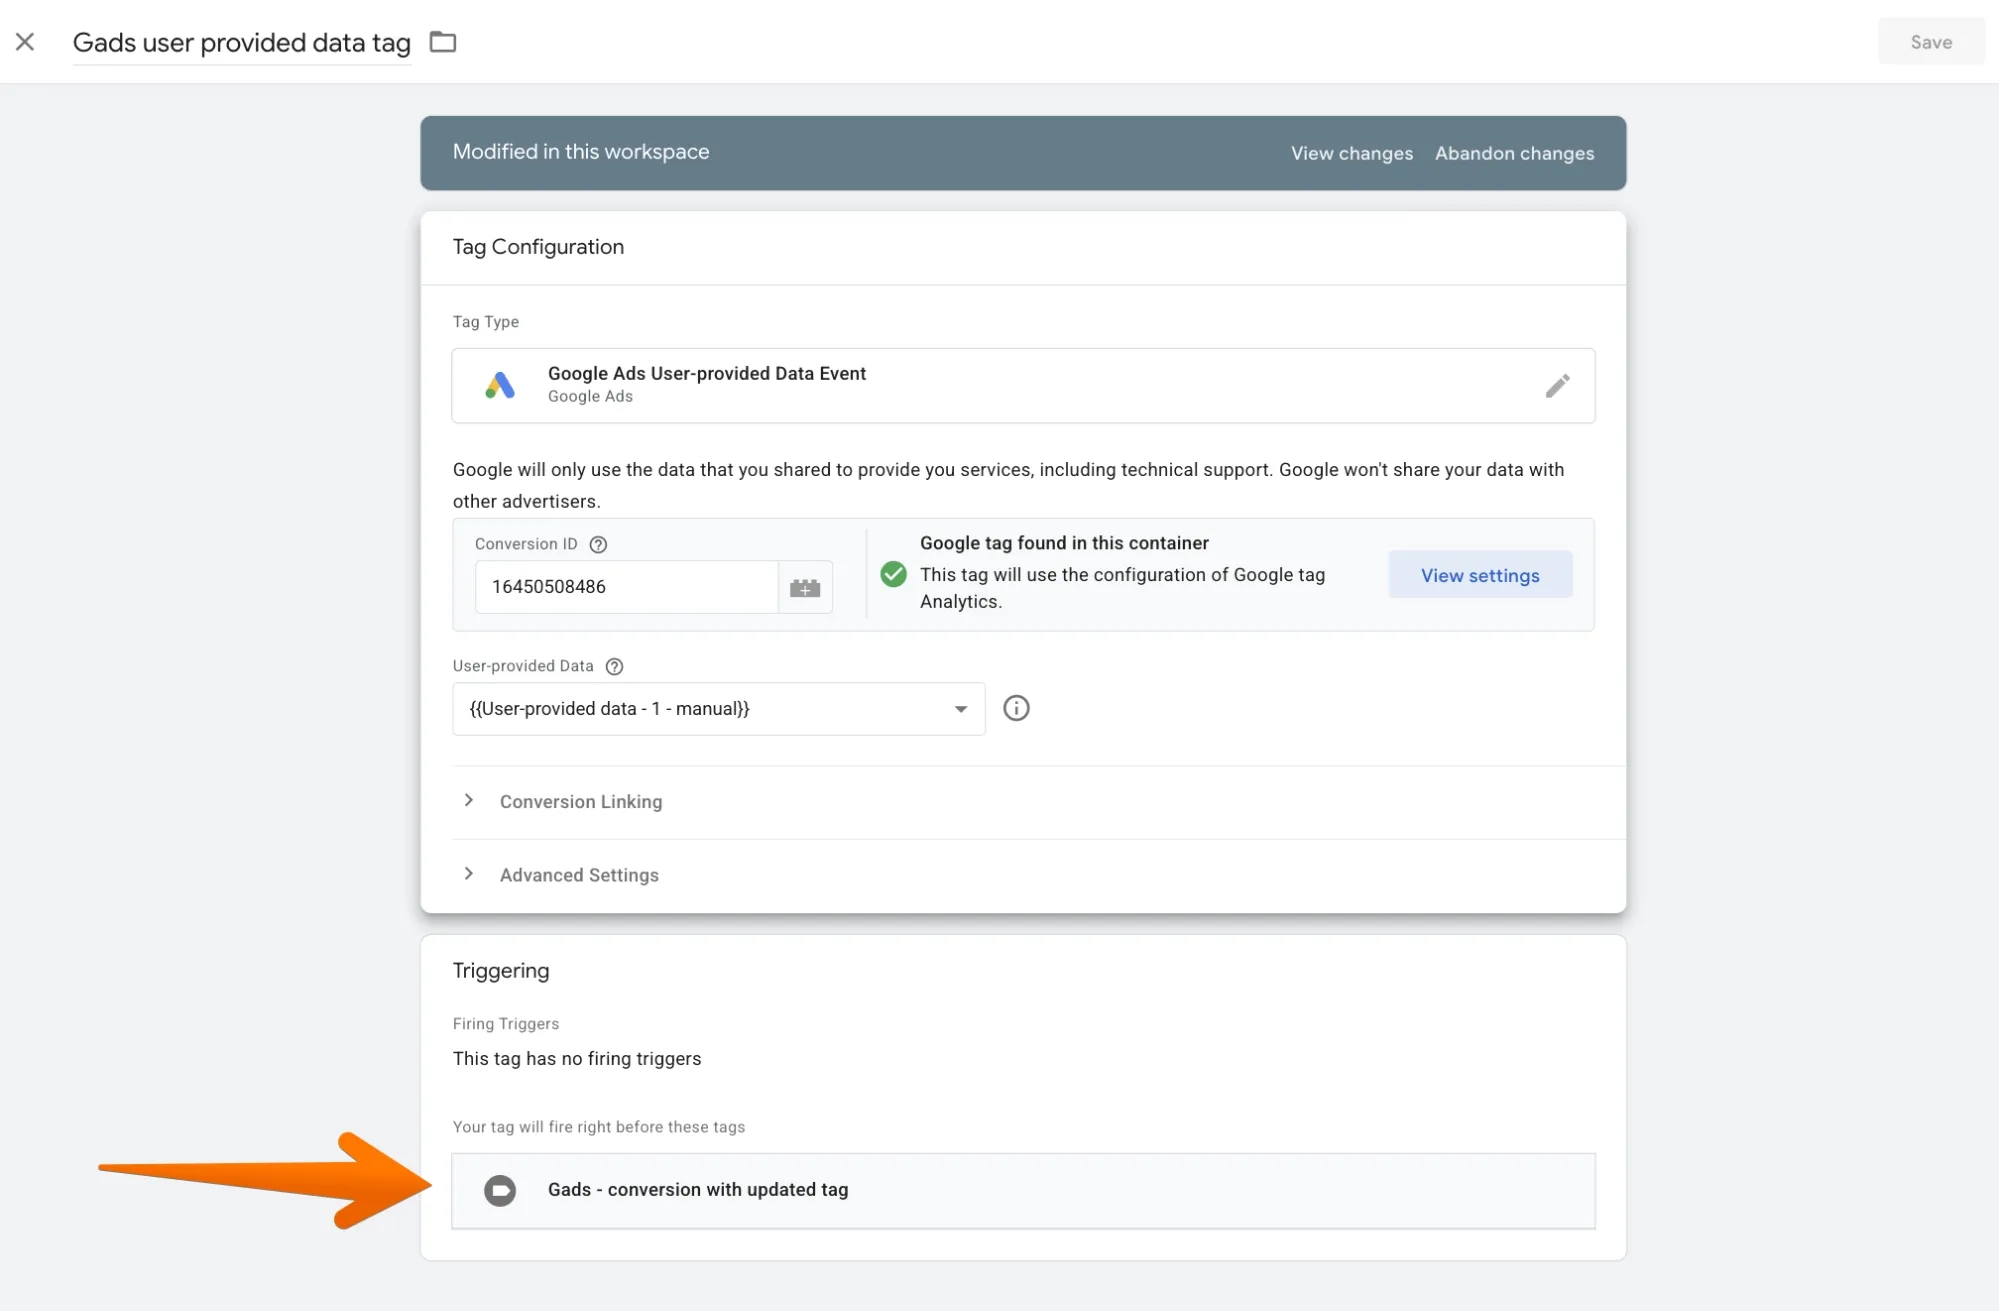
Further testing follows standard procedures.
The only thing to pay attention to: in Google Tag Manager's Preview mode under the Google Ads (AW) tab, you should see the conversion hit being sent, and before the conversion - a hit with user-provided data (User provided data).
This hit will pass the 'em' parameter with hashed user data.
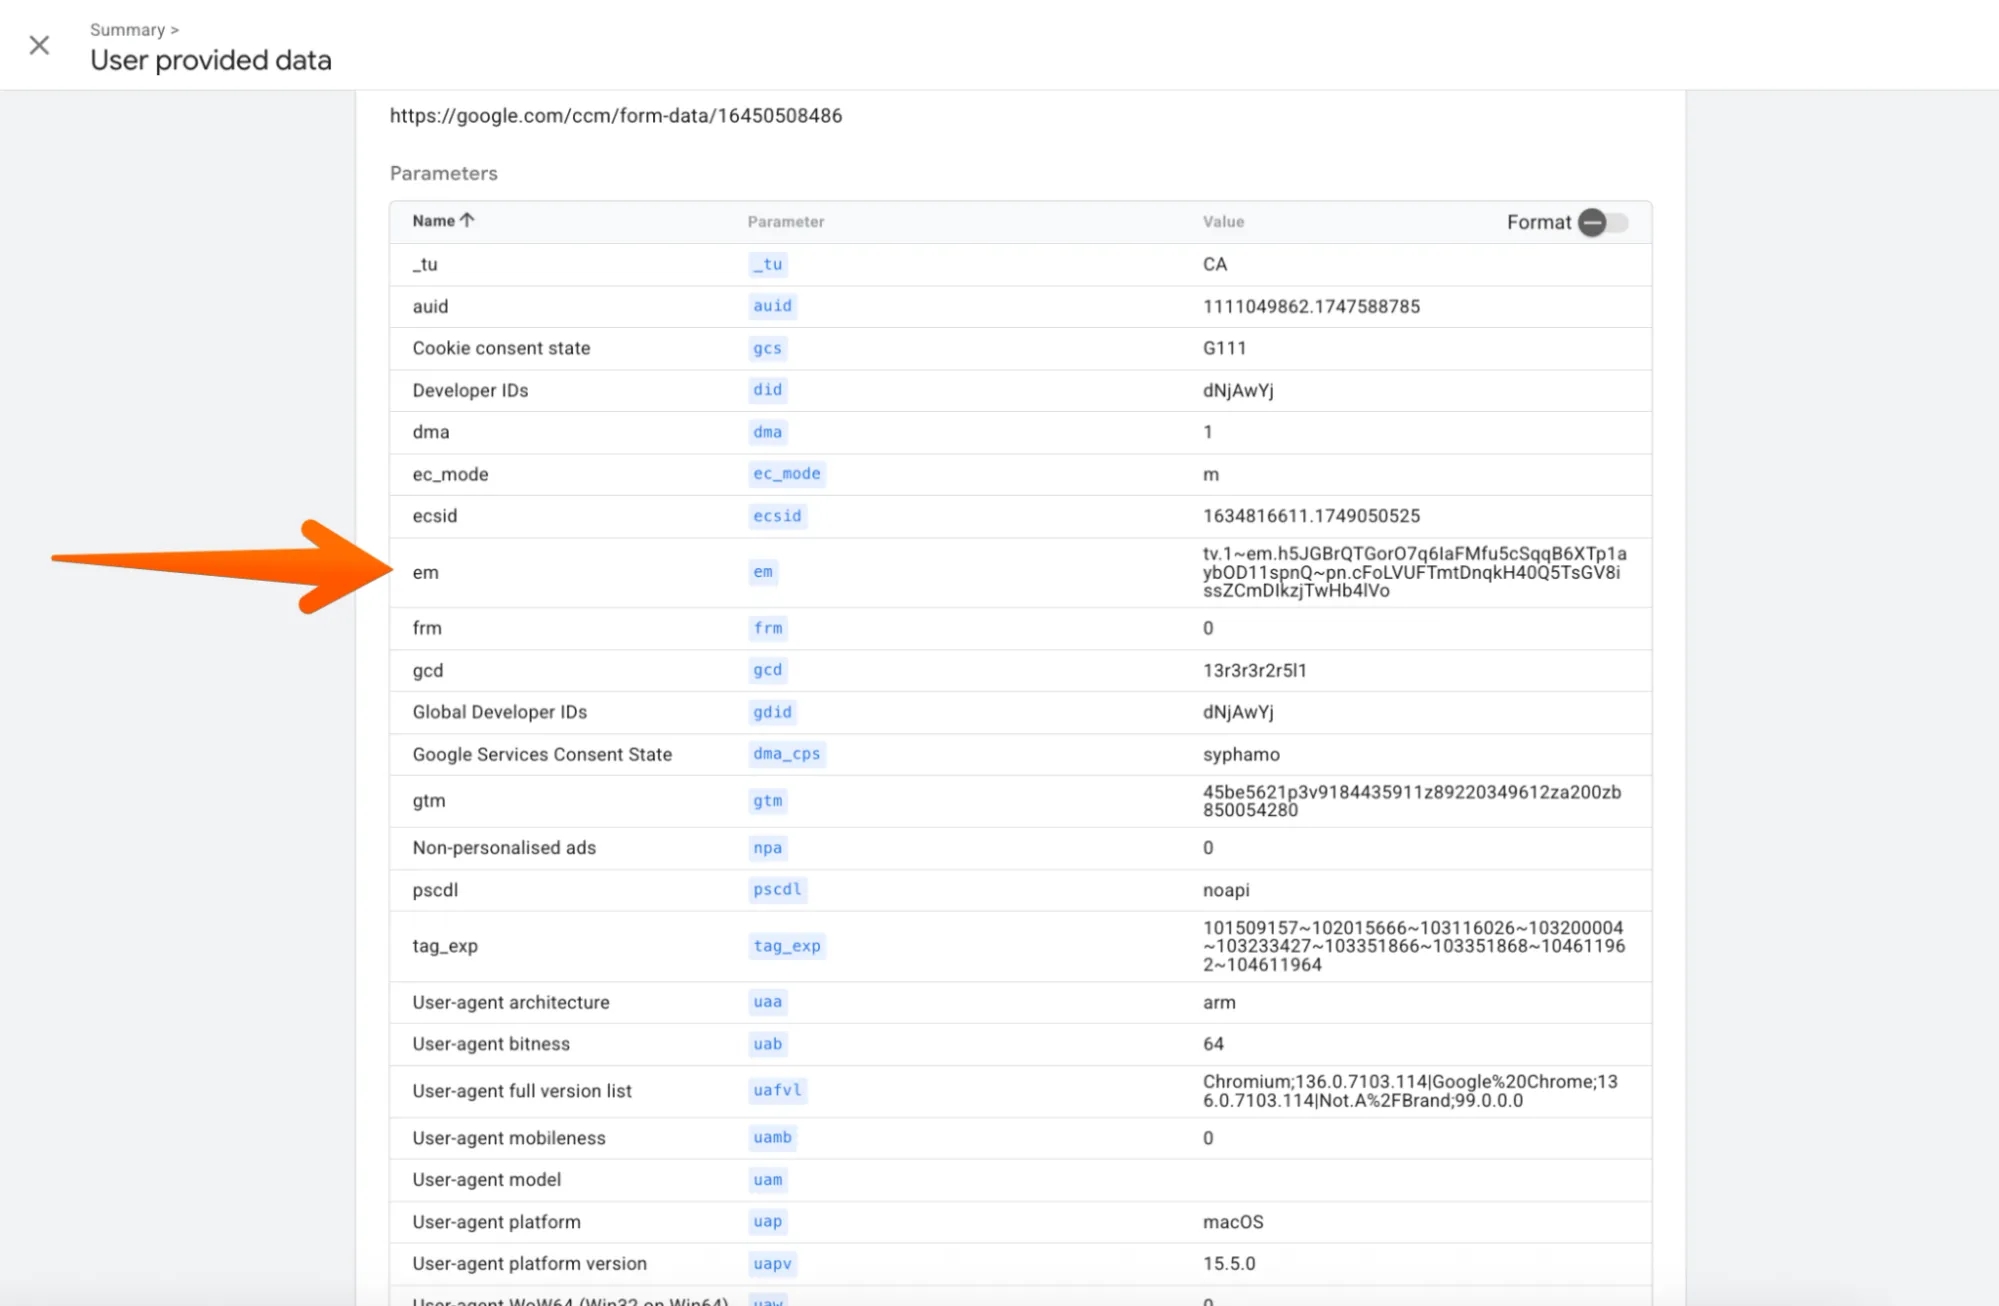
This process is partially covered in Google’s official guide under:
"Automatically enhanced conversions with the user-provided data event tag".
Google Ads - Example 2
User data is only available on the checkout page, while the purchase event is sent on the order confirmation page.
If user data is only available on the checkout page, there's no need to pass it again on the 'thank you' page where the purchase tag typically fires.
In this case, you can avoid using Tag sequencing and simply configure the Google Ads User-provided data event tag with a trigger on the checkout page.
The purchase tag Google Ads Conversion Tracking is then configured separately - with a trigger on the thank you page.
For example, the User-provided data event tag can fire during the add_payment_info event on the checkout page.
This allows transmitting data before the actual purchase moment, which will be sufficient for proper enhanced conversions for the purchase event.
As stated in Google's official documentation:
'With the user-provided data event tag, customer-provided data (such as email and physical addresses, and phone numbers) will be automatically recognized on pages users visit before the conversion page. With these settings, Google will have permission to use the advertising cookie to collect hashed customer-provided data on your behalf and associate it with subsequent conversion events within the same user session.'
What about testing on real projects?
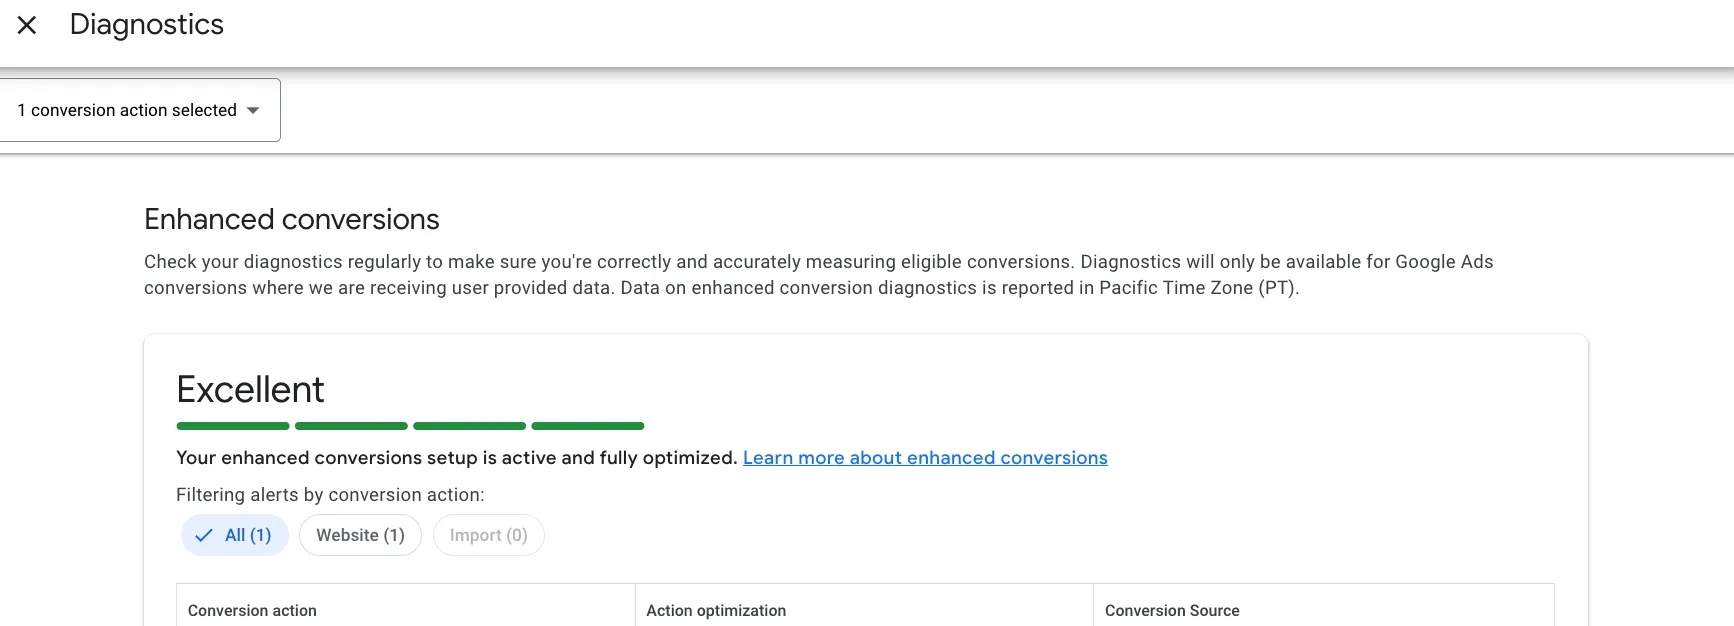
I tested everything on my own project. Results appeared in Google Ads diagnostics only after a week of setup. Previously it took 1-2 days. This might be part of a global update. We'll see.
Google Ads - Example 3
Recently, Google Tag Manager (GTM) added event parameters to the tag templates for Google Ads conversion tracking. Naturally, I tested the functionality of these parameters for enhanced conversions in my own projects beforehand, and now I’m sharing it with you.
This example is an update to the article from 02.10.2025.
We have already reviewed two previous examples of updates — how the tag templates looked before and after. Now, in the example below, you’ll see the third version of enhanced conversion settings. All three options remain functional at the moment. So, if you have already configured enhanced conversions:
- via the old Google Ads conversions tracking tag template,
- or with a separate Google Ads User-provided data event tag,
— these configurations are still valid and continue to work correctly.
So, how should you now configure enhanced conversion tracking for web in Google Ads after the latest update?
Spoiler: at the moment, the setup is essentially very similar to what we had in the very first version of the templates.
Step 1.
Create a User-provided data variable with the user data that is passed specifically at the moment of conversion. I’ll skip the details of this process — nothing new here.
Step 2.
Open the settings of the Google Ads conversions tracking tag.
In the block with Event parameters, add a new parameter named "user_data". Exactly as it is specified in the official GA4 documentation.
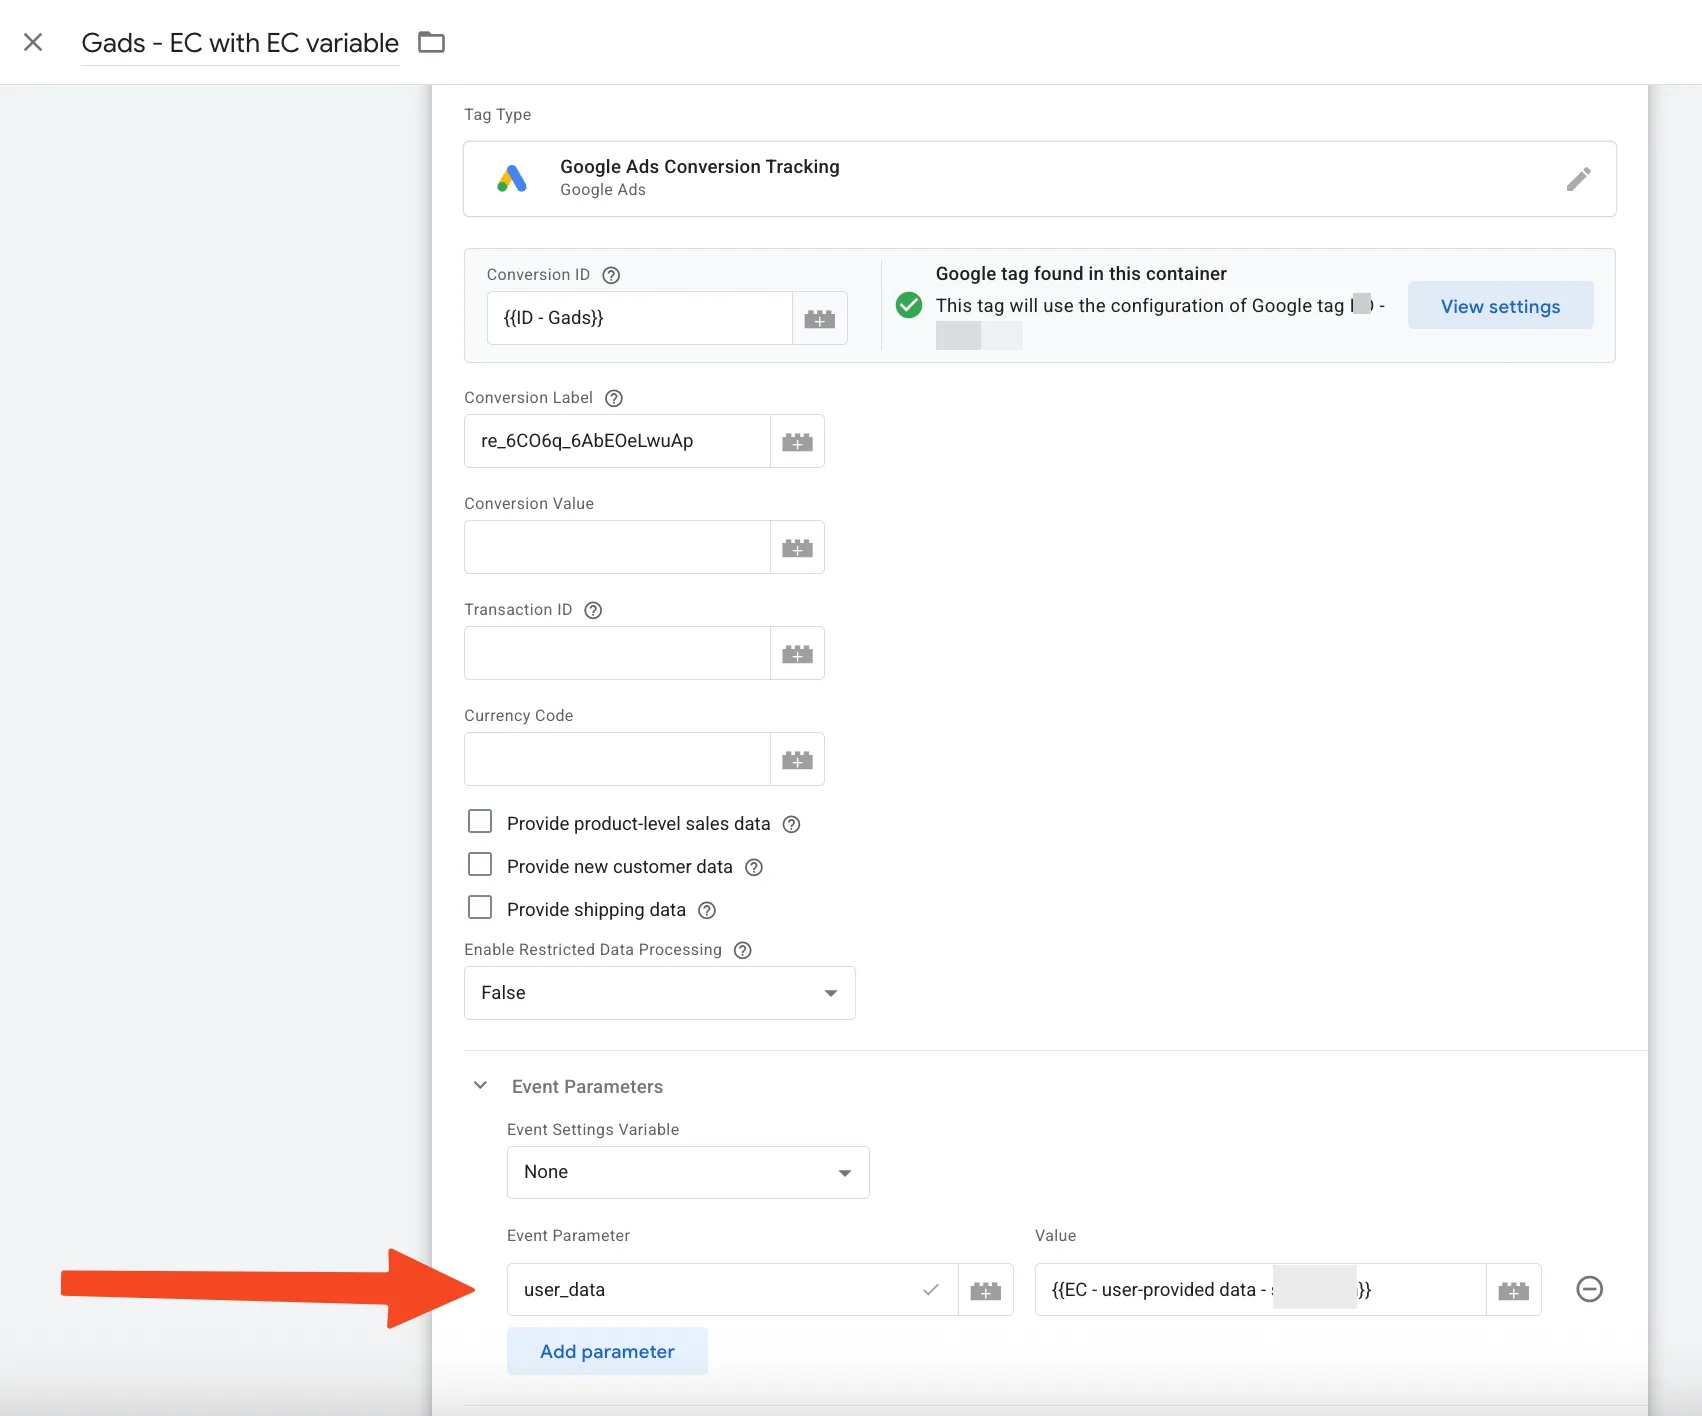
The value of this parameter should be the User-provided data variable you created in Step 1.
After that, check everything as usual: first, make sure that hashed user data is being sent during the conversion, and then, after a few days (depending on the number of conversions in your Ads account), review the Goals - Conversions menu, specifically the diagnostics tab for enhanced conversions.
The example of writing parameters and their values shown below for GA4 will work just as well for Google Ads. The key point is that the parameter names must exactly match the documentation.
GA4 - Updates in Tag Templates
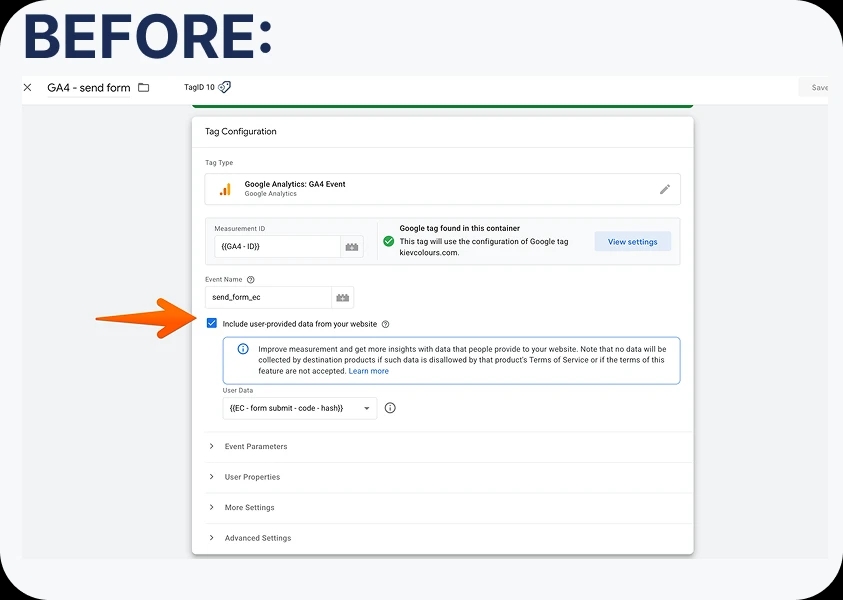
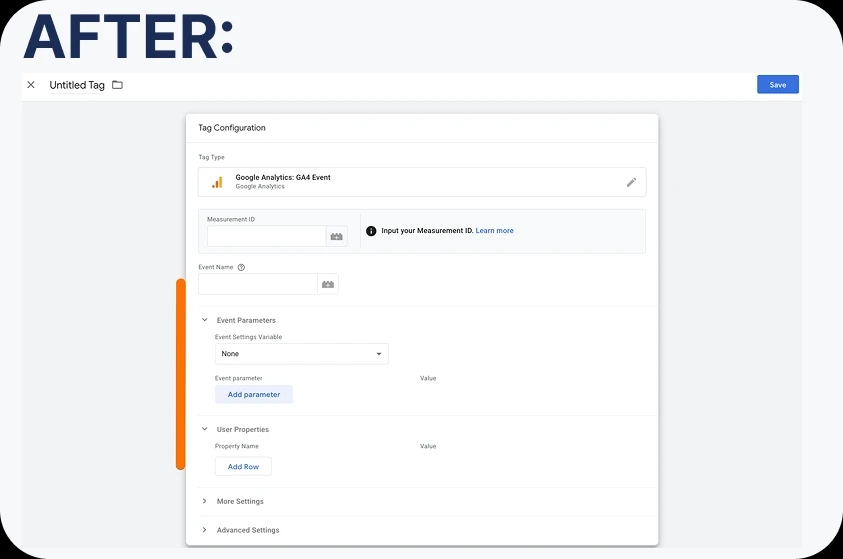
For Google Analytics 4 (GA4), the setup logic differs slightly. Below is an example using GTM’s built-in tag templates.
GA4 - Example
Step 1
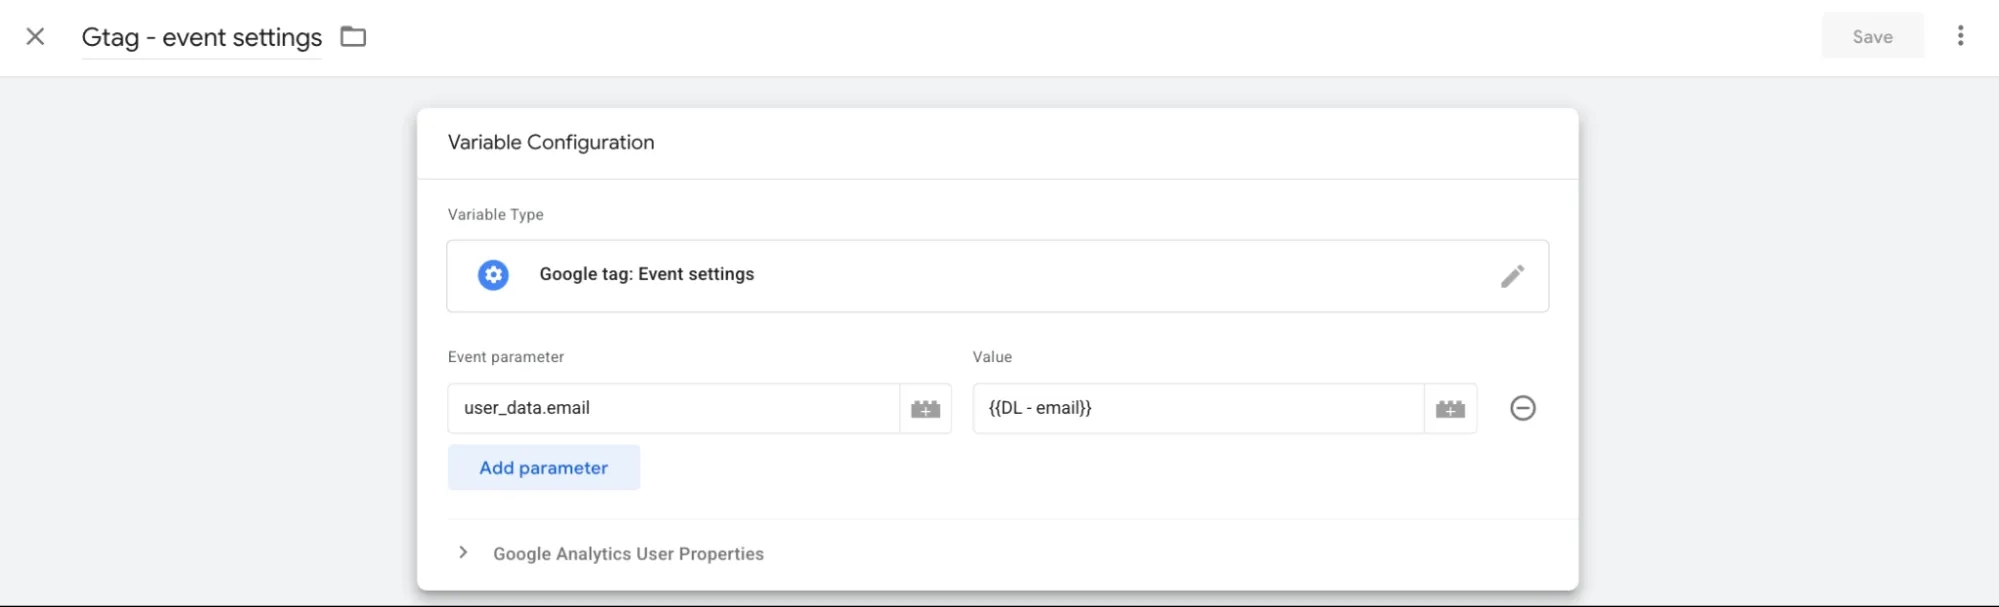
Create a variable of the Google Tag: Event settings type.
In this variable, add event parameters like:
user_data.emailuser_data.phone_number
Parameter names must match GA4’s documentation. документації GA4
The values are your GTM variables that pull user data (e.g., email, phone) from forms or dataLayer.
Step 2
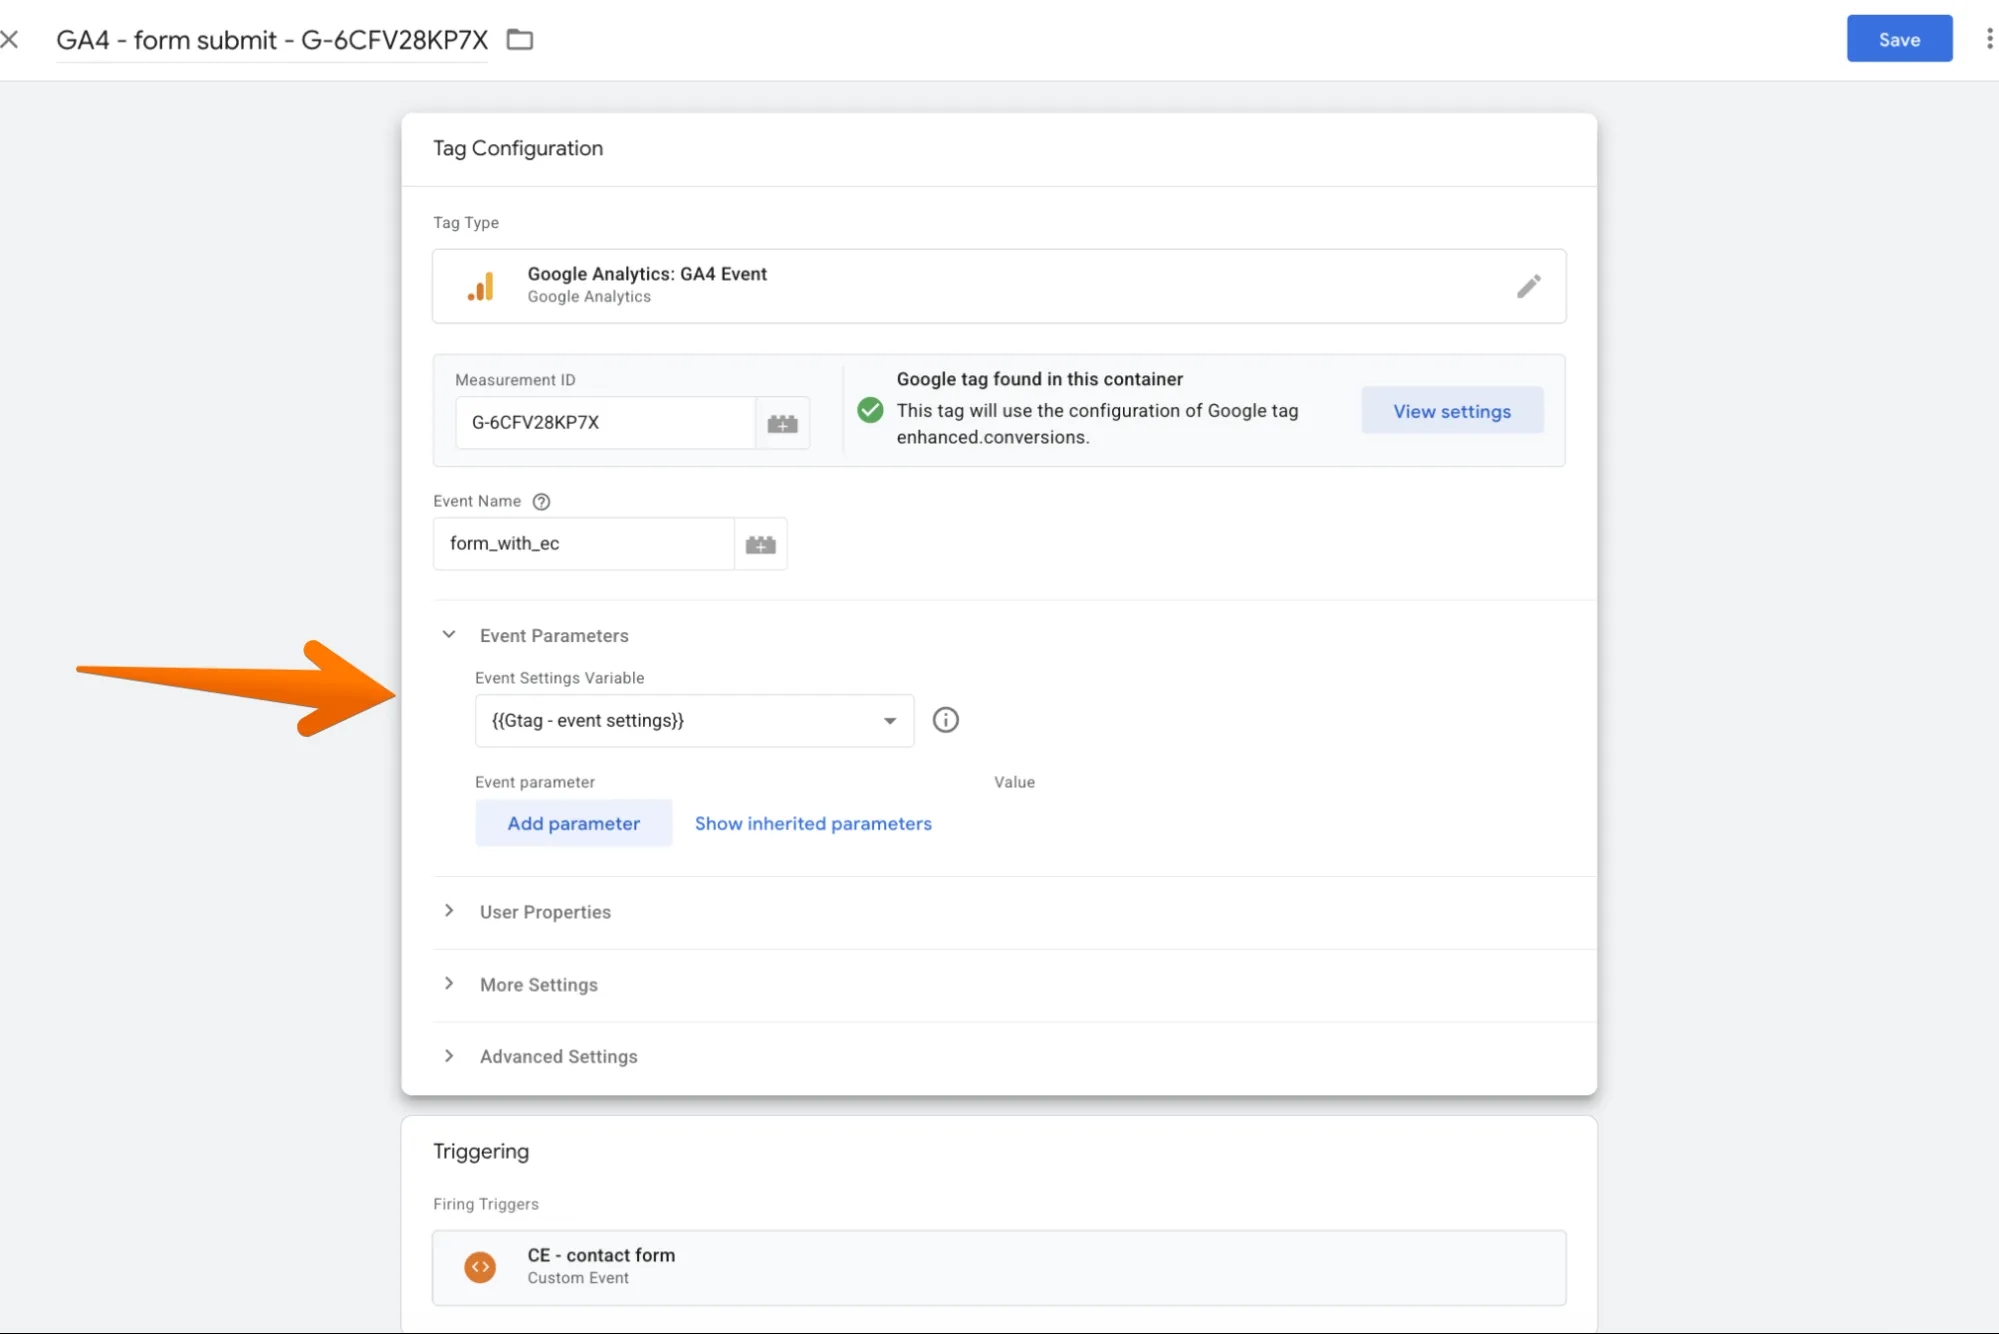
In your GA4 event tags, add the Google Tag: Event settings variable as an Event parameter.
This ensures GA4 sends user-provided data (e.g., email/phone) with the event.
Testing remains unchanged from previous methods.
Still have questions about the updates? Just leave your email to get the container with all the updated settings mentioned above.
Conclusion
Once you understand the data flow logic, everything becomes simpler.
Key takeaways:
- Don’t fear new templates. Google changes—we adapt faster.
- Know when and how to send user-provided data.
- Verify data is available at the moment of transmission.
Wishing you high CR and ROAS! And if you’re new to enhanced conversions or writing user-data variables—welcome to my "Enhanced Conversions for Google Ads" course.
Loading comments…