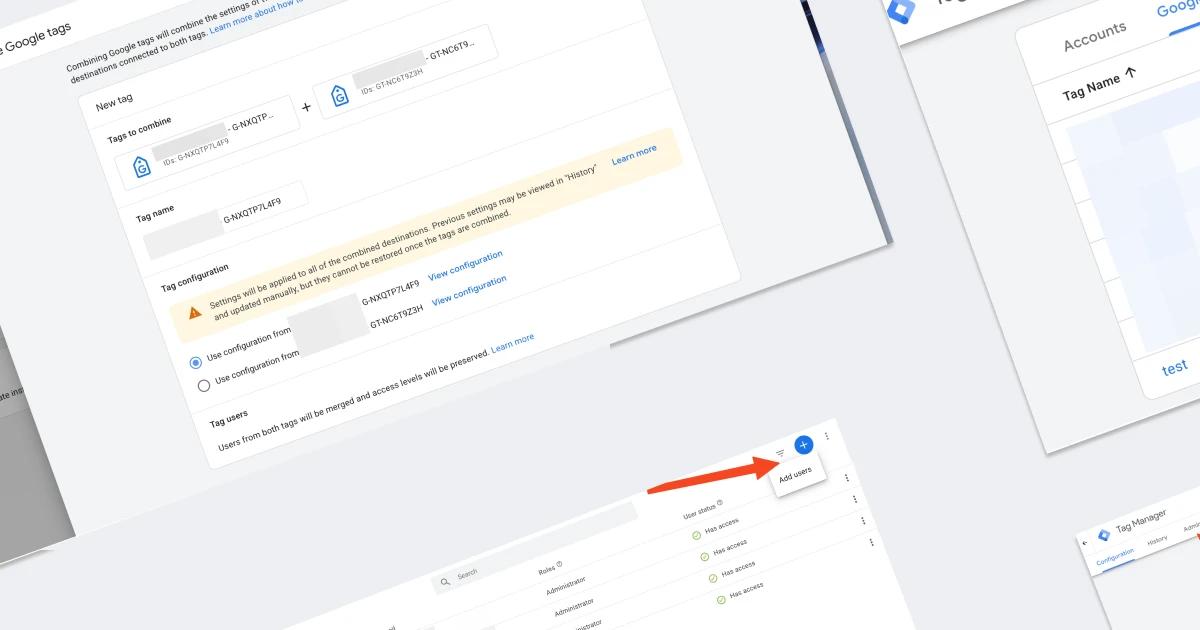
Combined Google Tags: When “One Tag for Everything” Breaks Analytics — a Step-by-Step Guide to Unlinking

It so happens that this is not the first time I have encountered errors in GA4 and Google Ads conversion tracking. And often the reason is a combined tag configuration.
In digital marketing, a “one tag for everything” trend has emerged: combining Google Tags for GA4 and Google Ads so that everything works through a single implementation.
Google describes this approach as follows in its documentation:
“The Google tag (gtag.js) is a single tag that you can add to a website to use multiple Google products and services. You no longer need to manage multiple tags for different Google product accounts.”
And it sounds logical.
However, in practice, this is not always the best strategy — especially if you deliberately keep separate event and conversion tracking systems for GA4 and for Google Ads.
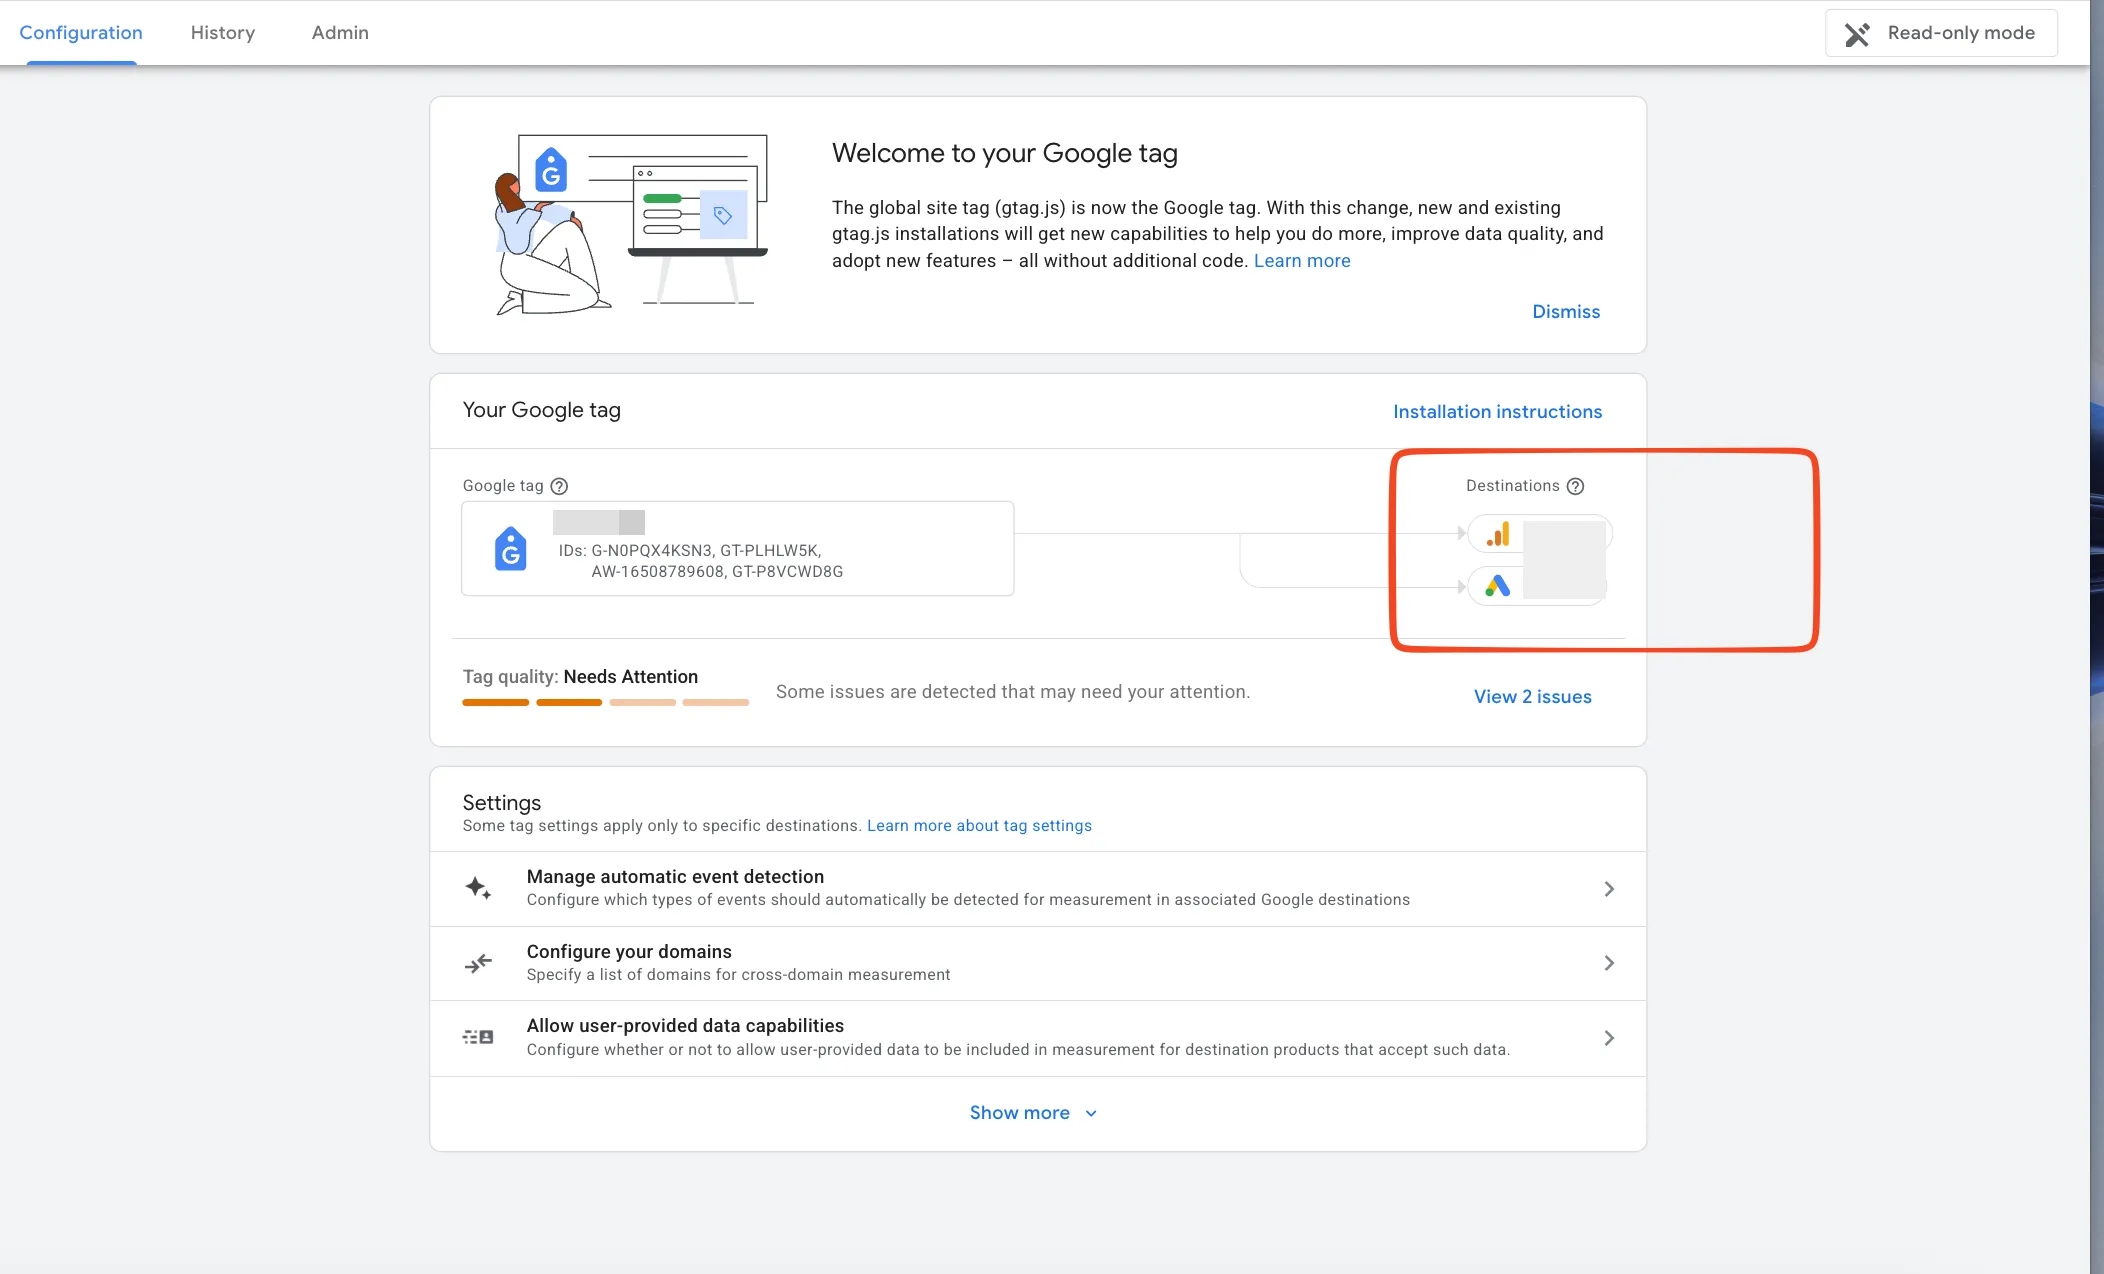
In practice, the errors may look like this:
- events are not tracked or are tracked only partially;
gtagcommands exist but do not send data to analytics;- the data is “distorted,” anomalies appear;
- it is unclear what exactly is being sent, where, and from which point in time.
In such a configuration, it is very difficult to understand where exactly the problem occurred and how to fix it.
If you use only GA4 for conversion tracking and simply import conversions into Google Ads, then this article is most likely not for you — in such a scenario, combining tags usually does not create confusion.
However, my experience as a PPC specialist suggests that in most commercial projects it is worth setting up separate conversions directly in Google Ads. This approach usually provides better data for campaign optimization than importing conversions from GA4.
Therefore, below is an instruction on how to unlink tags if you have already encountered a situation where GA4 and Google Ads work through a shared configuration and errors are present.
Step 1. Google Tag access
Before starting, it is important to make sure that you have sufficient access specifically to Google Tag.
In a configuration where tags are combined, access to GA4 or Google Ads, which we usually grant at the account level, may not be sufficient.
In practice, when working with the account, it looks like this:
- you have access to GA4 / Google Ads;
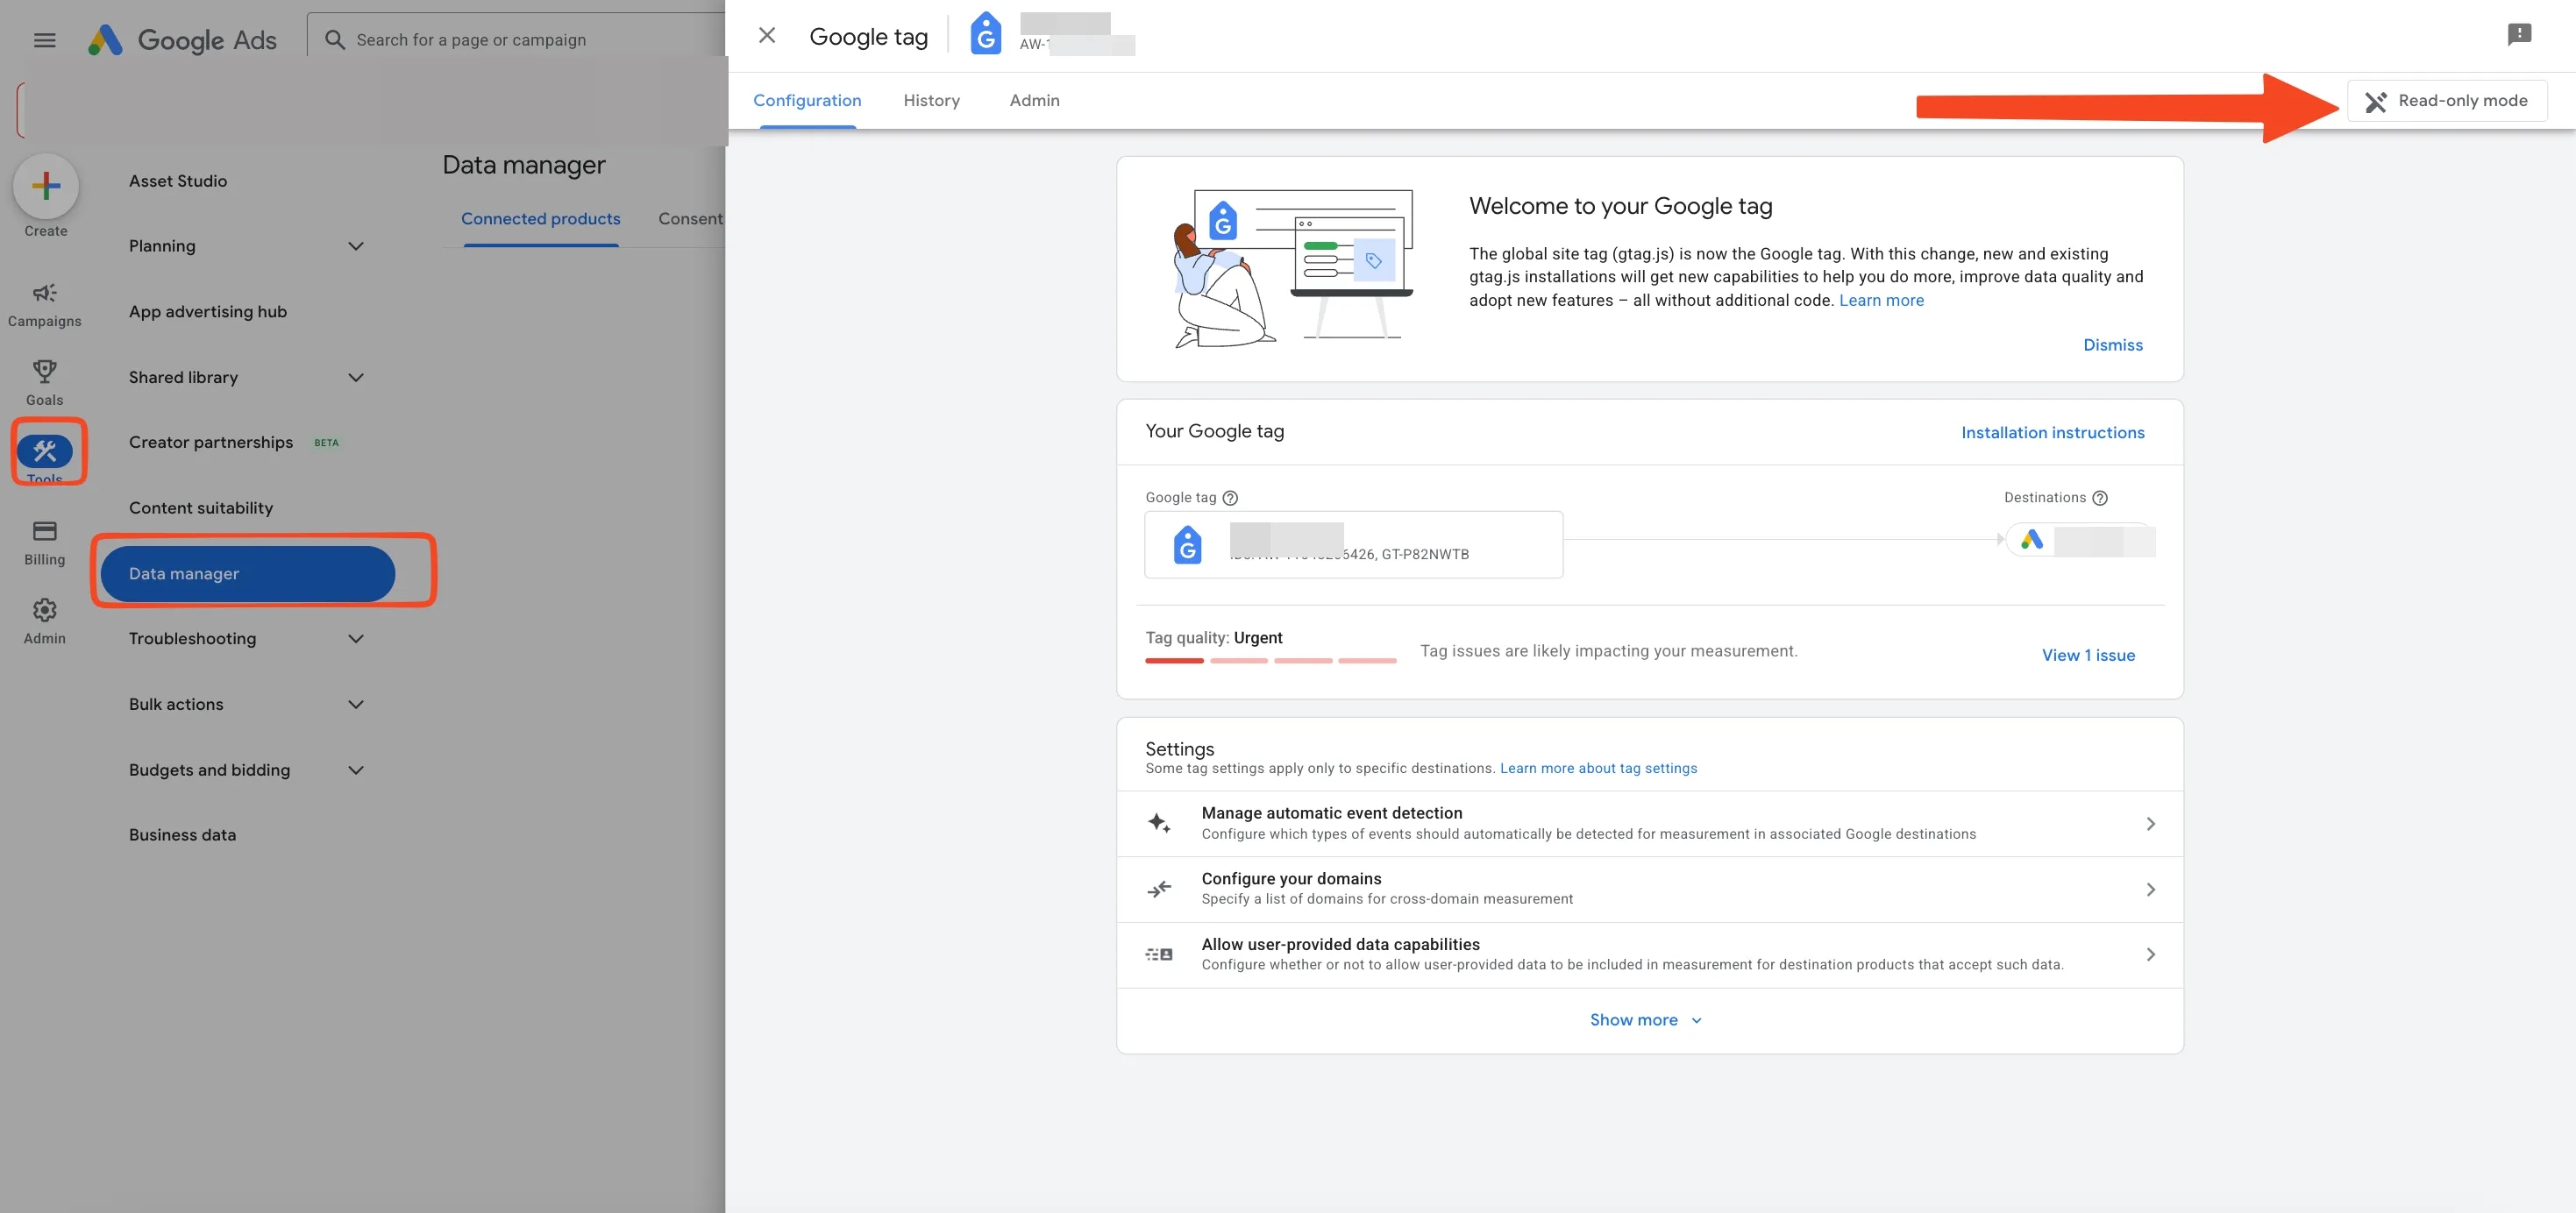
- but Google Tag opens only in read-only mode;
- accordingly, it is not possible to make changes or unlink tags — at most, you can remove target services, but this also depends on the access level.
In the screenshot below, there is an example of a situation with insufficient access.
To unlink tags, administrator permissions are required specifically at the Google Tag level.
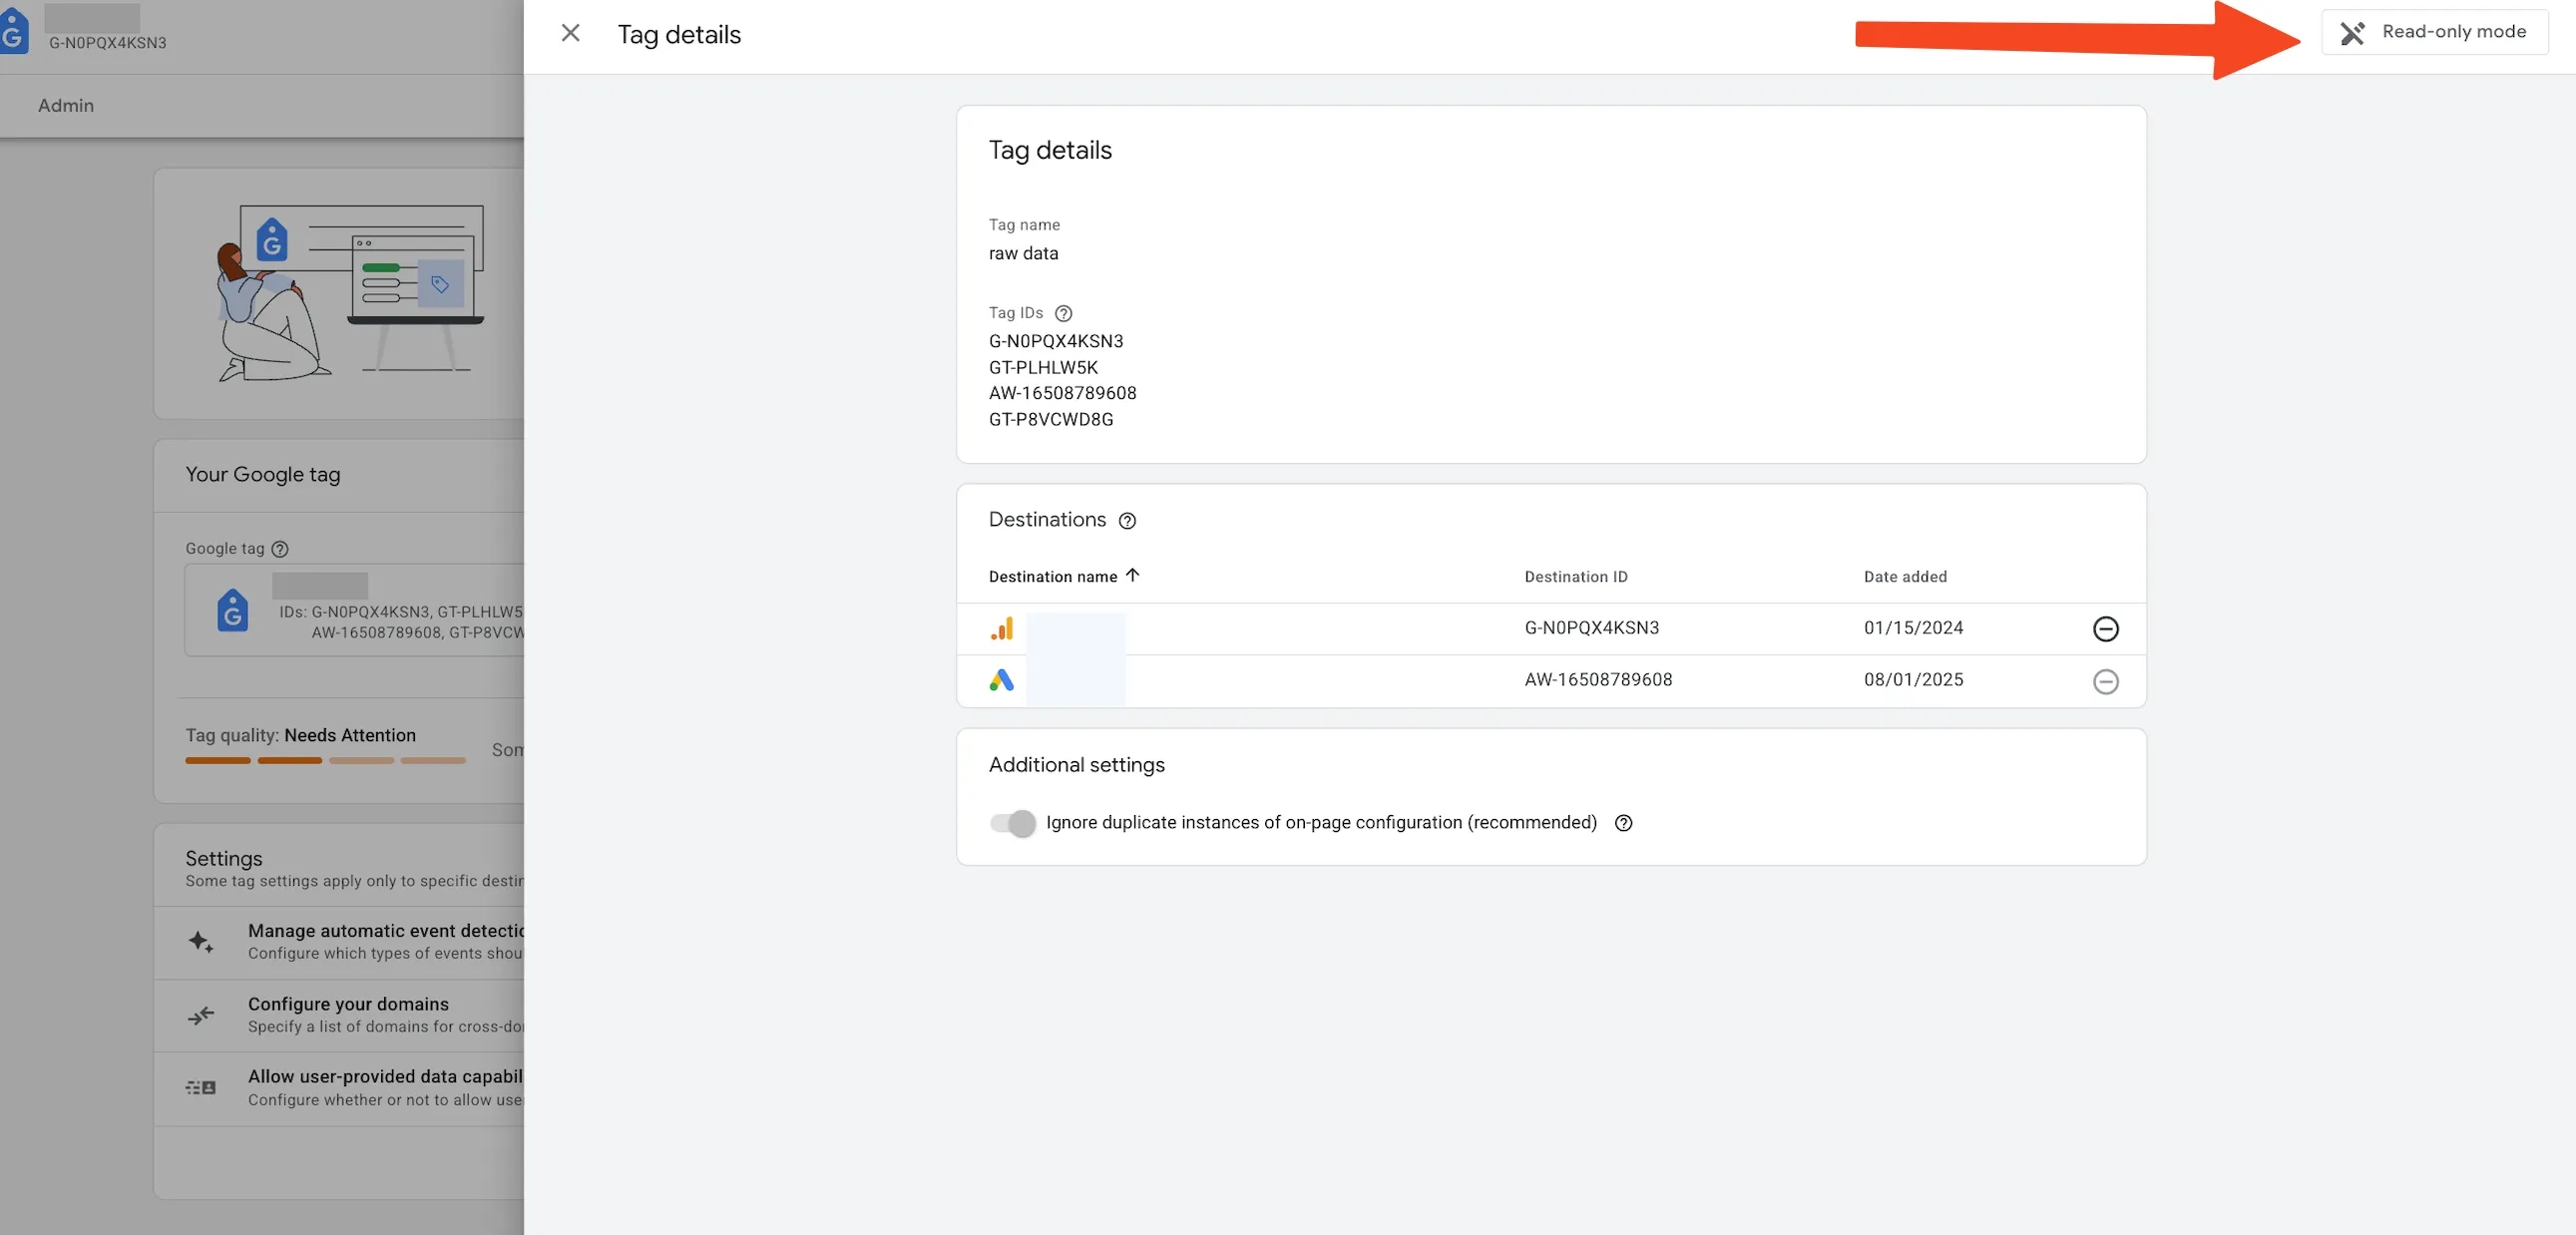
To check access to Google Tag, you can use several interfaces:
In GA4:
Admin -> Data Streams -> Configure tag settings -> Your Google tag (below is a screenshot showing an example of insufficient read-only access).
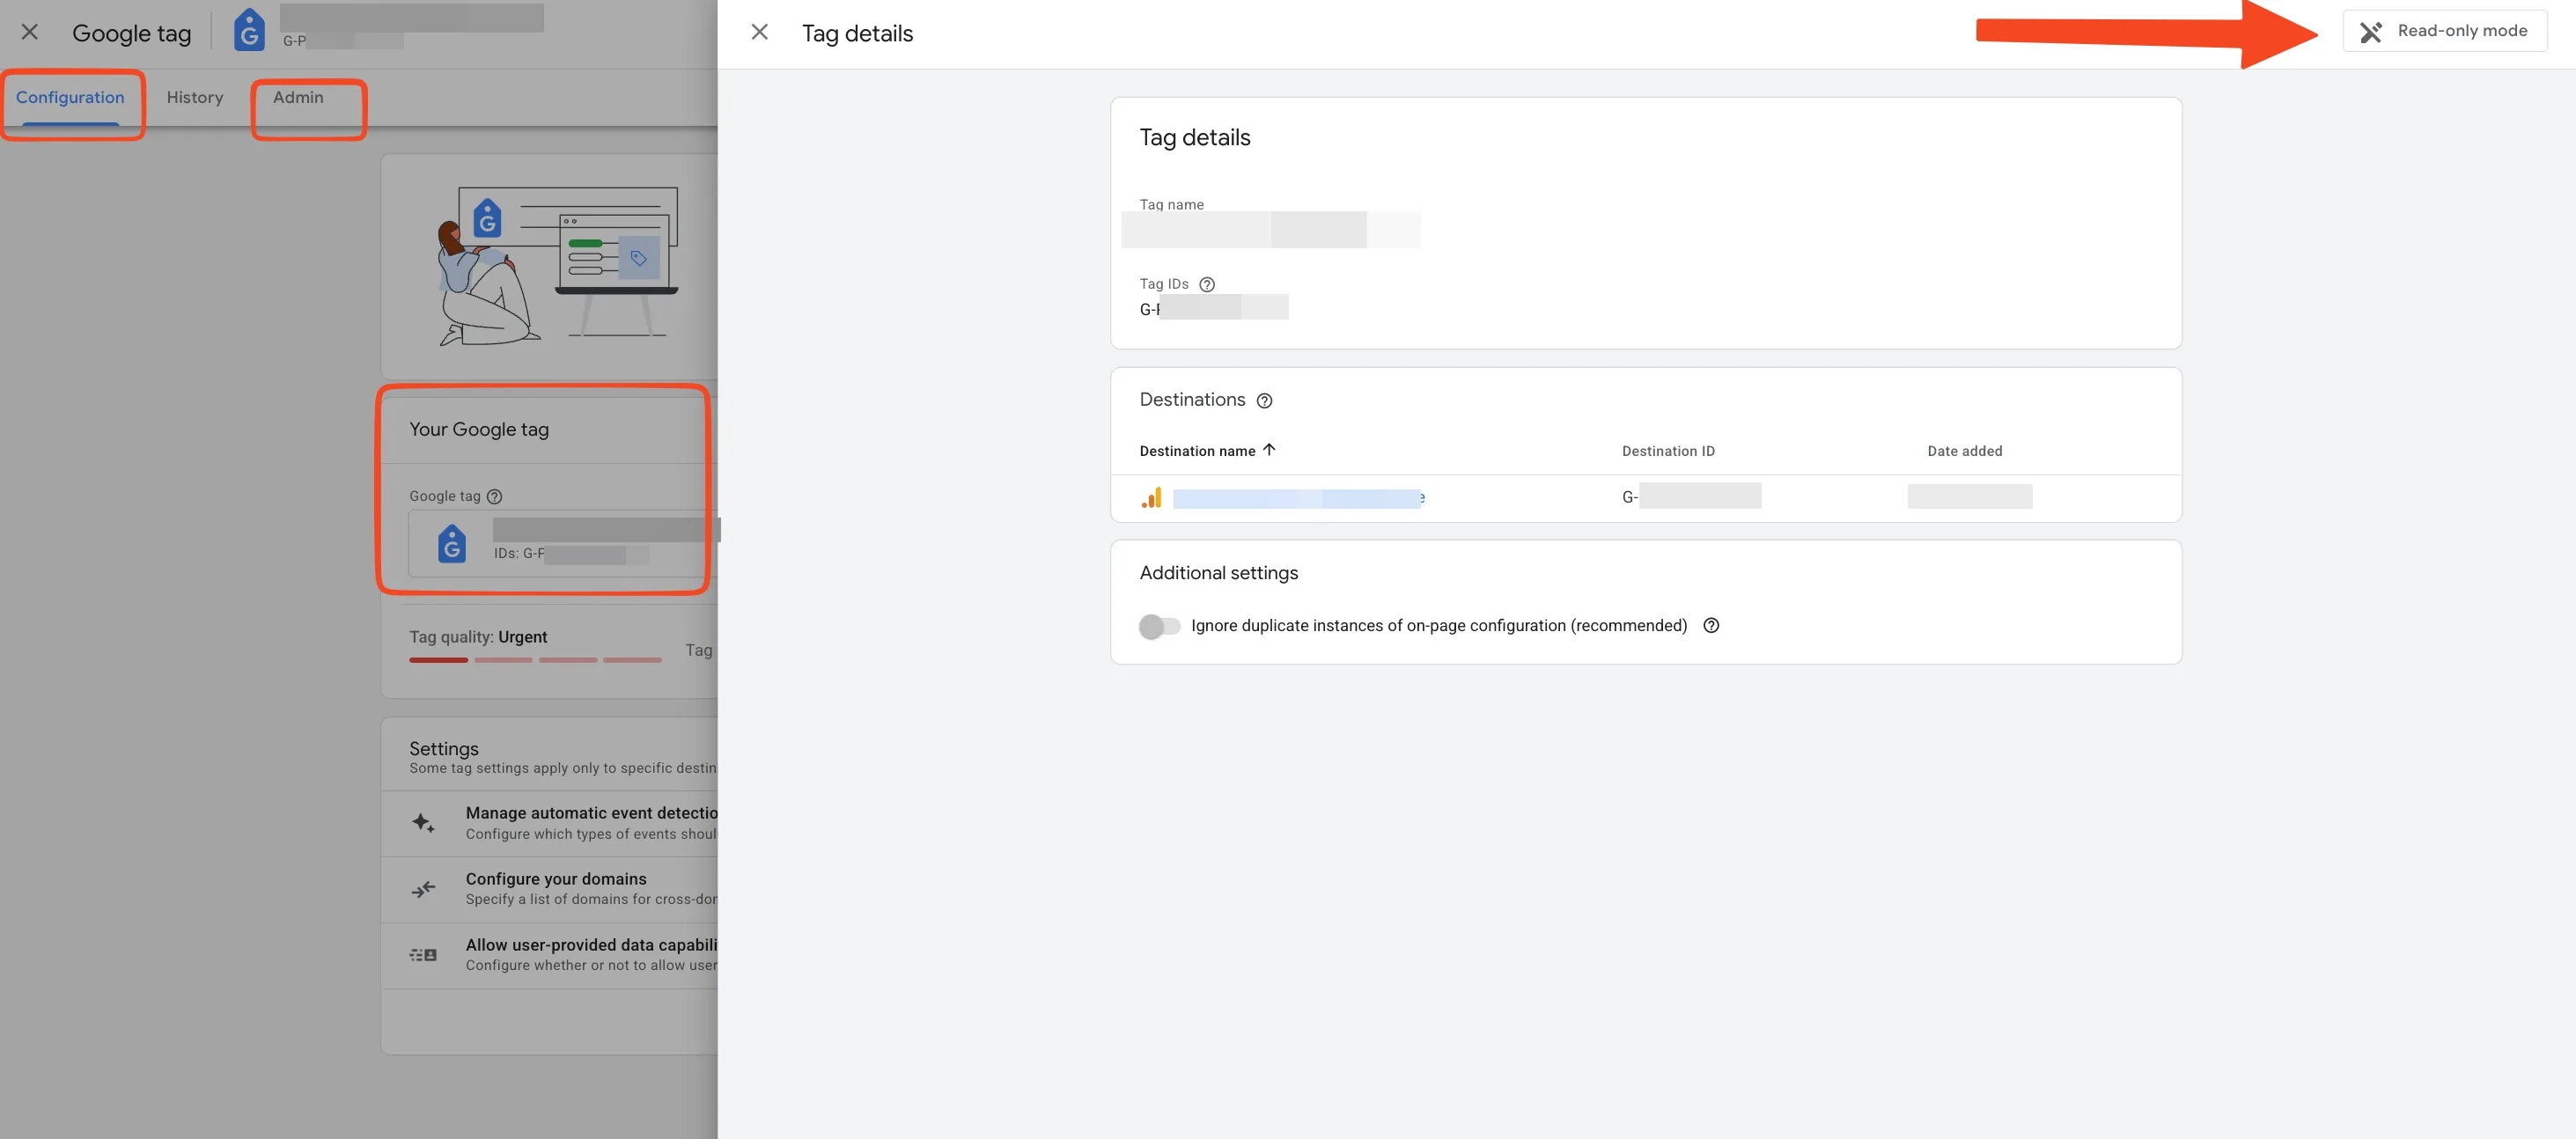
In Google Ads:
Tools -> Data Manager -> Google tag -> Manage -> Your Google tag (below is a screenshot showing an example of insufficient read-only access).
In Tag Manager:
the Google tags tab — this is the option we will look at in more detail below.
Accordingly, access to Google Tag can be obtained through any of the interfaces listed above. I hope it is obvious that access must be granted by the person who created these tags or who has the appropriate administrator permissions.
I am writing this guide, perhaps even for myself :), because every time it is a separate adventure to explain that access to a GA4 account or property is not enough, and that making changes also requires separate access to Google Tag — and how to grant it. Spoiler: “I have admin access in GA4” ≠ “I can change something in Google Tag.”
Tag Manager — granting access
Go to the link and find your combined tag: https://tagmanager.google.com/#/home#tags
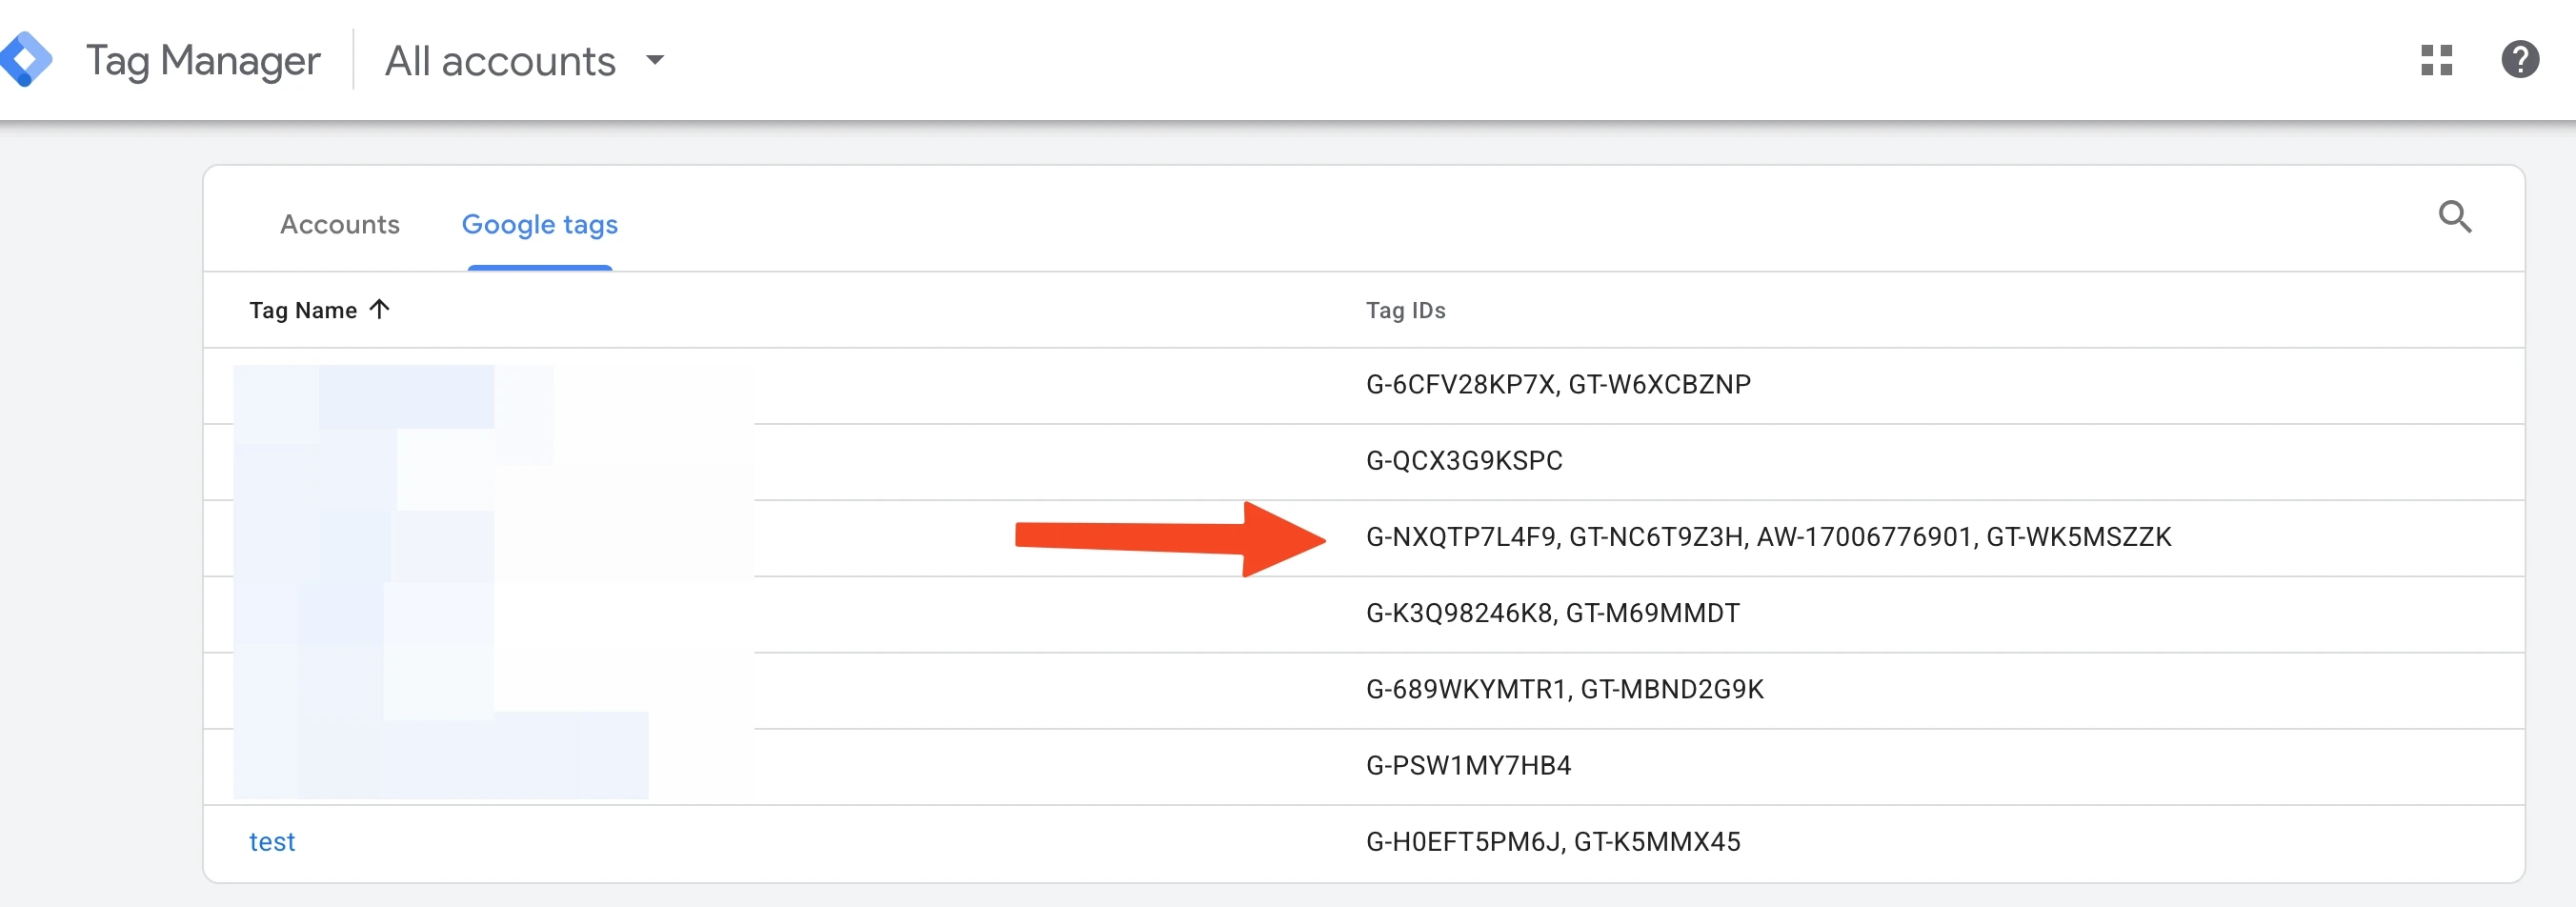
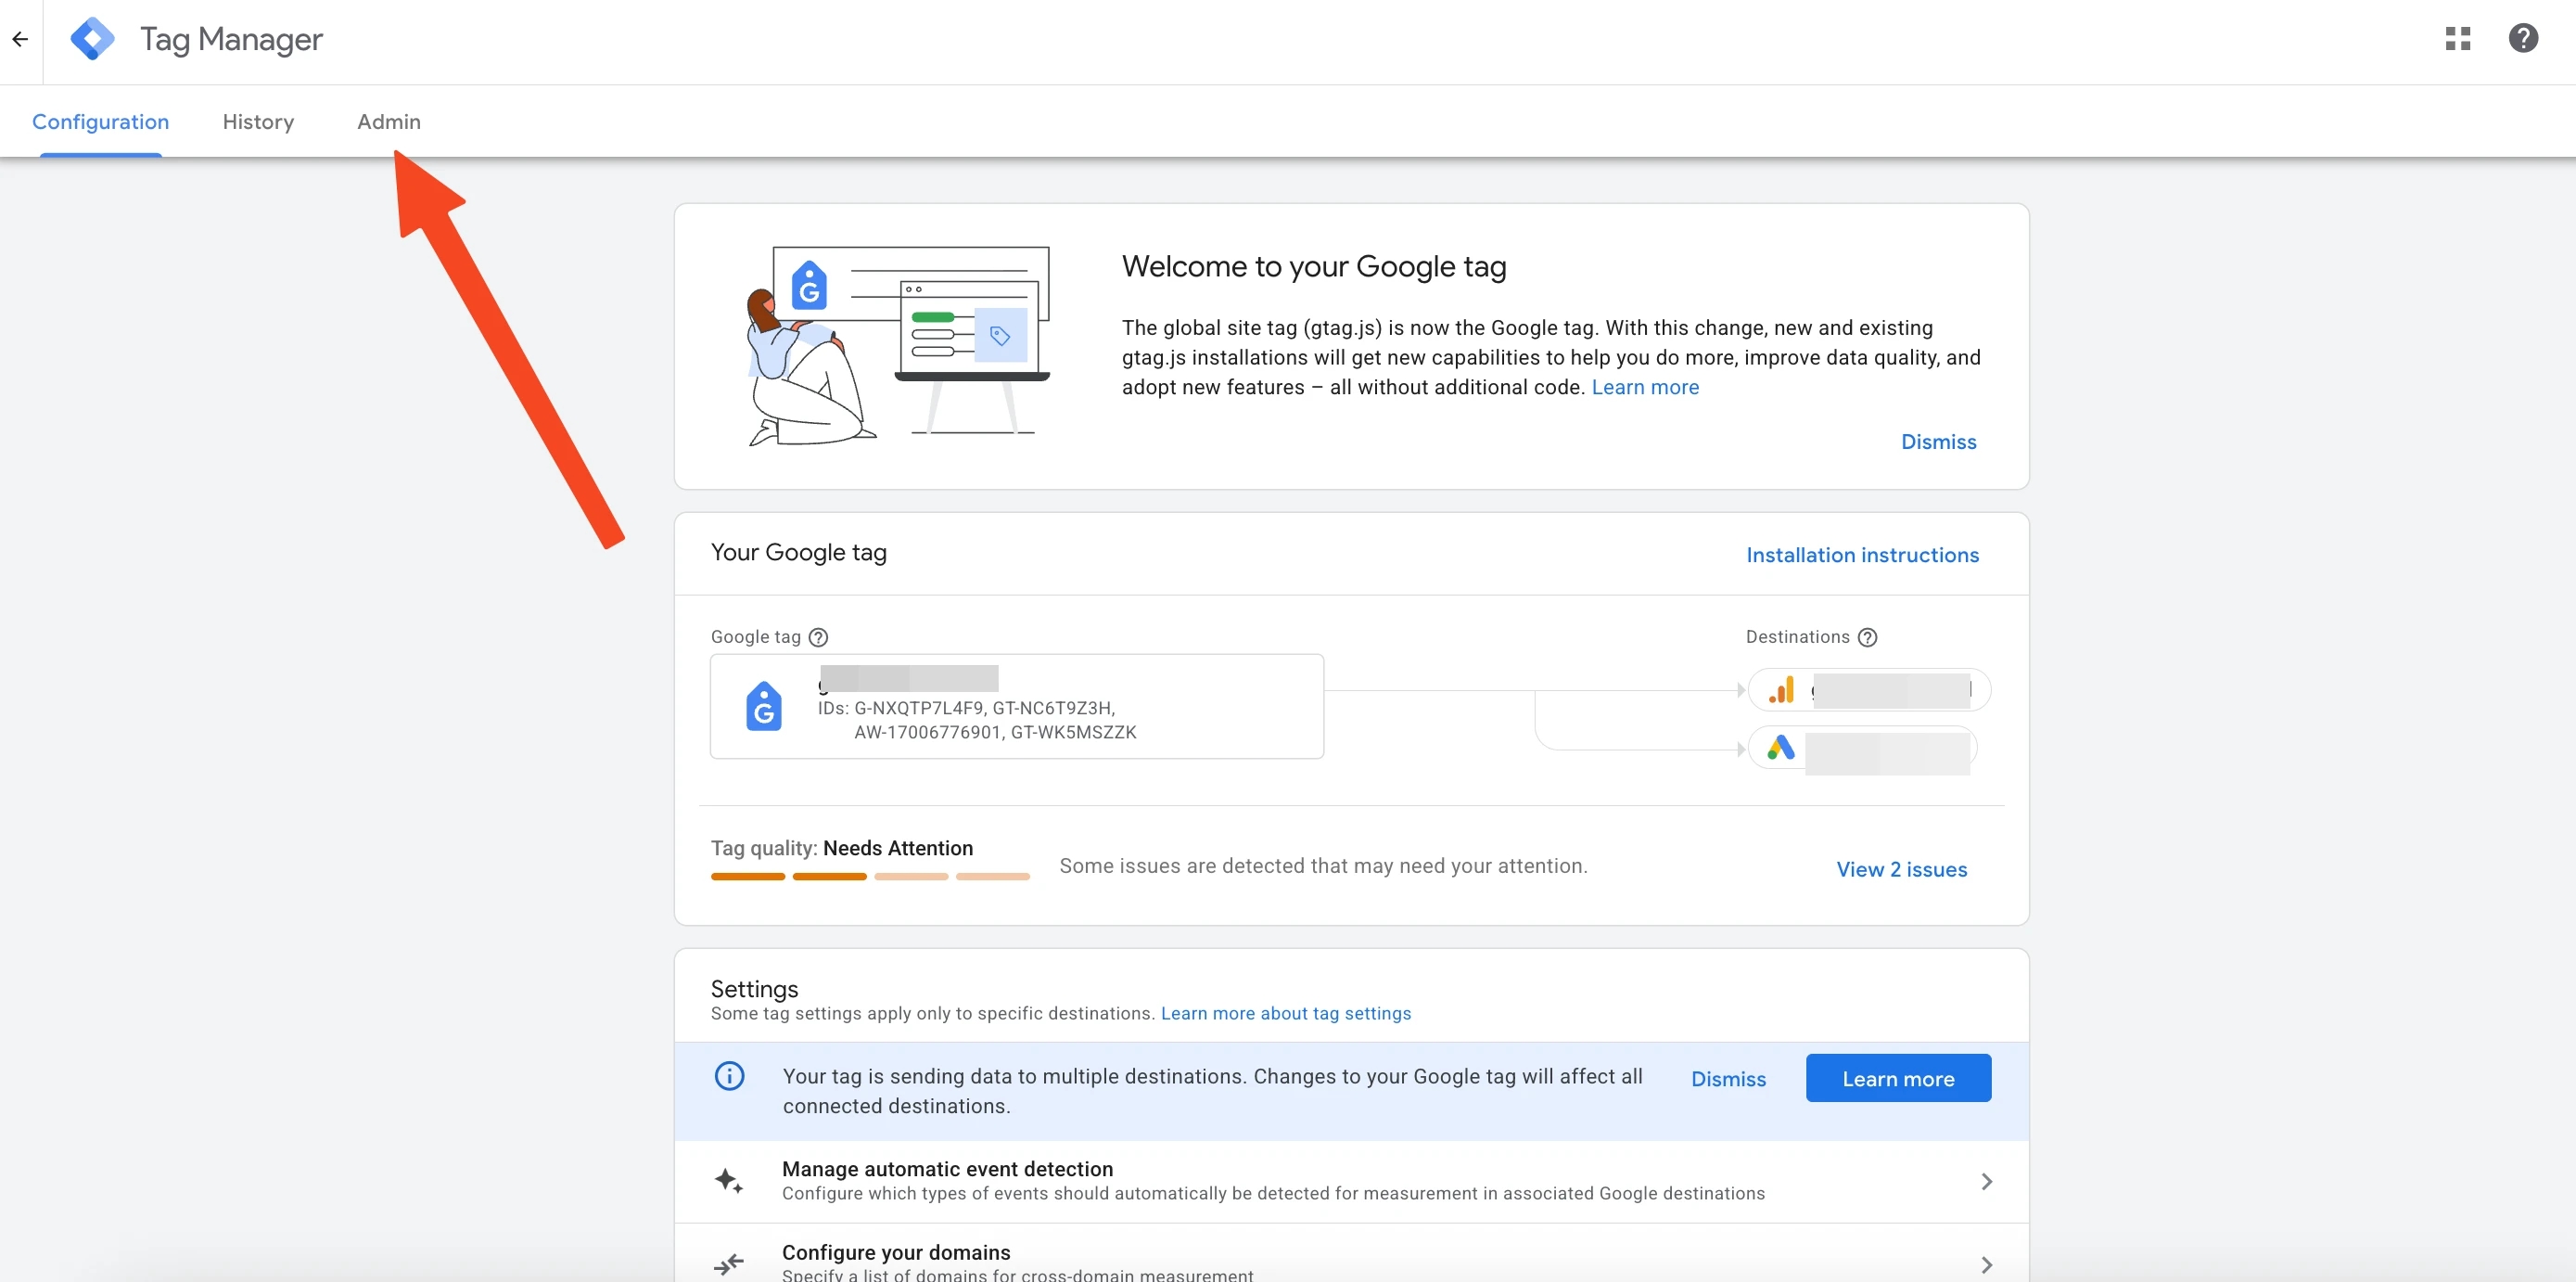
Click on the tag name and go to the Admin menu.
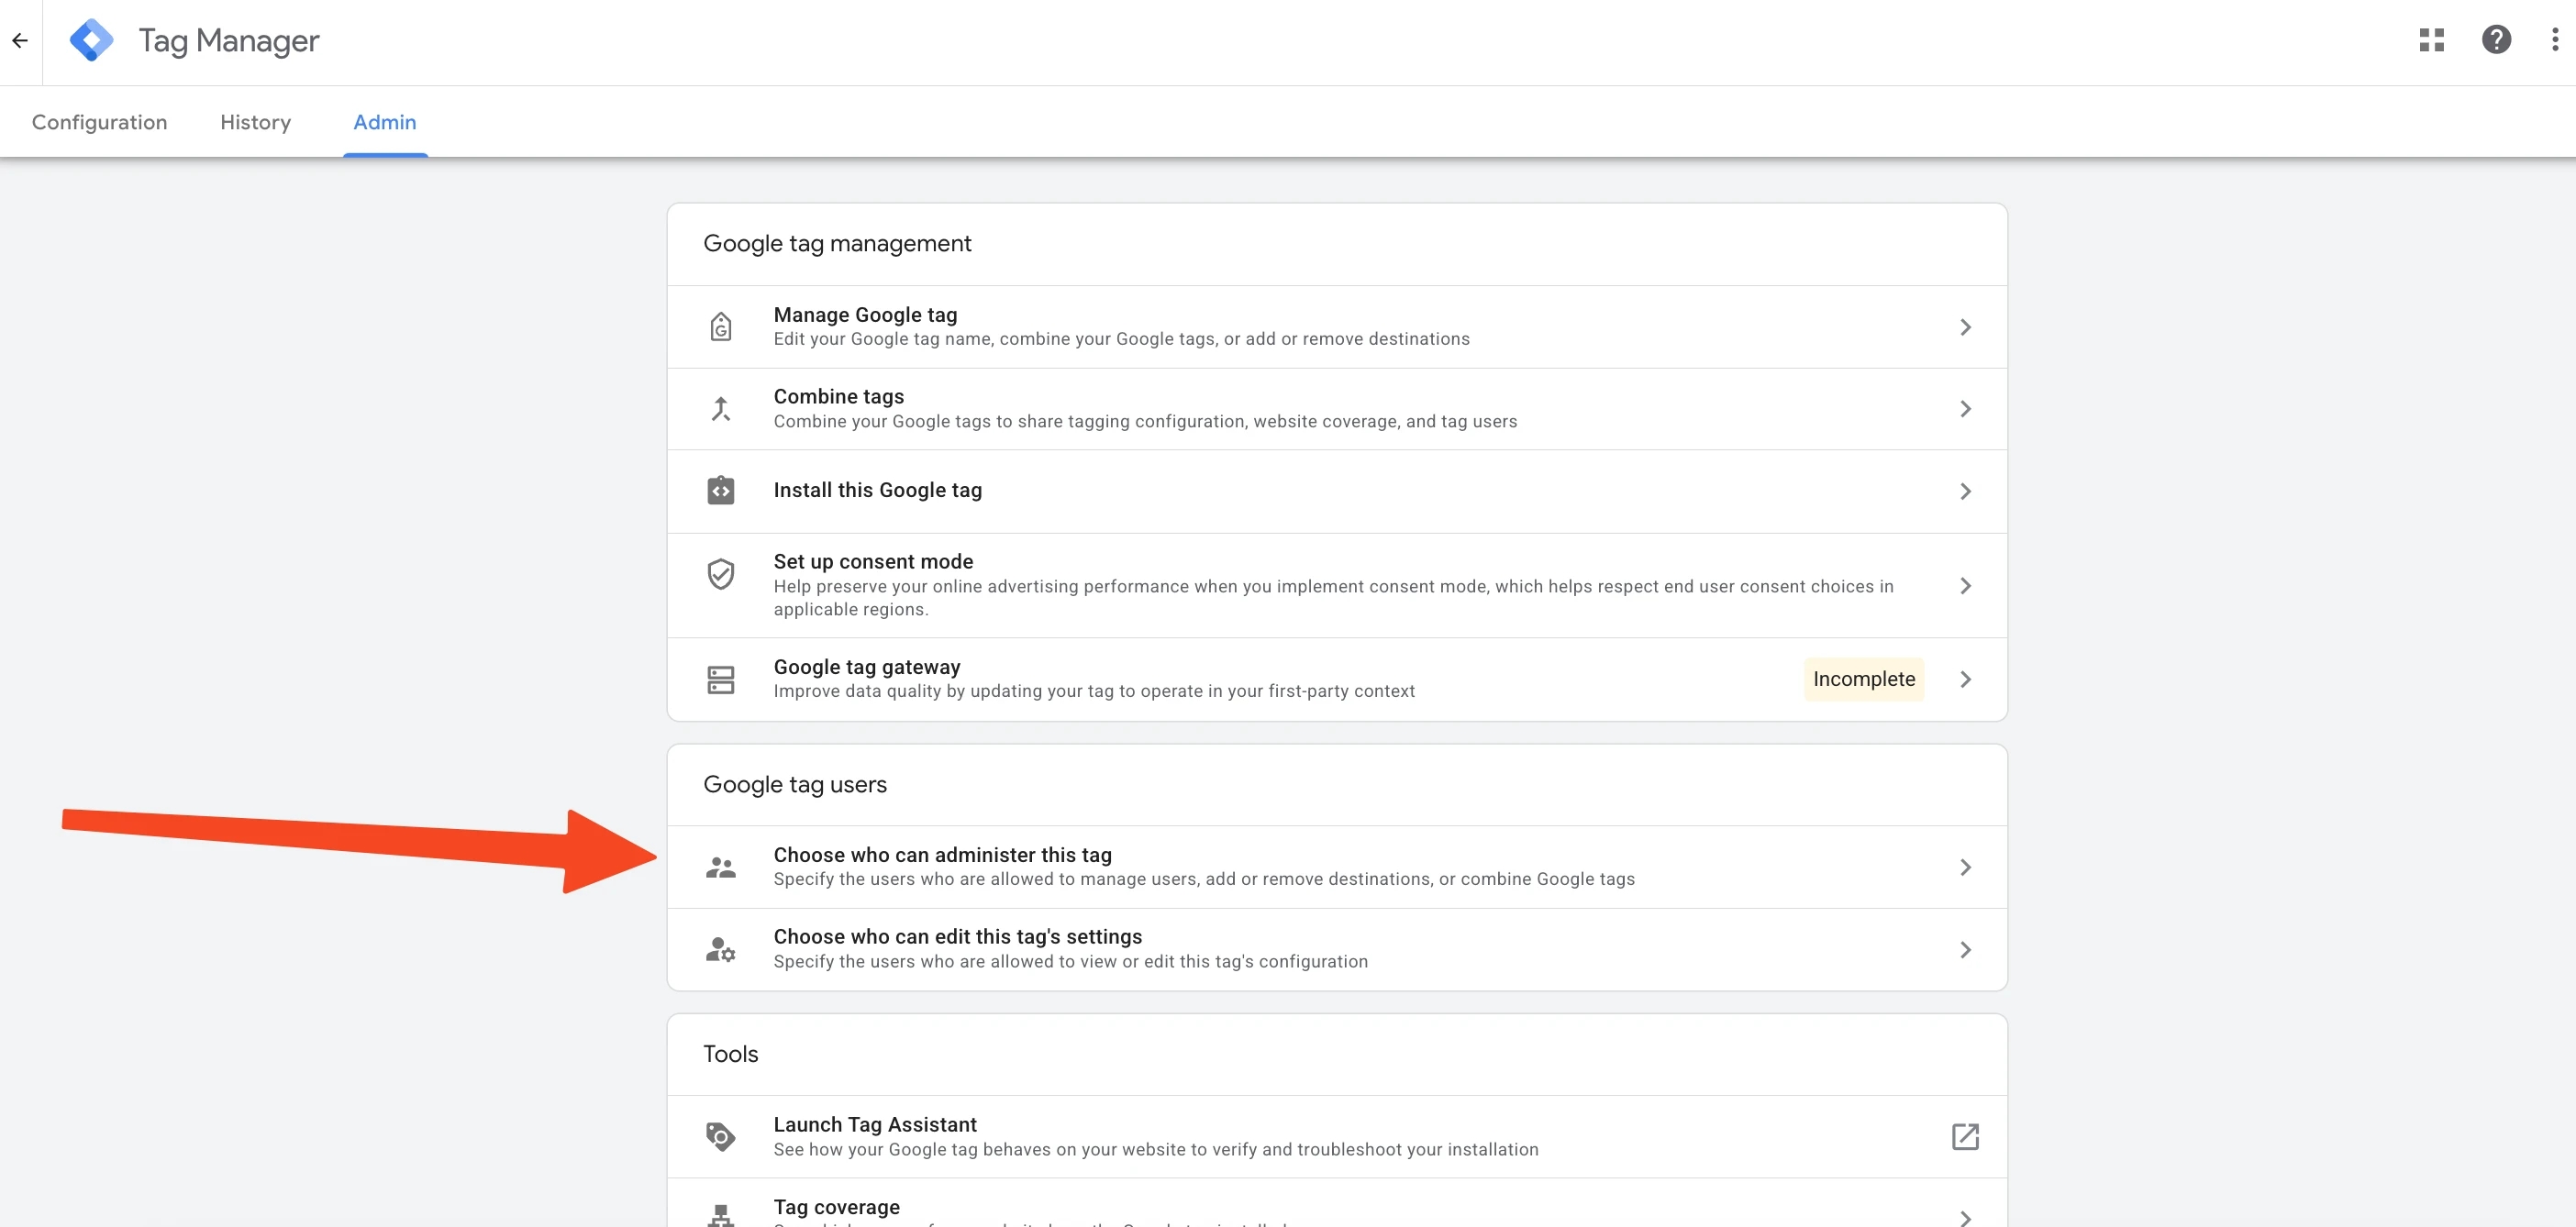
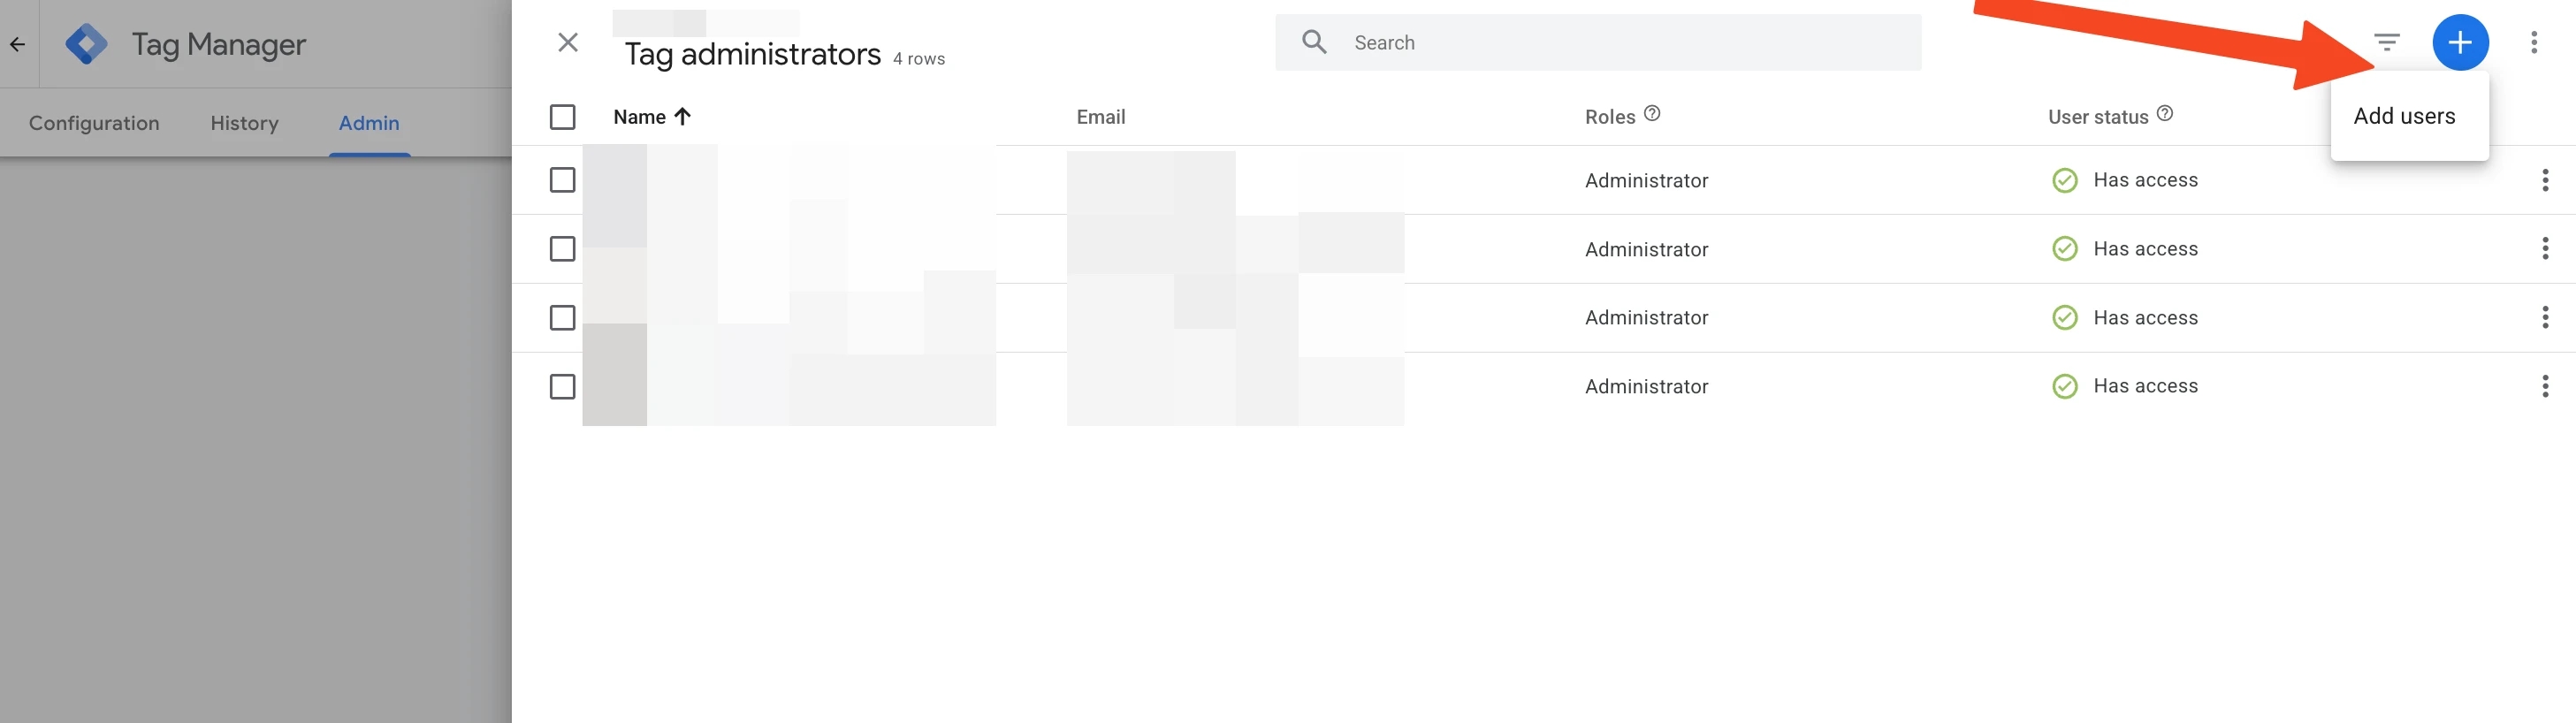
Next, select the access management menu — Choose who can administer this tag, since in the following steps we will need to make changes to the Google Tag configuration: remove destinations and unlink Google tags.
Then add a new user with Administrator access.
IMPORTANT
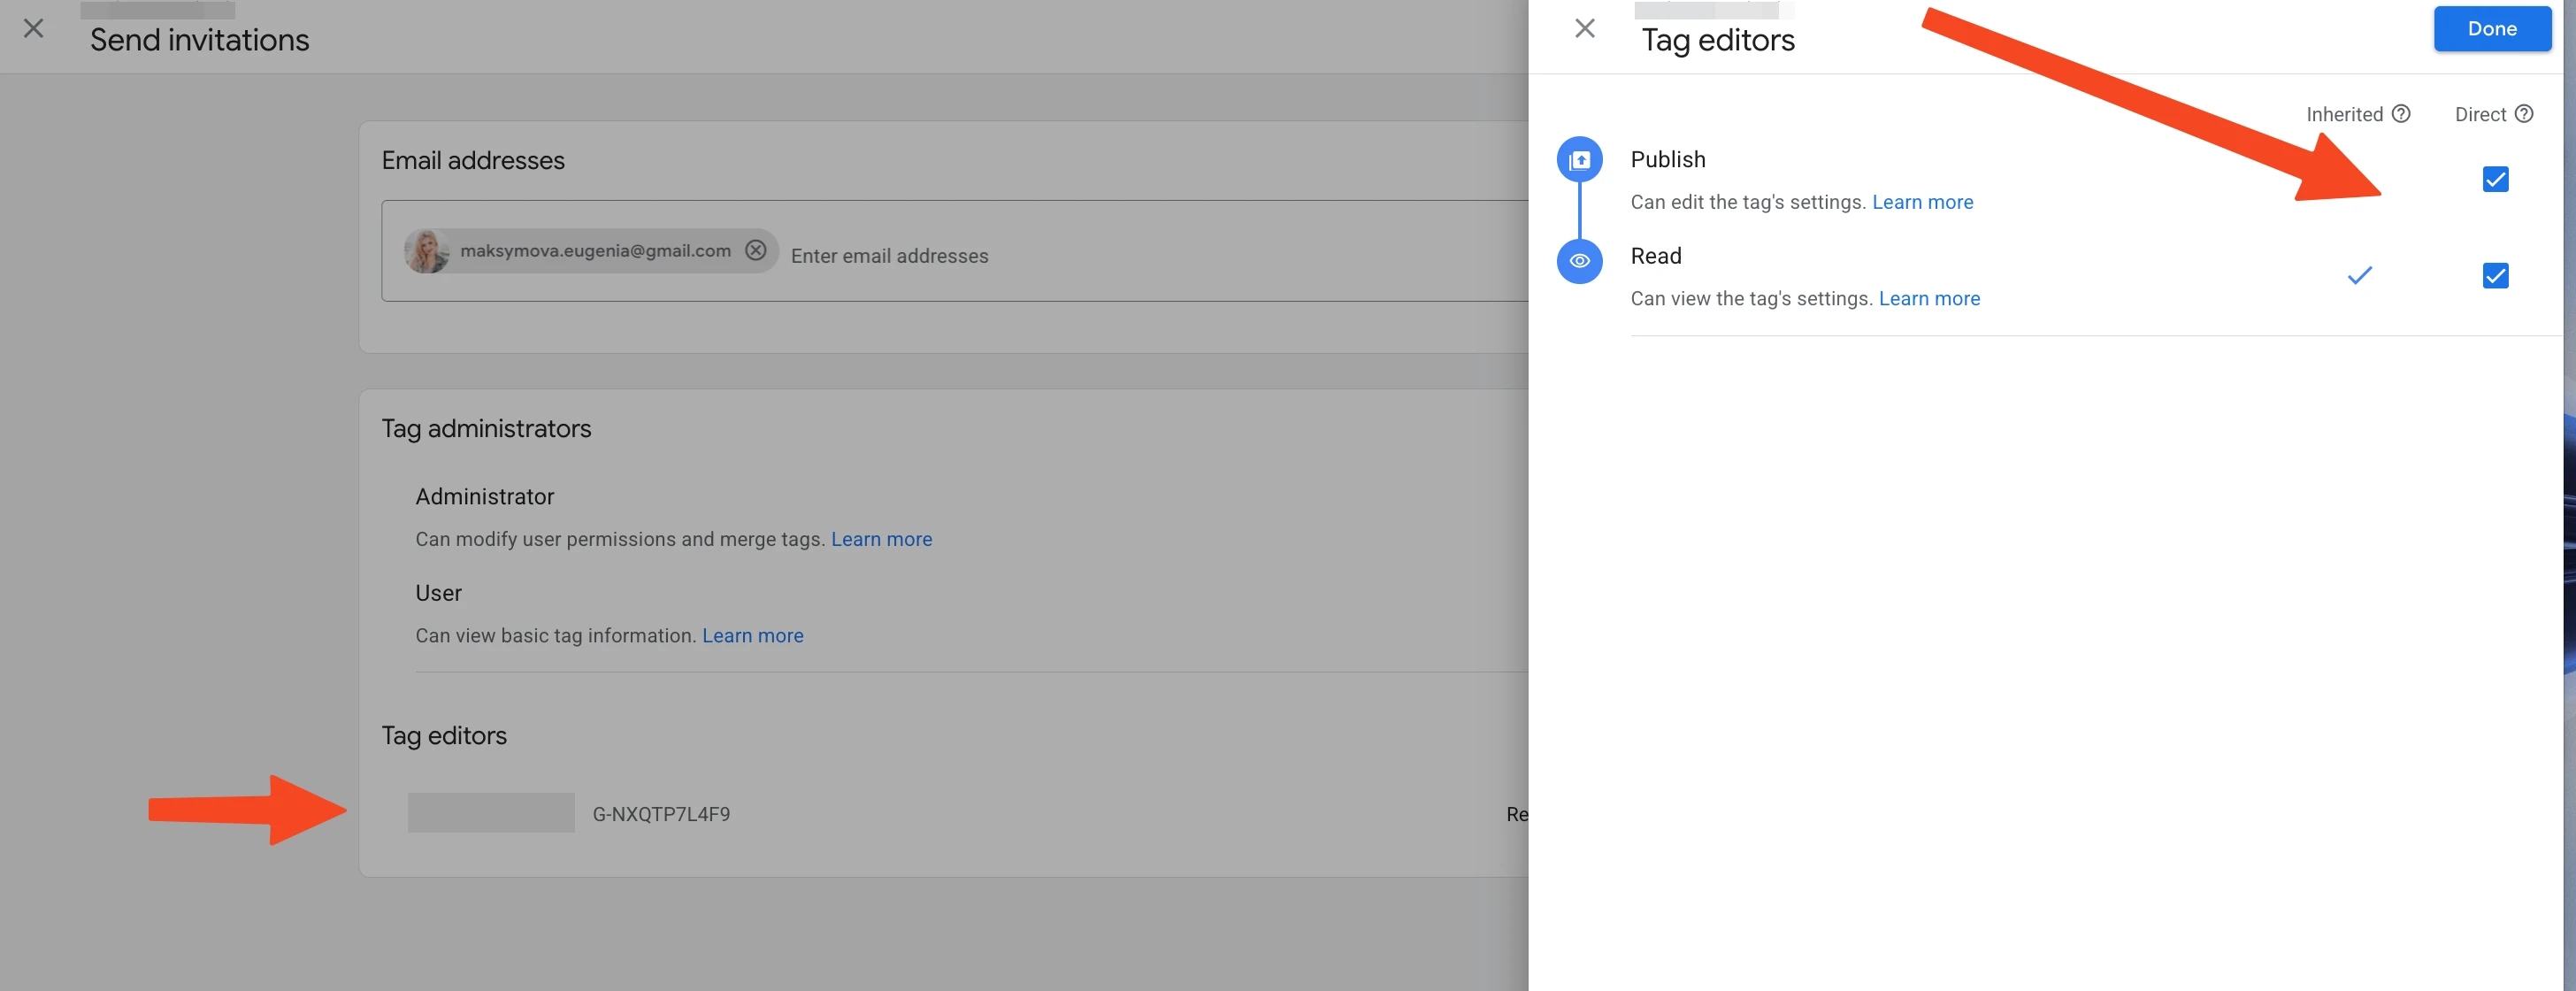
Access must be granted in two places — not only Tag Administrators, but also Tag editors.
By default, the Read (view-only) mode is enabled, as shown in the screenshot below.
If you work with Google Tag Manager, you probably know this access-related nuance — higher-level access does not automatically apply to lower levels. The same logic applies when working with access in Google Tag.
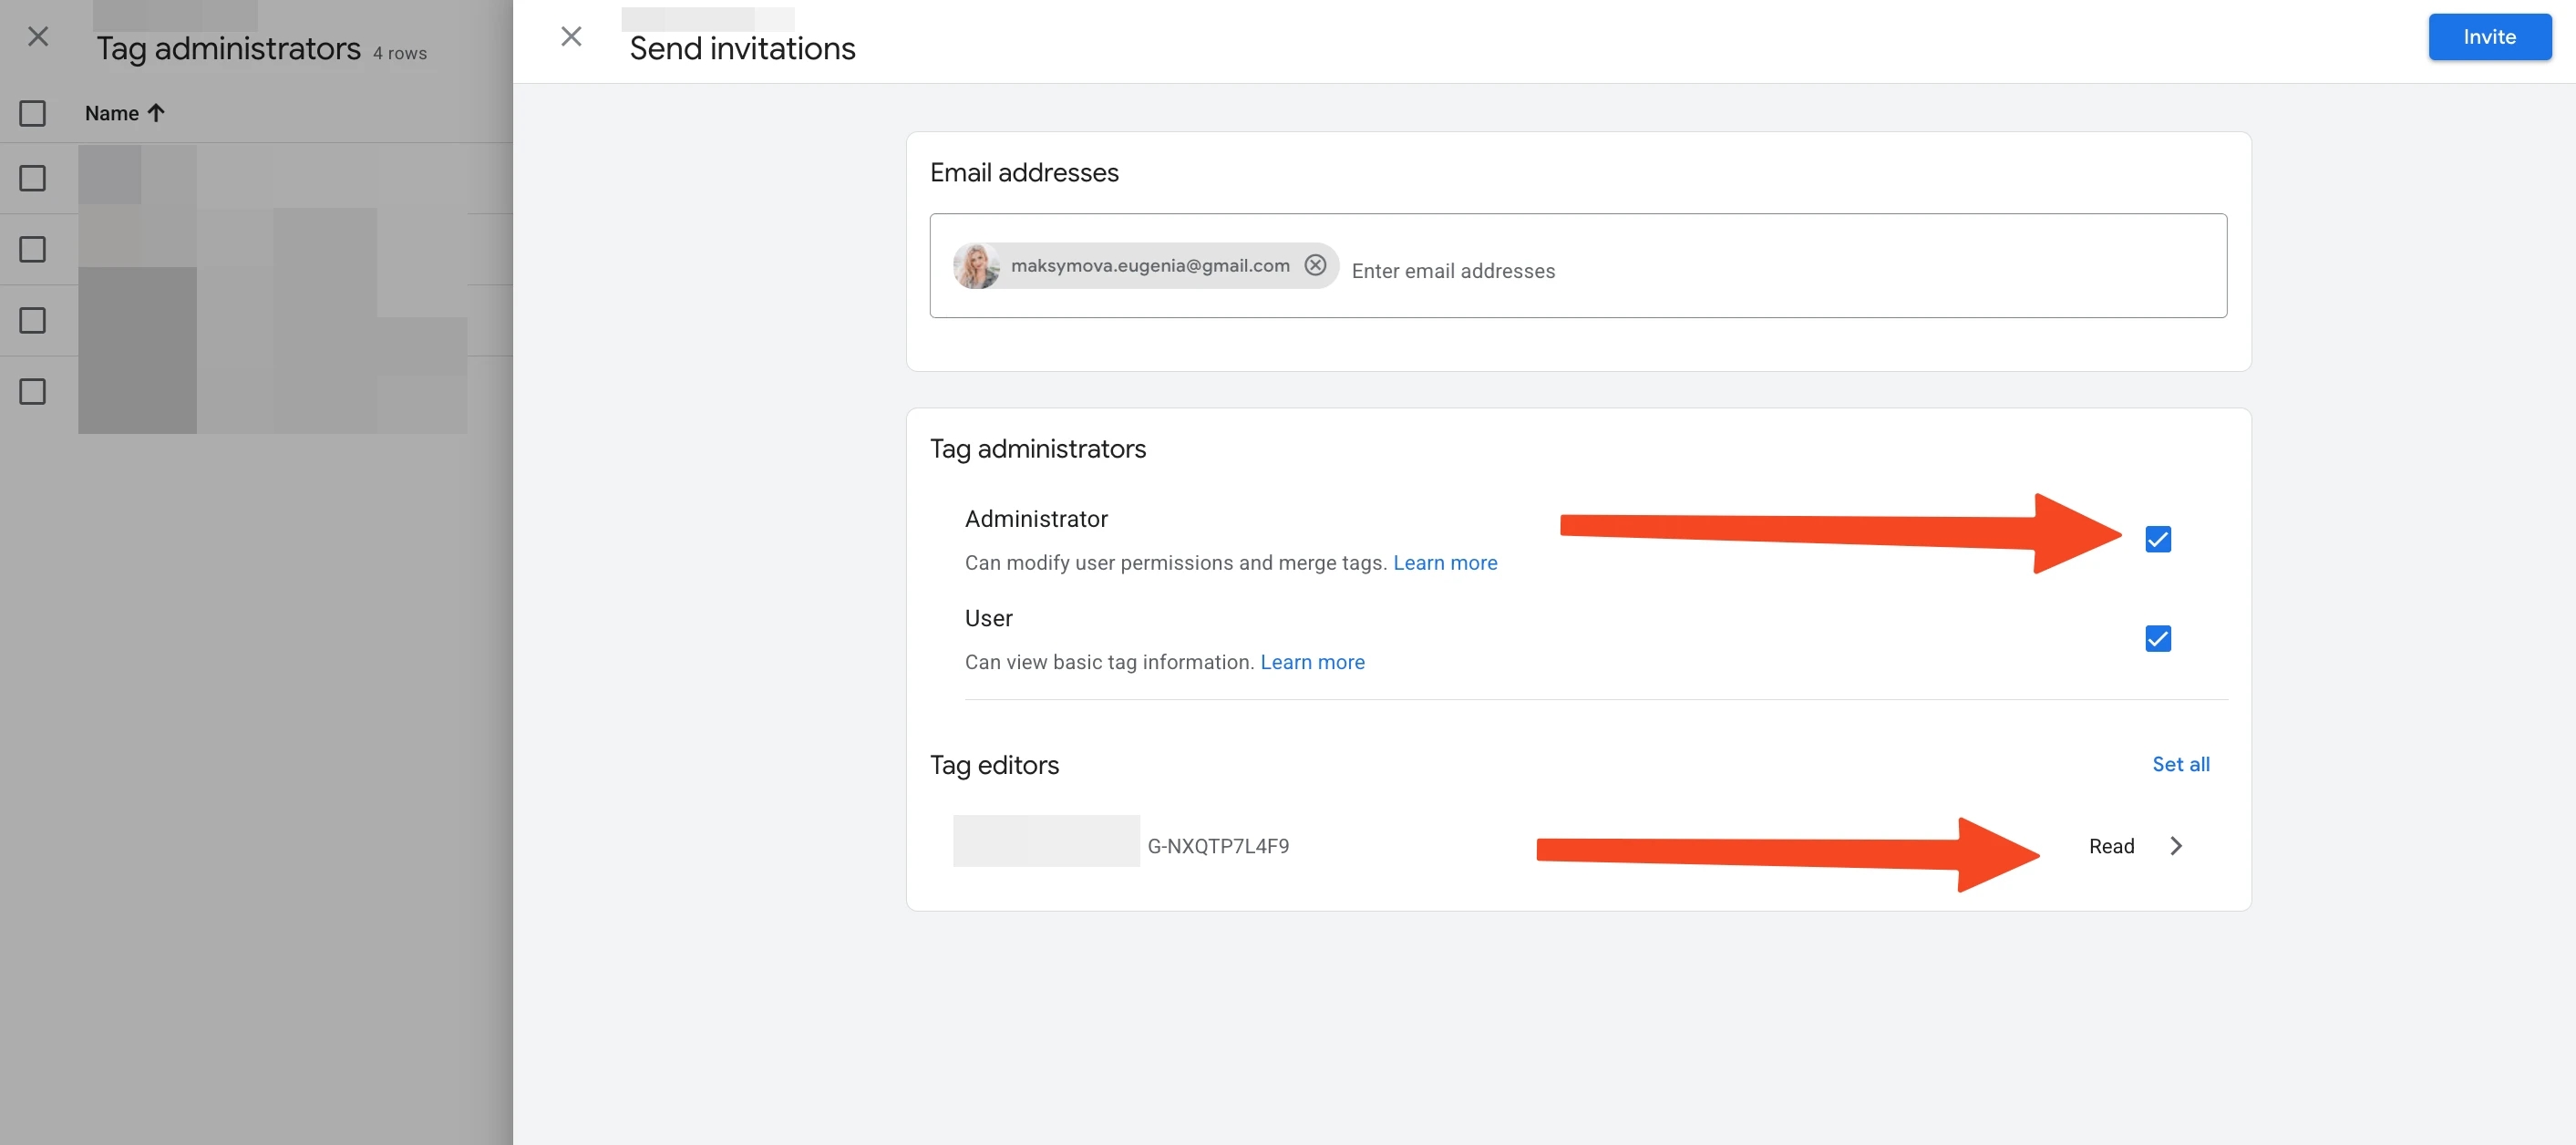
Click on the Tag editors menu and grant maximum permissions.
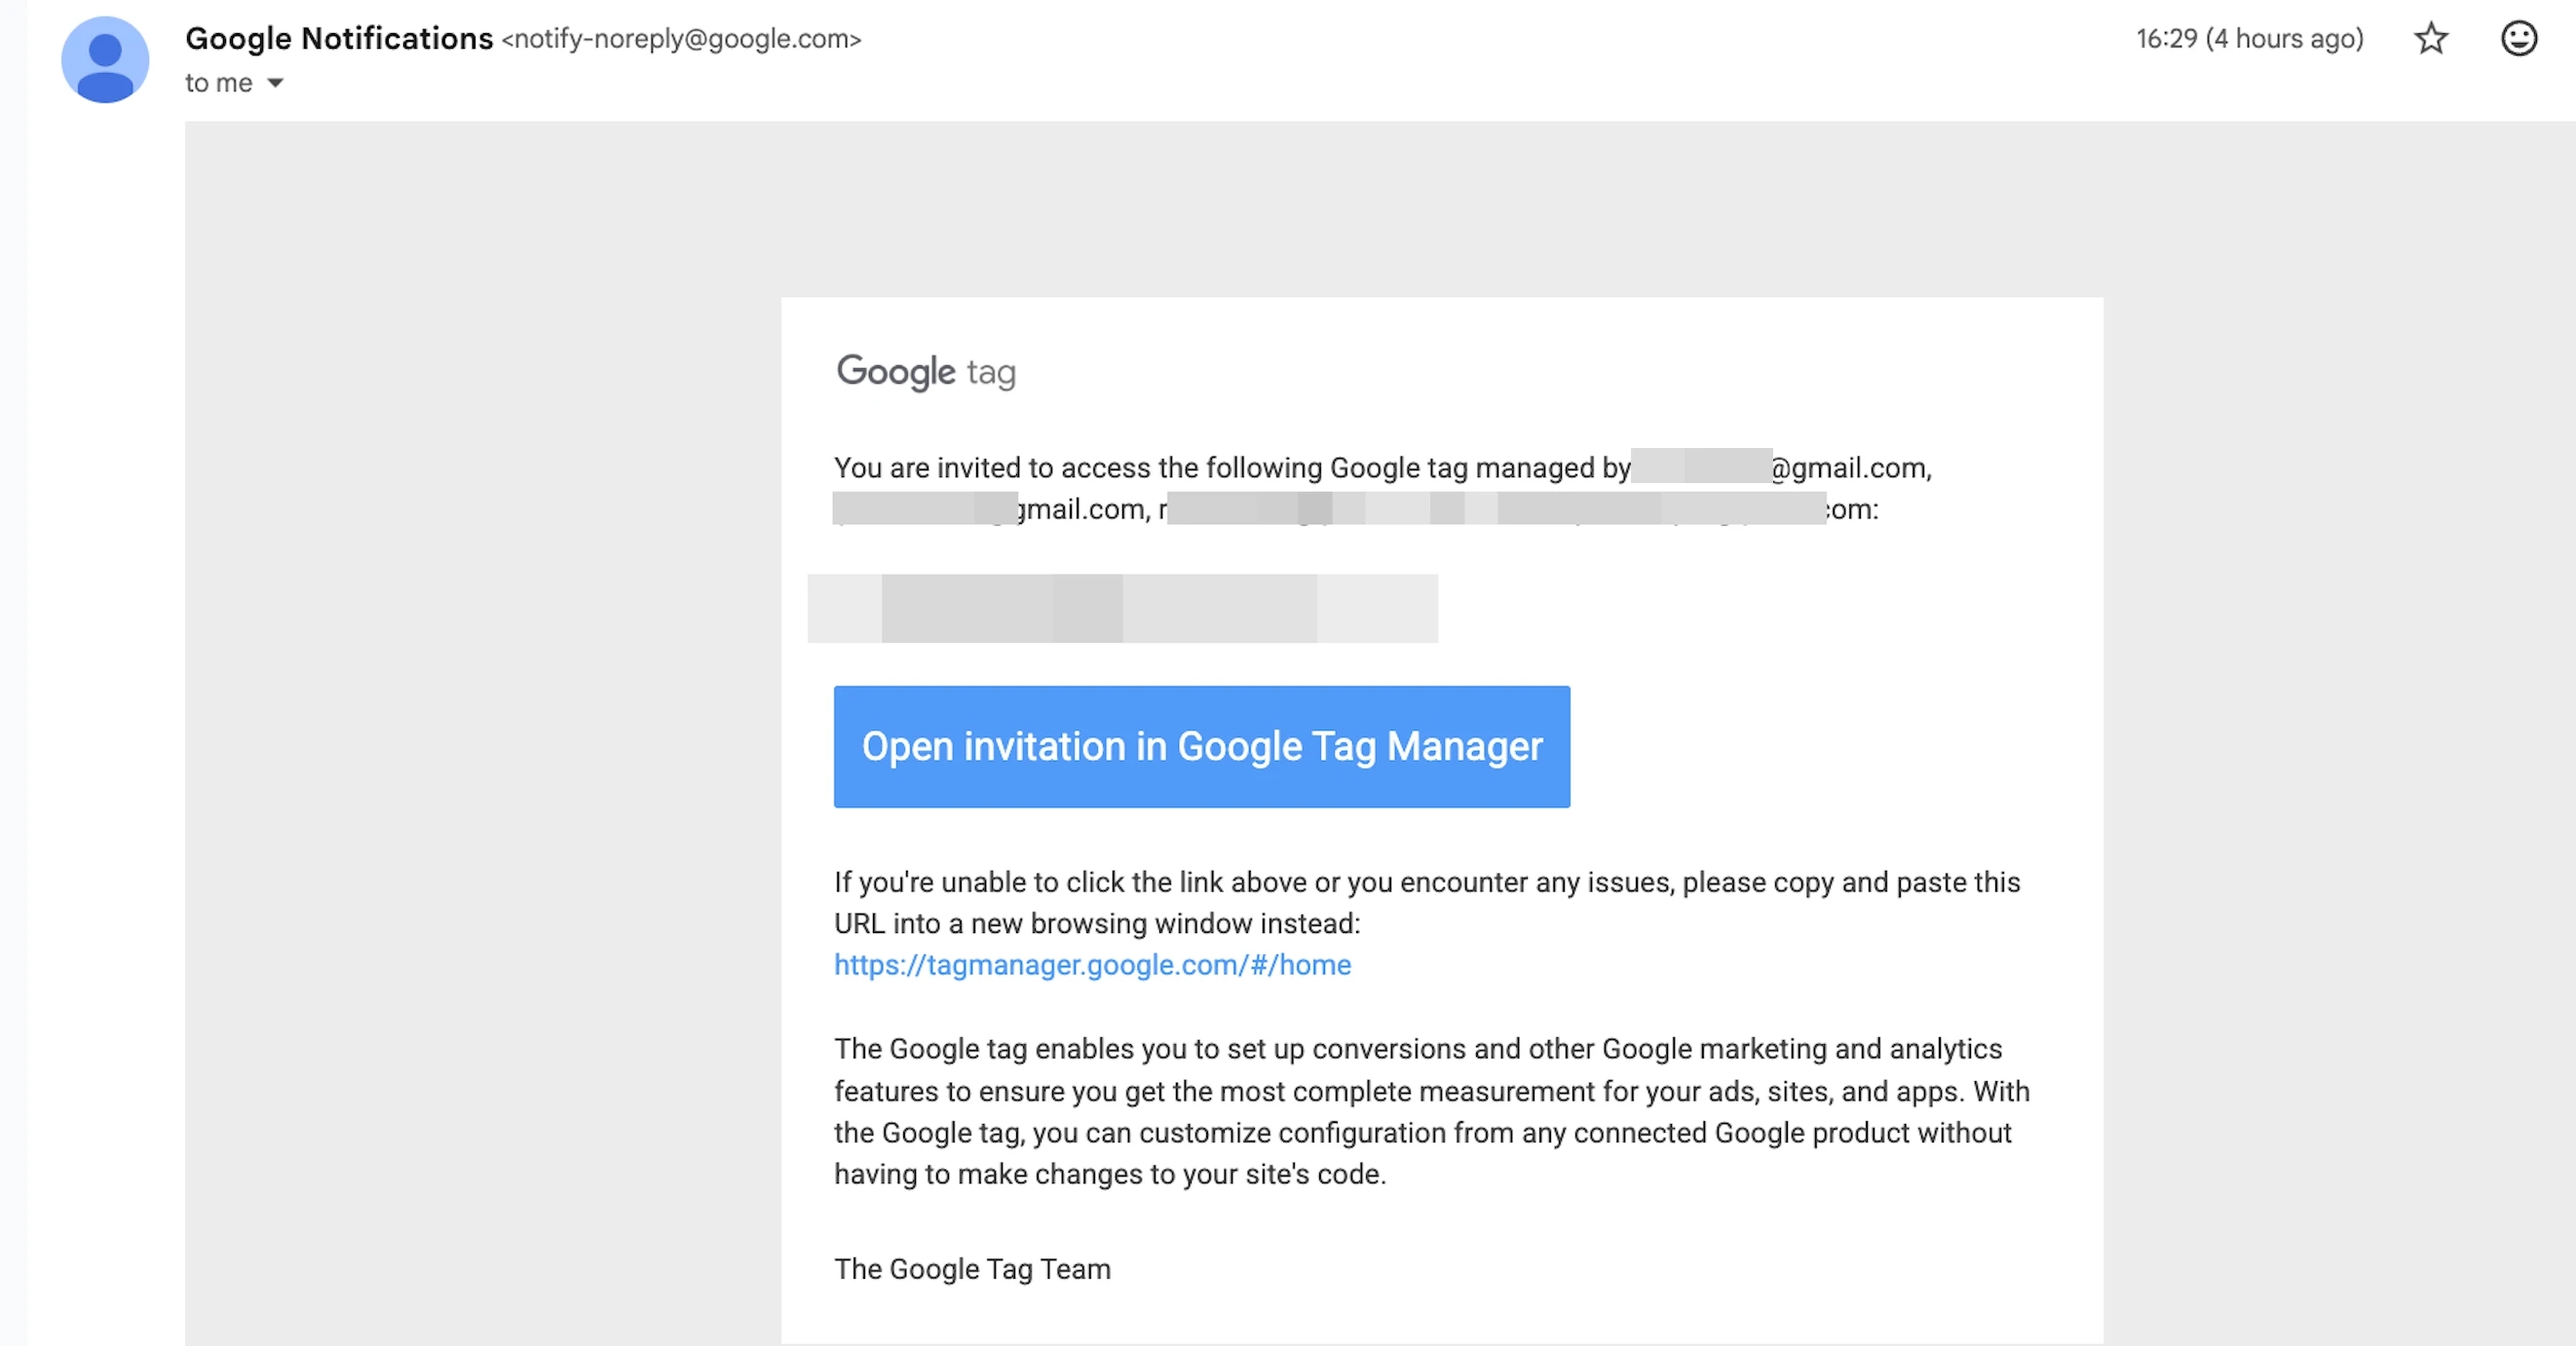
Voilà :) An invitation will be sent to the email address — all that’s left is to accept it.
I will demonstrate the plan schematically using the example of unlinking specific tags.
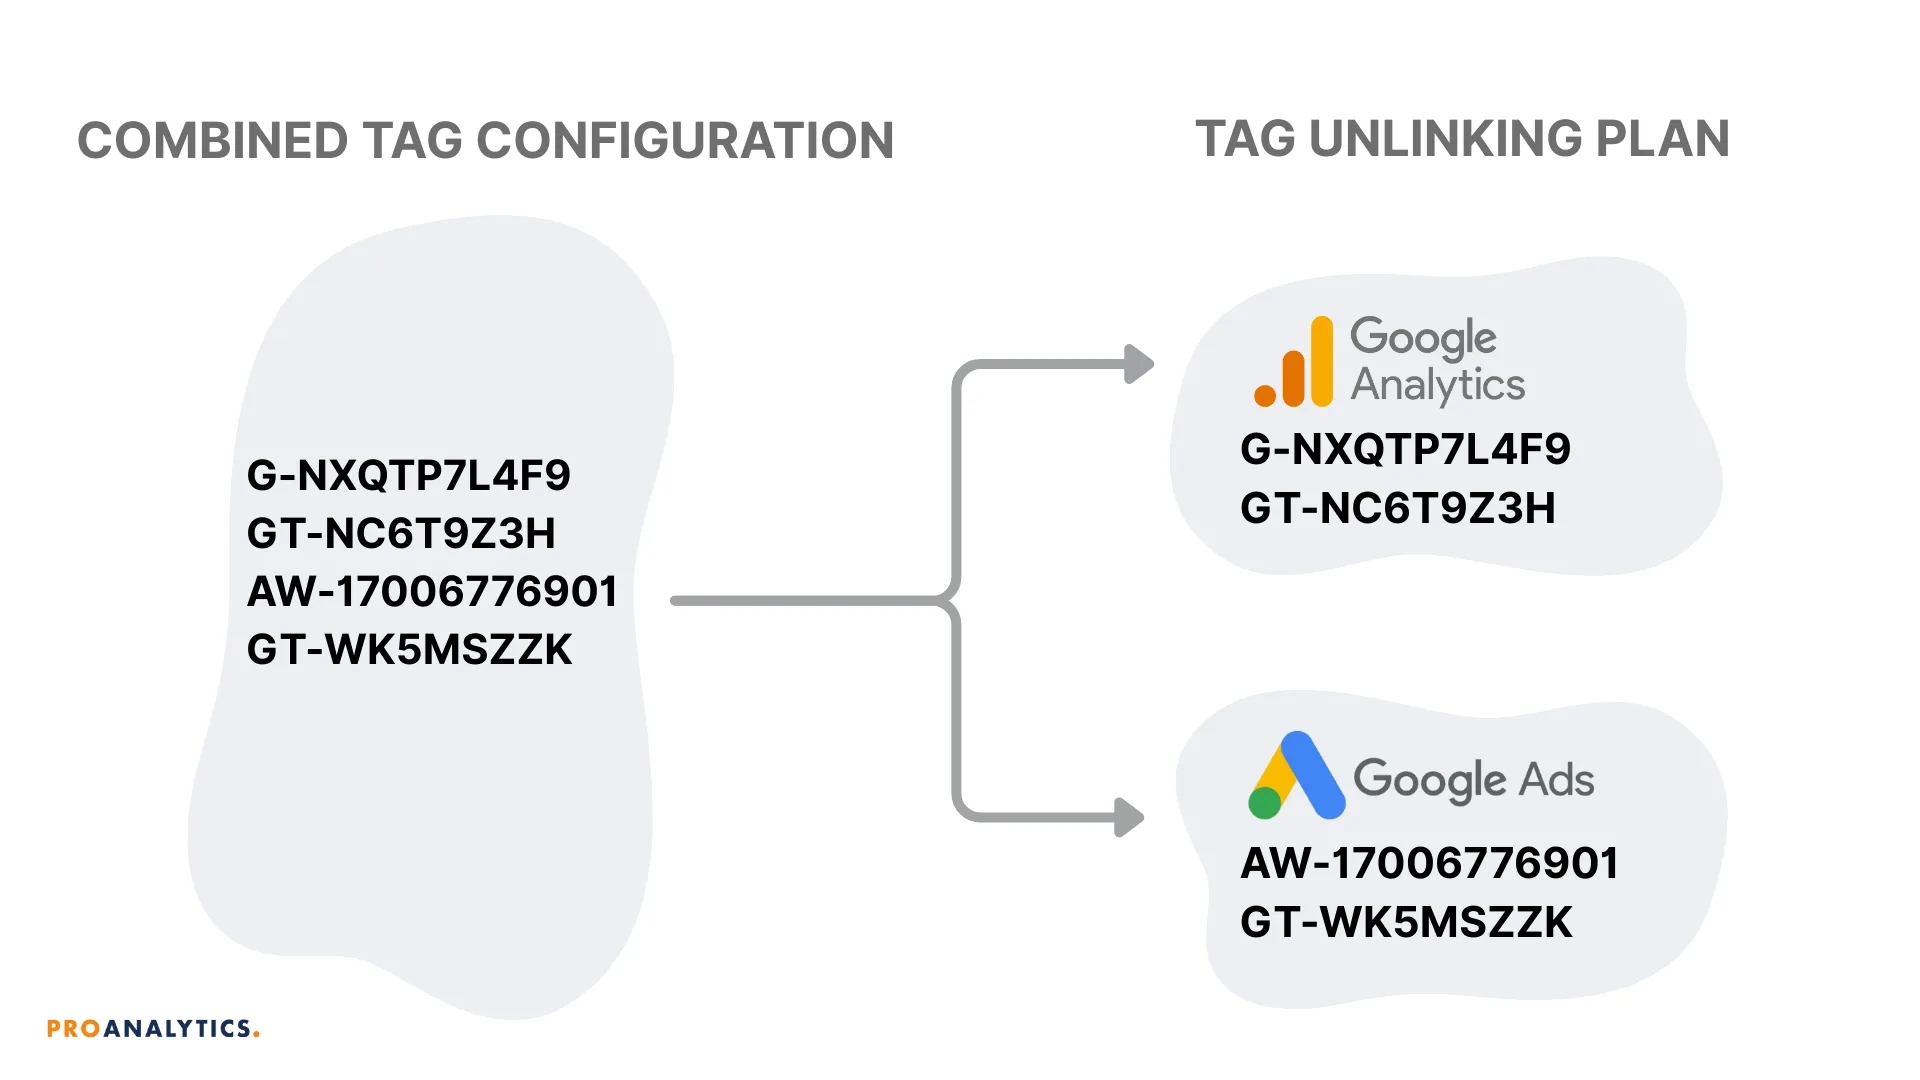
As a result of unlinking, the tags should look like this.
In GA4:
- Google Tag G-NXQTP7L4F9;
- the corresponding separate Google Tag GT-NC6T9Z3H.
In Google Ads:
- Google Tag AW-17006776901;
- the corresponding separate Google Tag GT-WK5MSZZK.
That is:
- different Google Tags are used for GA4 and Google Ads;
- none of them has shared destinations;
- each tag is responsible only for its own product.
We work in Tag Manager, where we have navigated directly to the tag that we are going to unlink.
In the Configuration menu, click on our Google Tag or on Destinations.
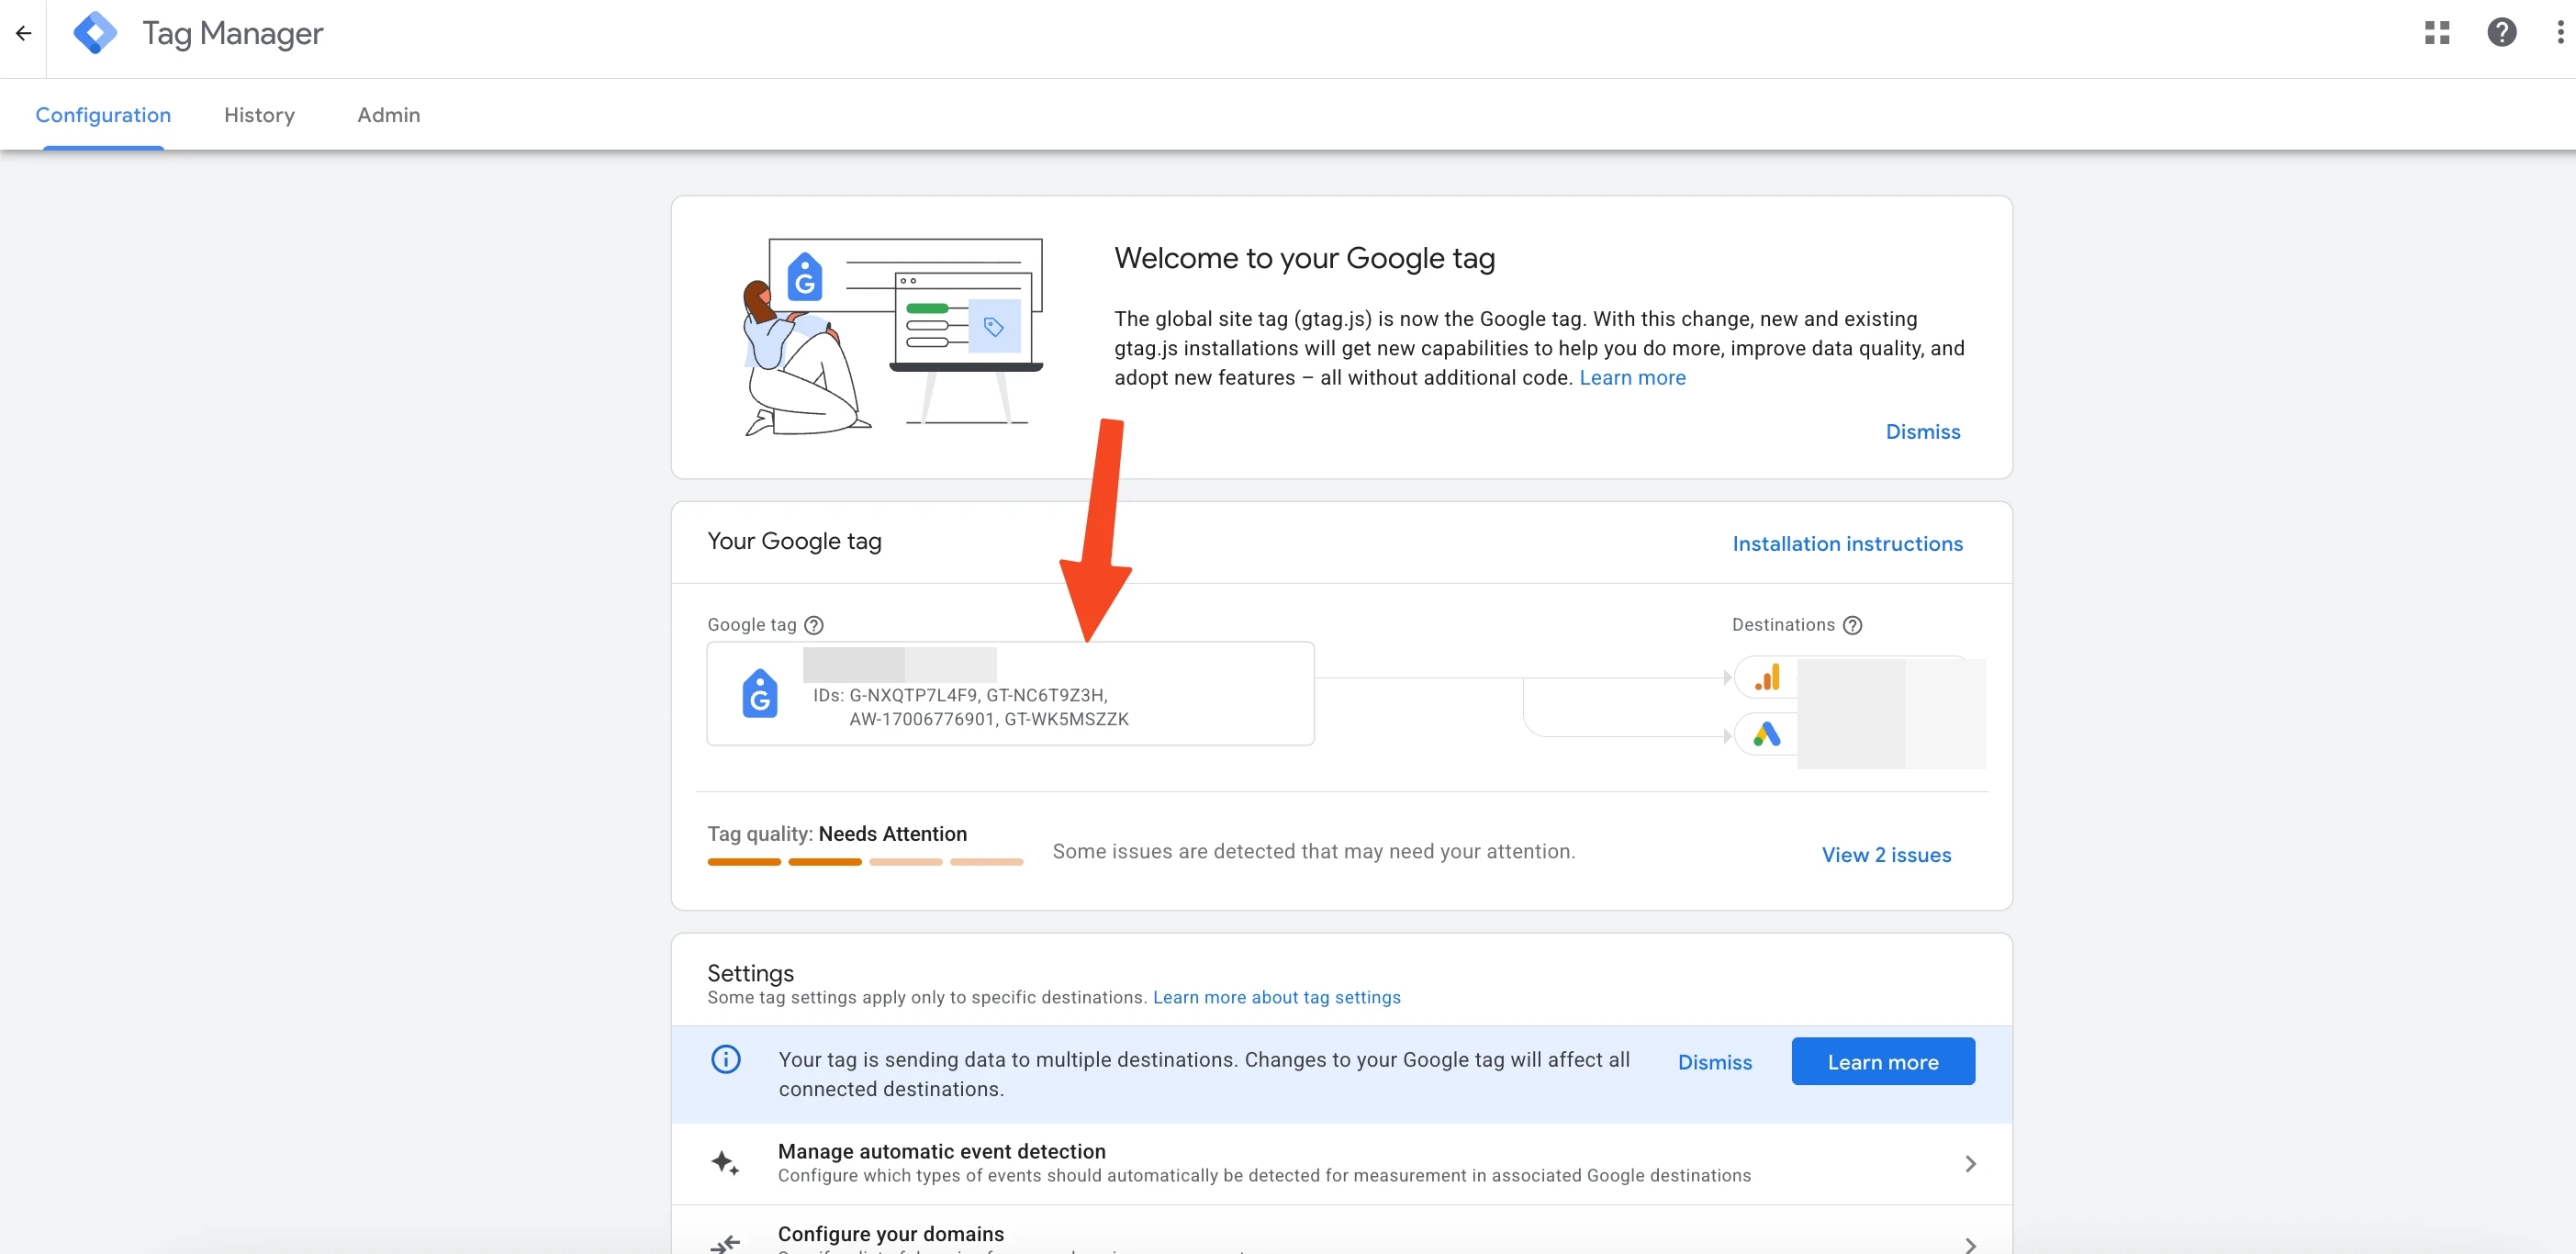
In either case, the same tag configuration tab will open.
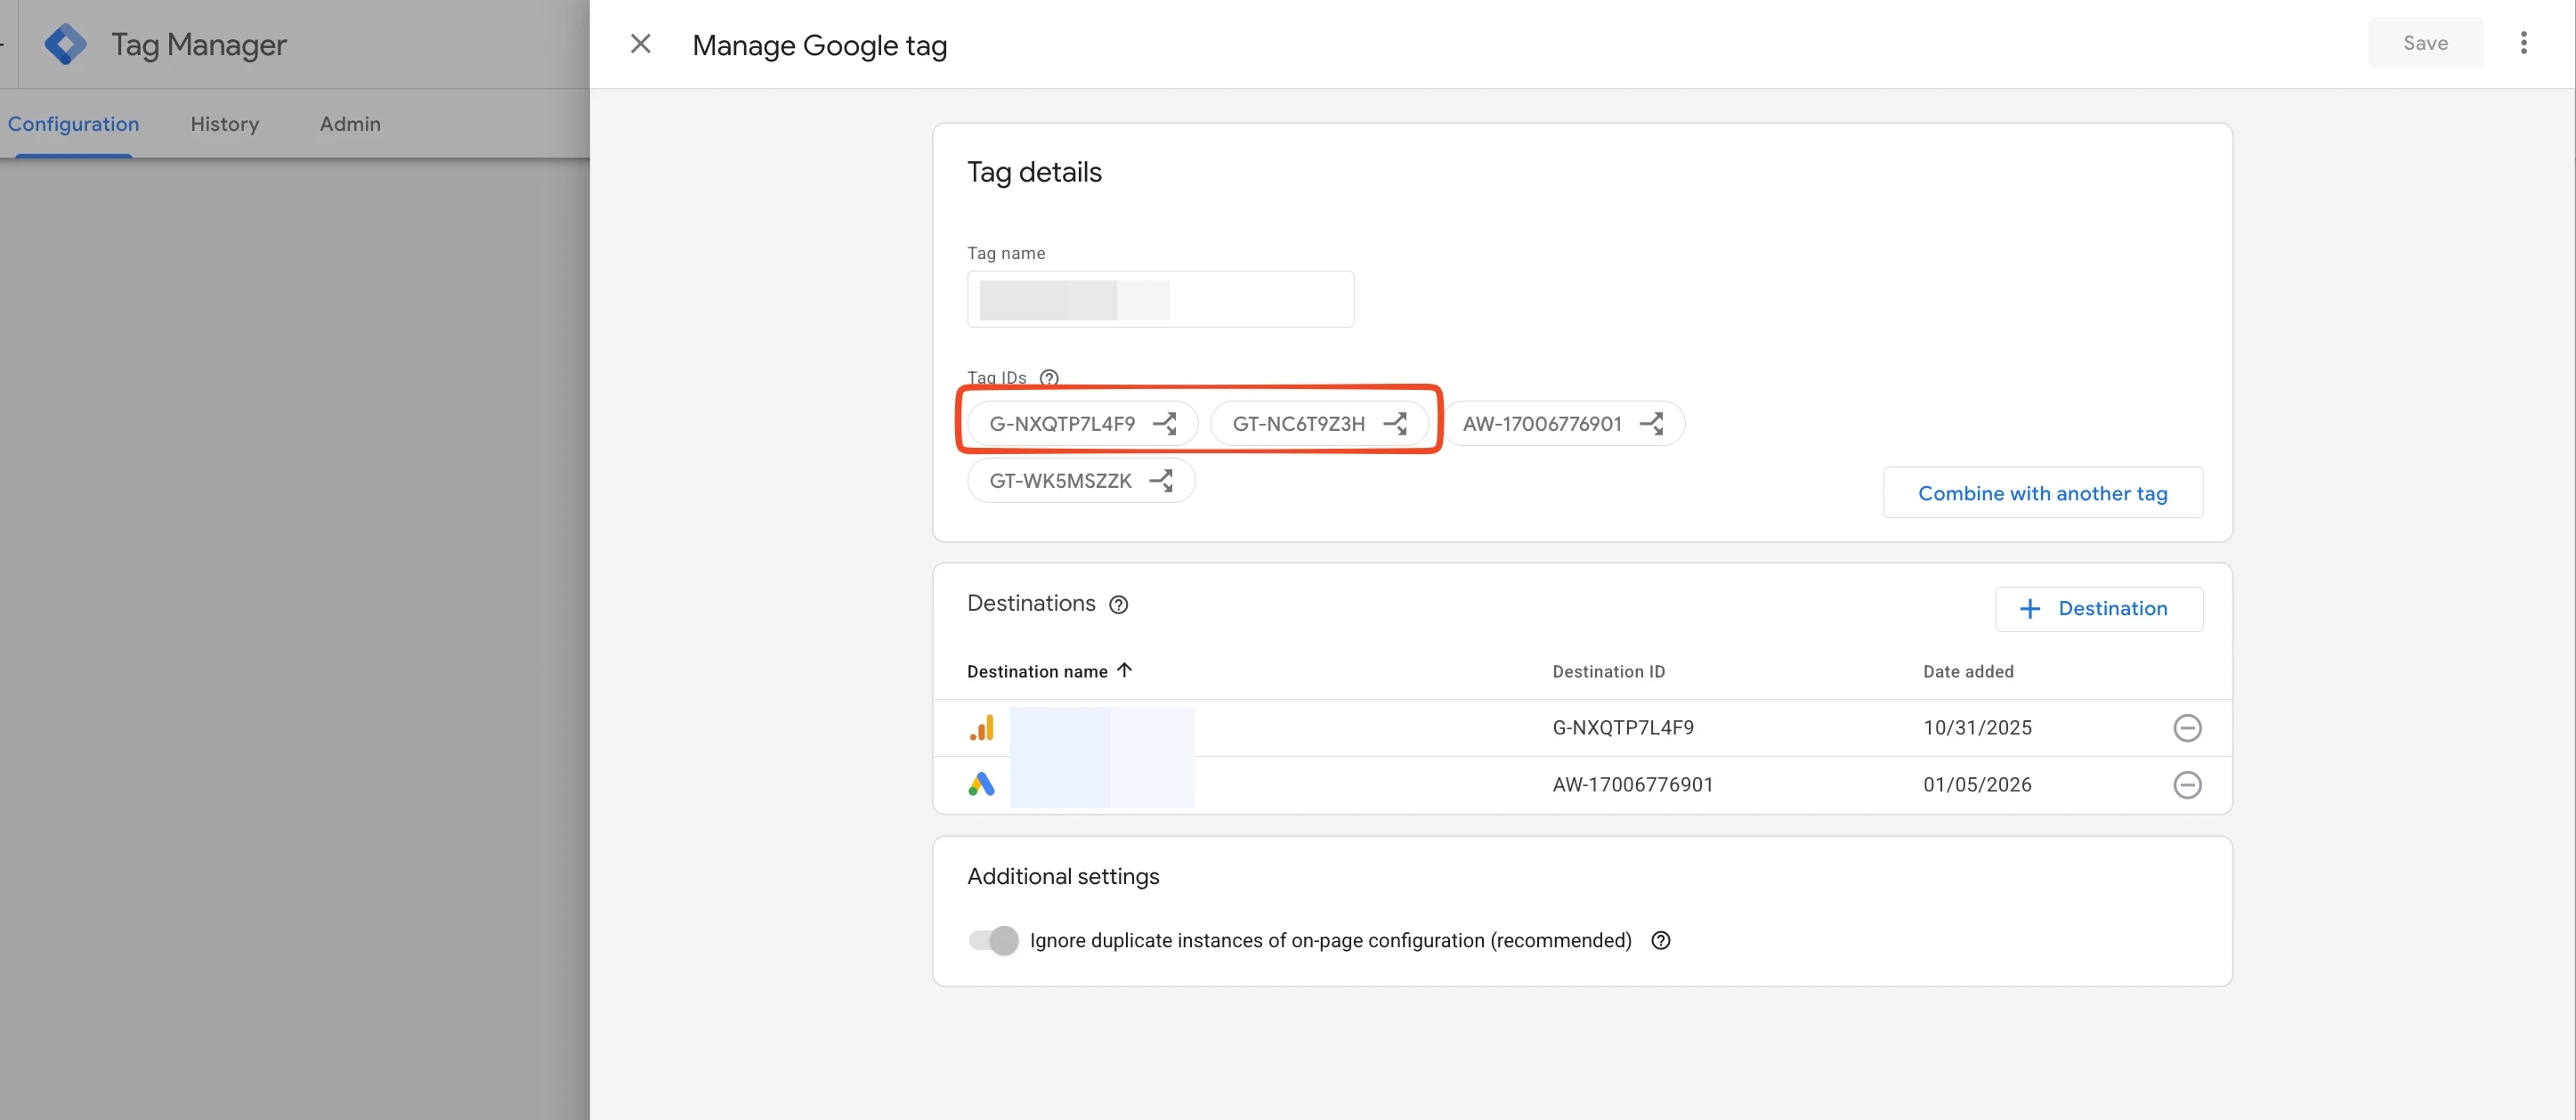
We need to create a separate Google Tag for each ID. Let’s start with G-NXQTP7L4F9.
Click on it — a prompt will appear: Assign G-NXQTP7L4F9 to a new Google tag.
Next:
- set a name for the new tag;
- if needed, copy the configuration (or do not copy it — depending on whether it is important to keep the data already collected);
- click Review choices to review the changes.
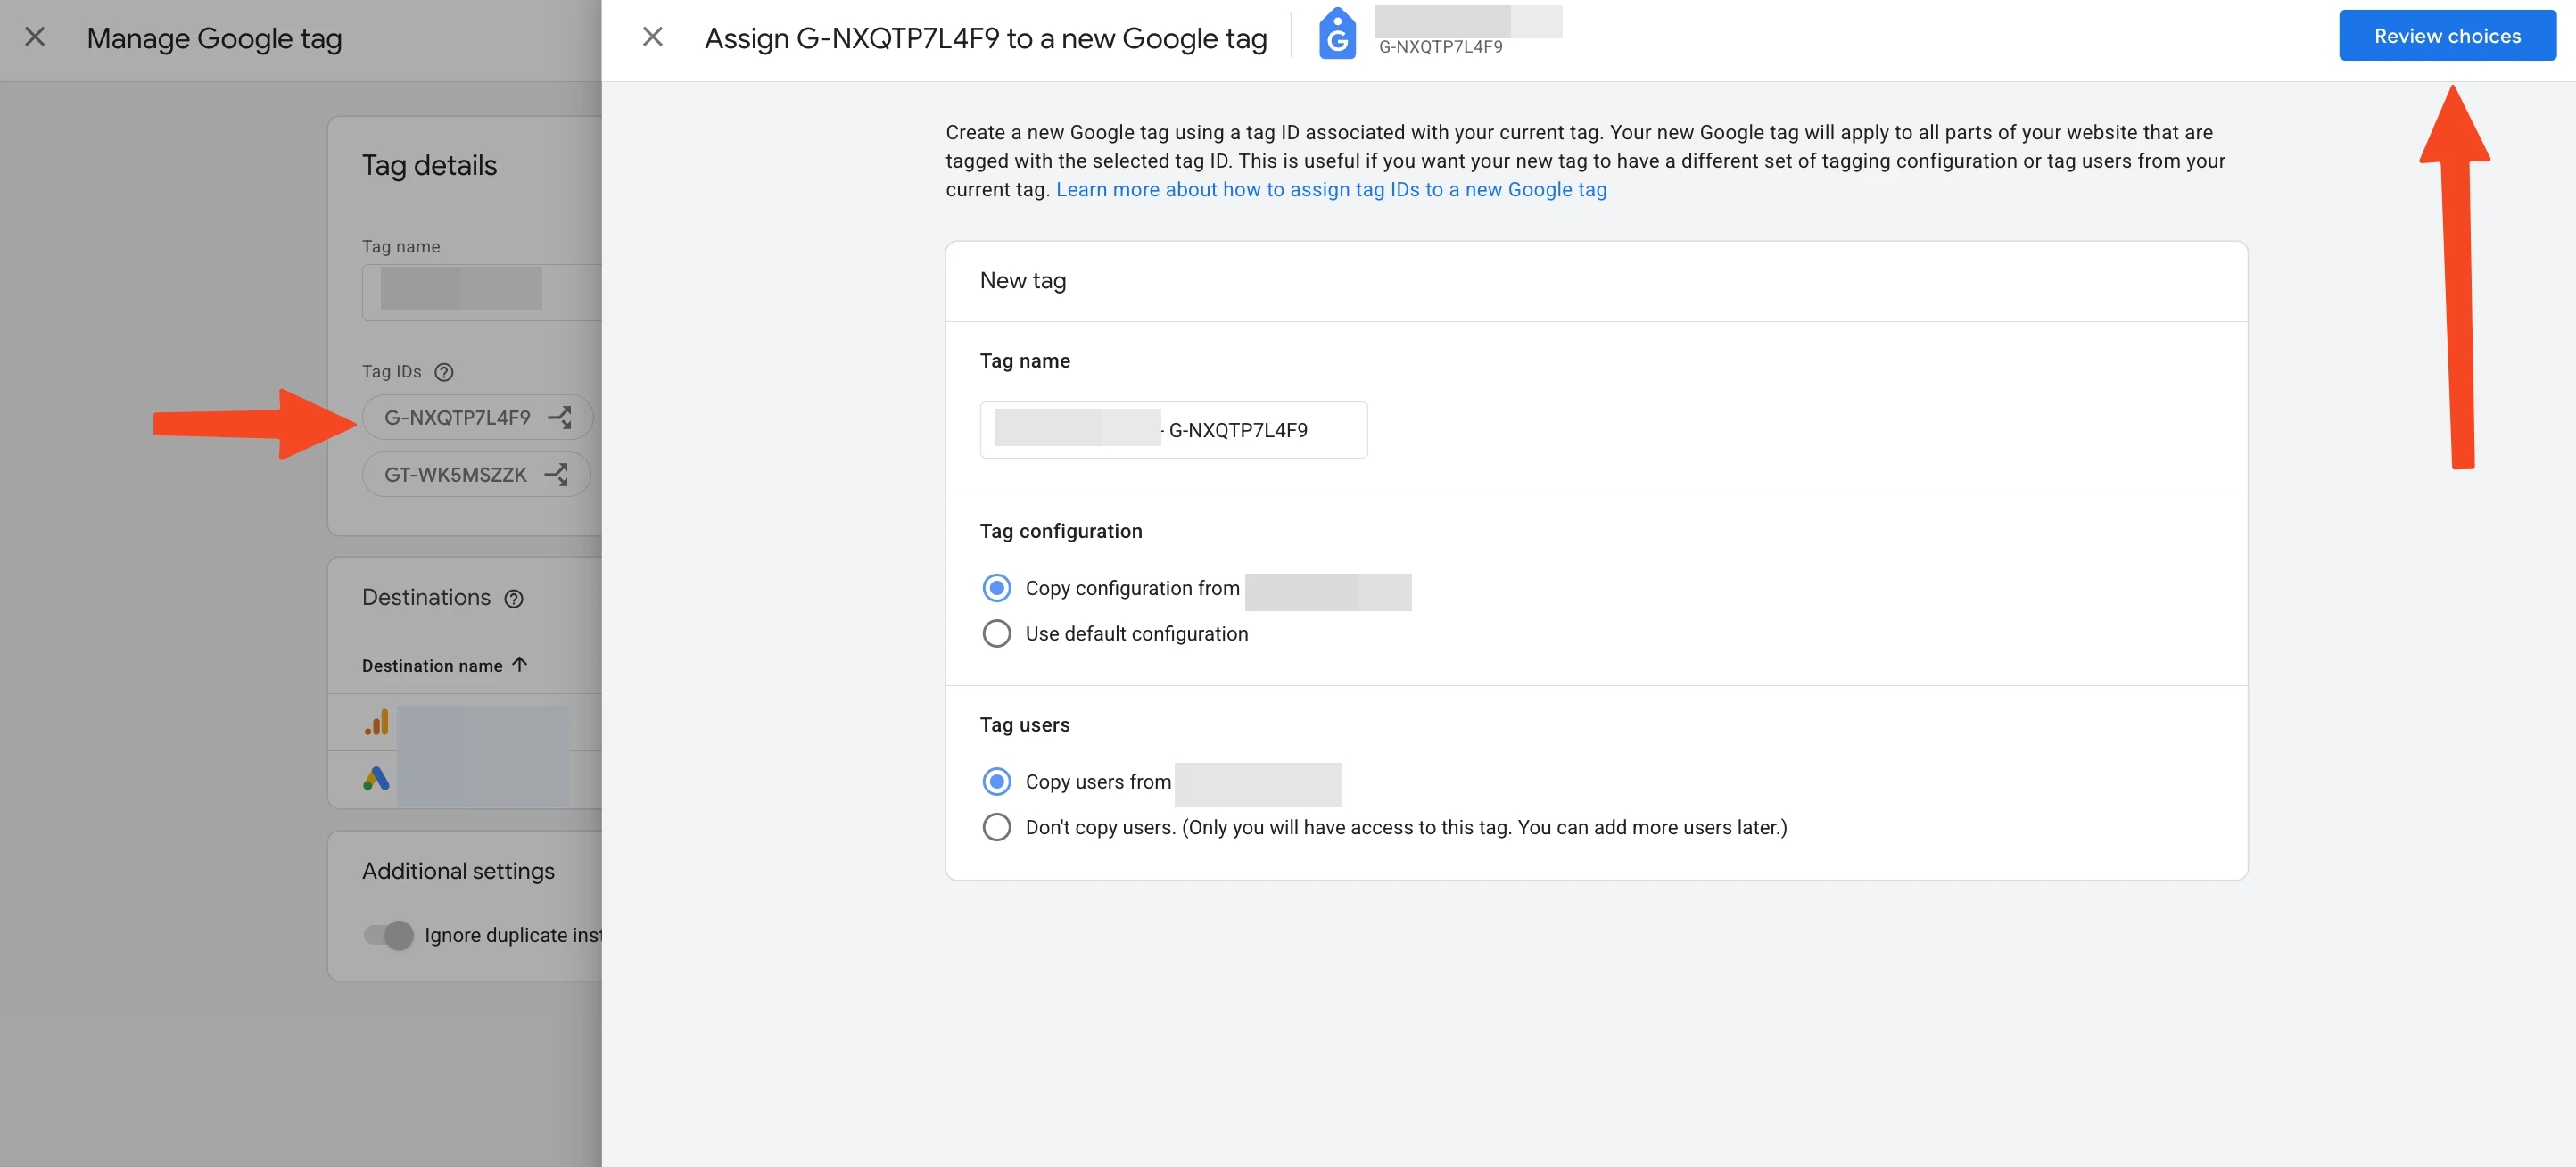
If we are confident that everything is configured correctly, save the changes.
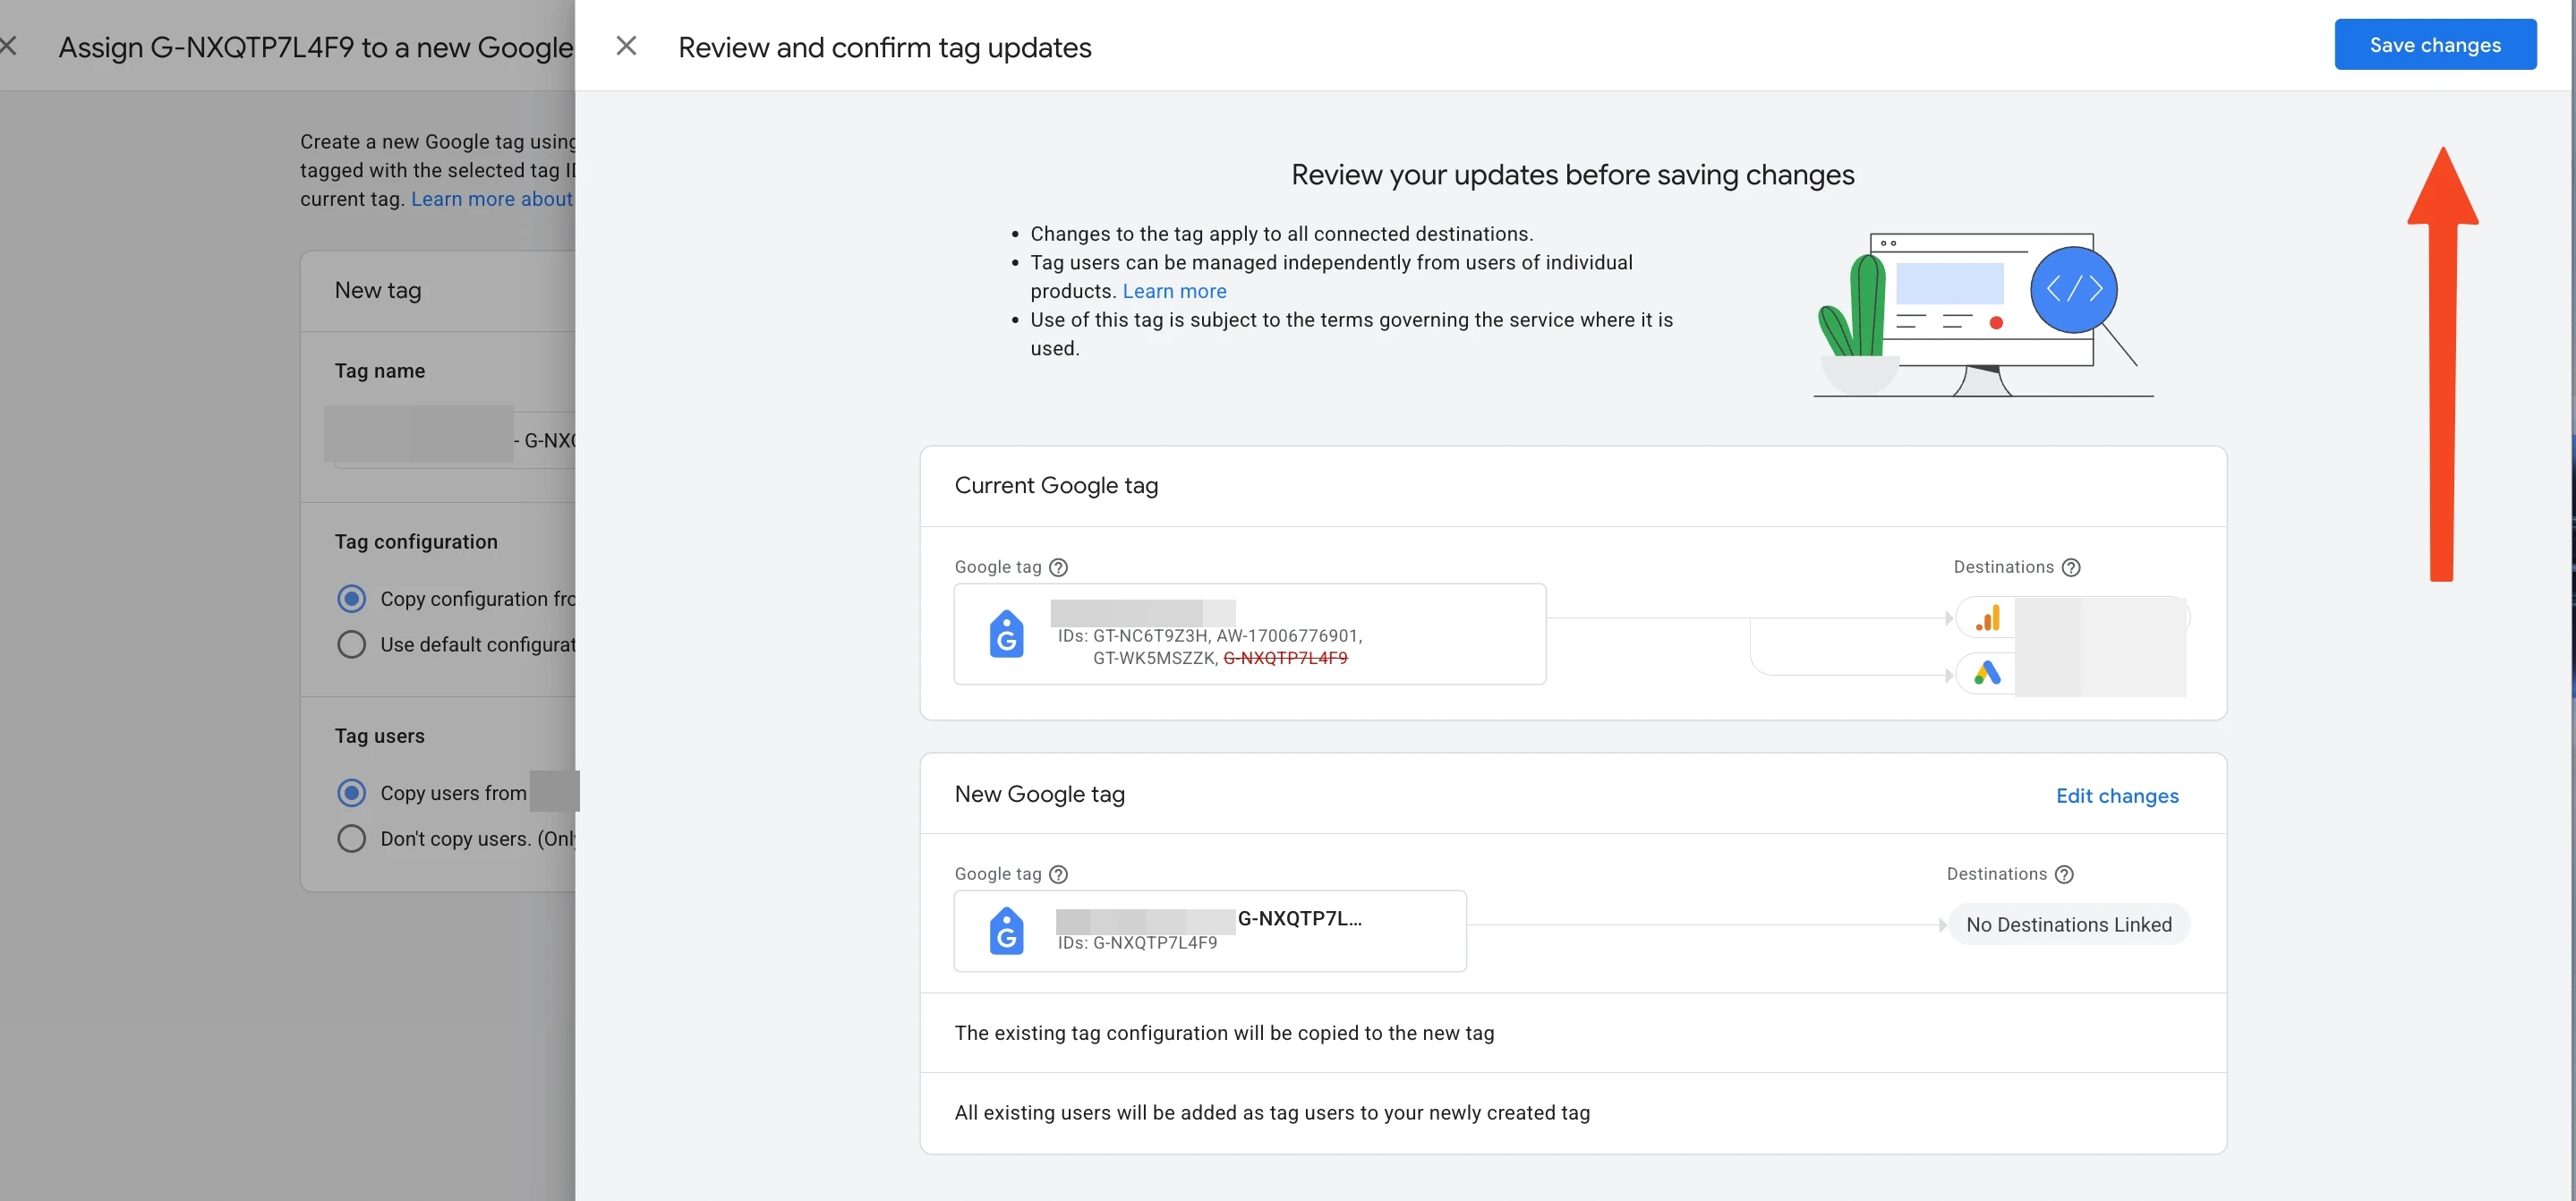
We perform the same steps for the GT-NC6T9Z3H tag as well.
2.2 Checking the configuration of Google Tag IDs related to Google Ads and adjusting Destinations
As a result, we are left only with the IDs for Google Ads, as planned:
- AW-17006776901
- GT-WK5MSZZK
Now we need to detach the GA4 destination and leave only Google Ads in this Google Tag.
To do this:
click the “–” icon next to the destination related to GA4.
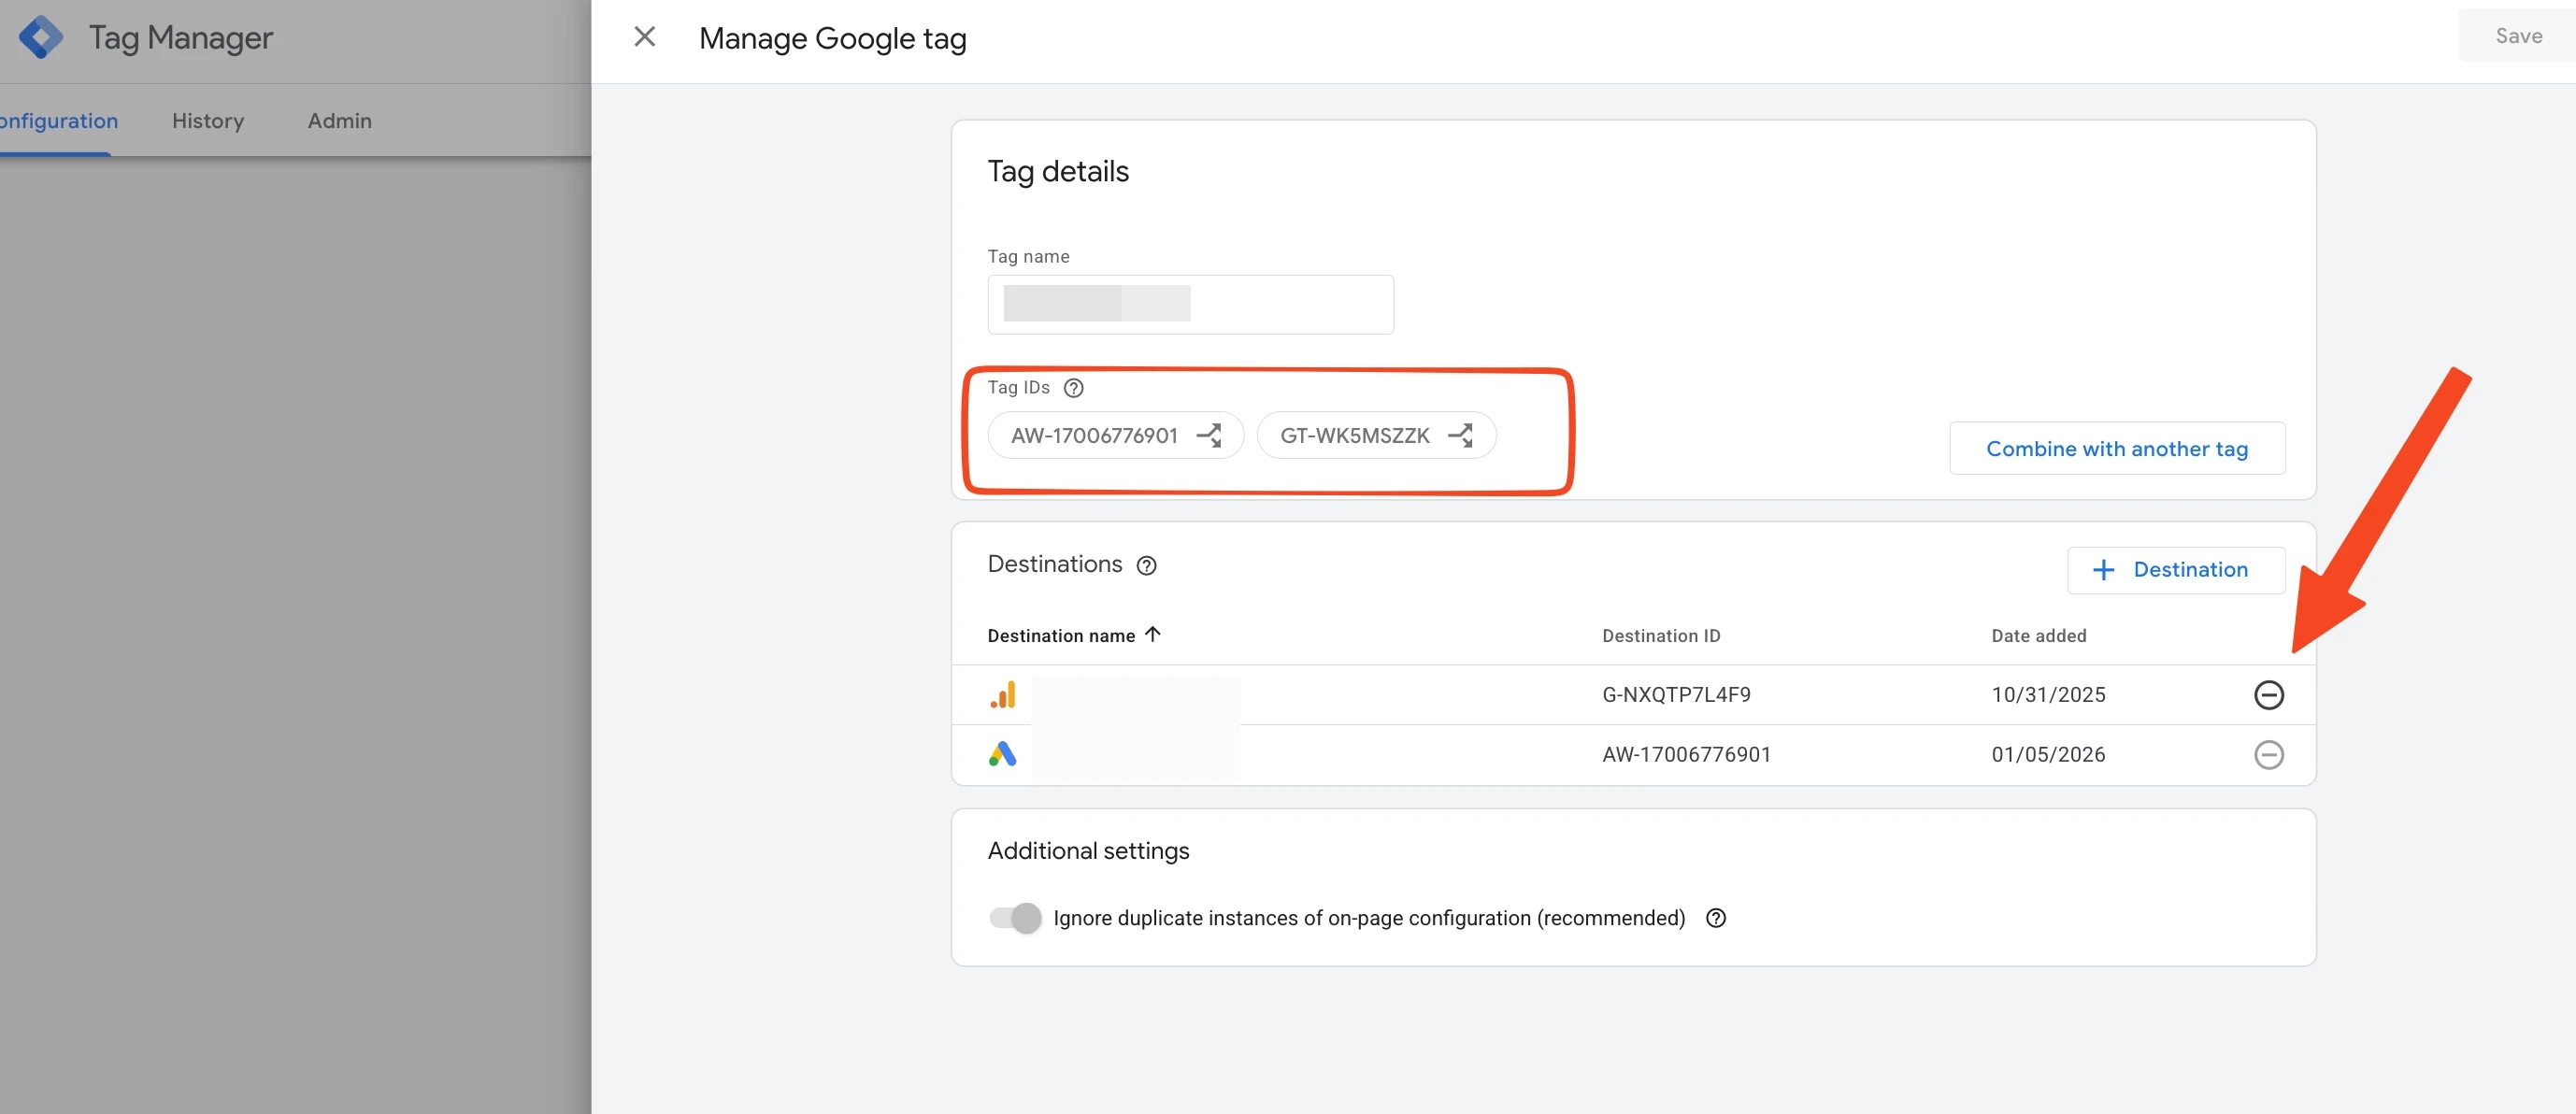
Next, select the existing Google Tag that we essentially just created.
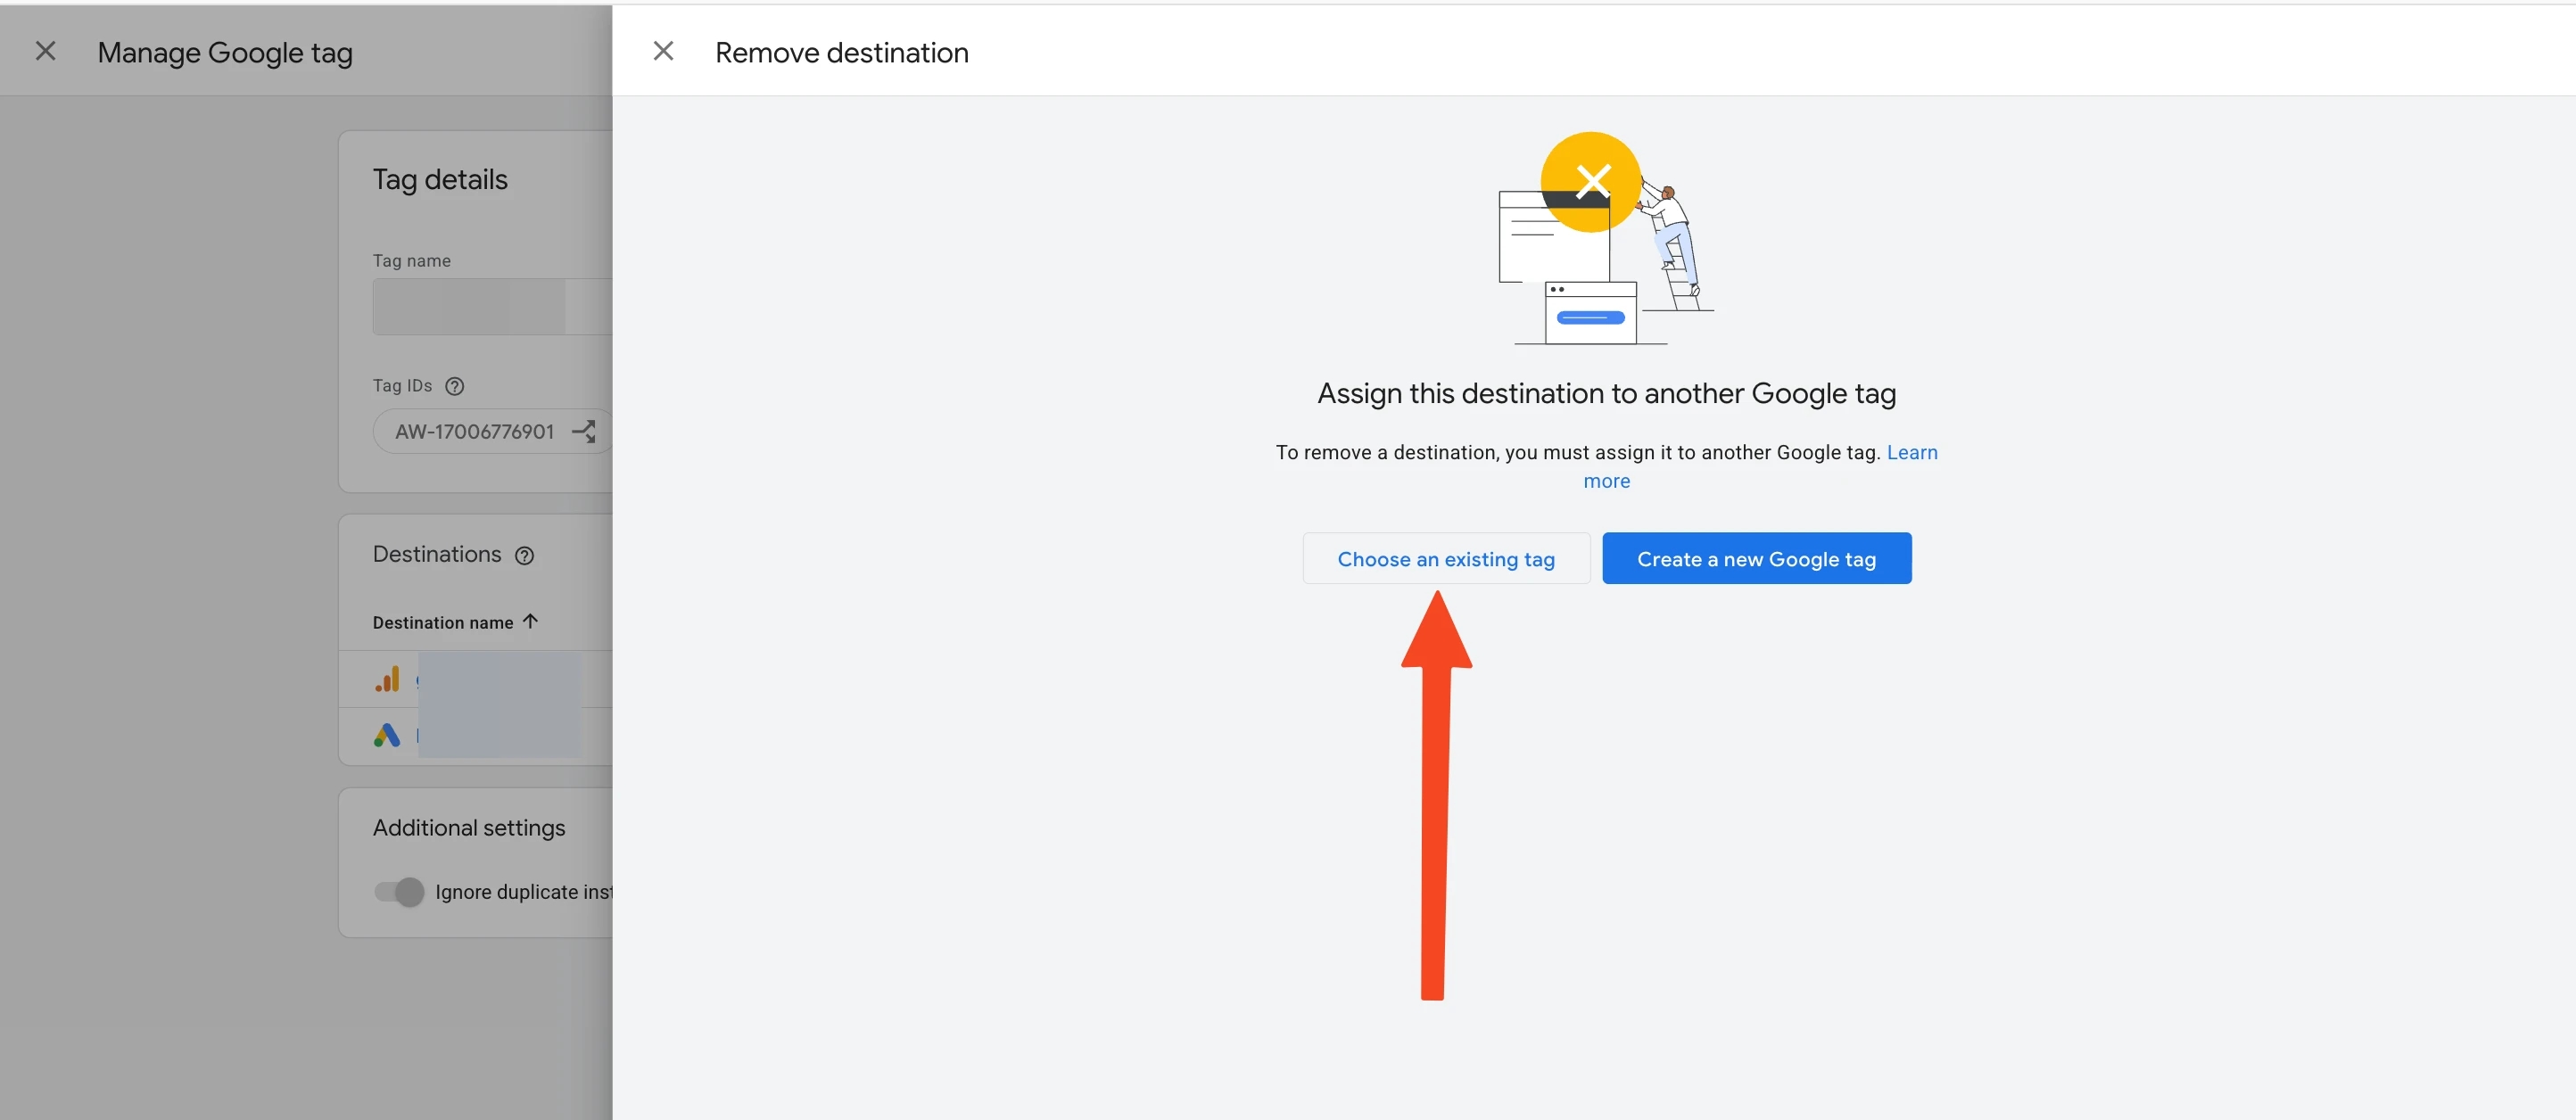
It is always worth naming tags so that it is immediately clear what they are responsible for.
In my case, this is the website domain + the tag ID.
As a result, we have already created two separate tags for:
- G-NXQTP7L4F9
- GT-NC6T9Z3H
Next, I select G-NXQTP7L4F9 first, and only after that will I combine it with the newly created Google Tag (GT-...).
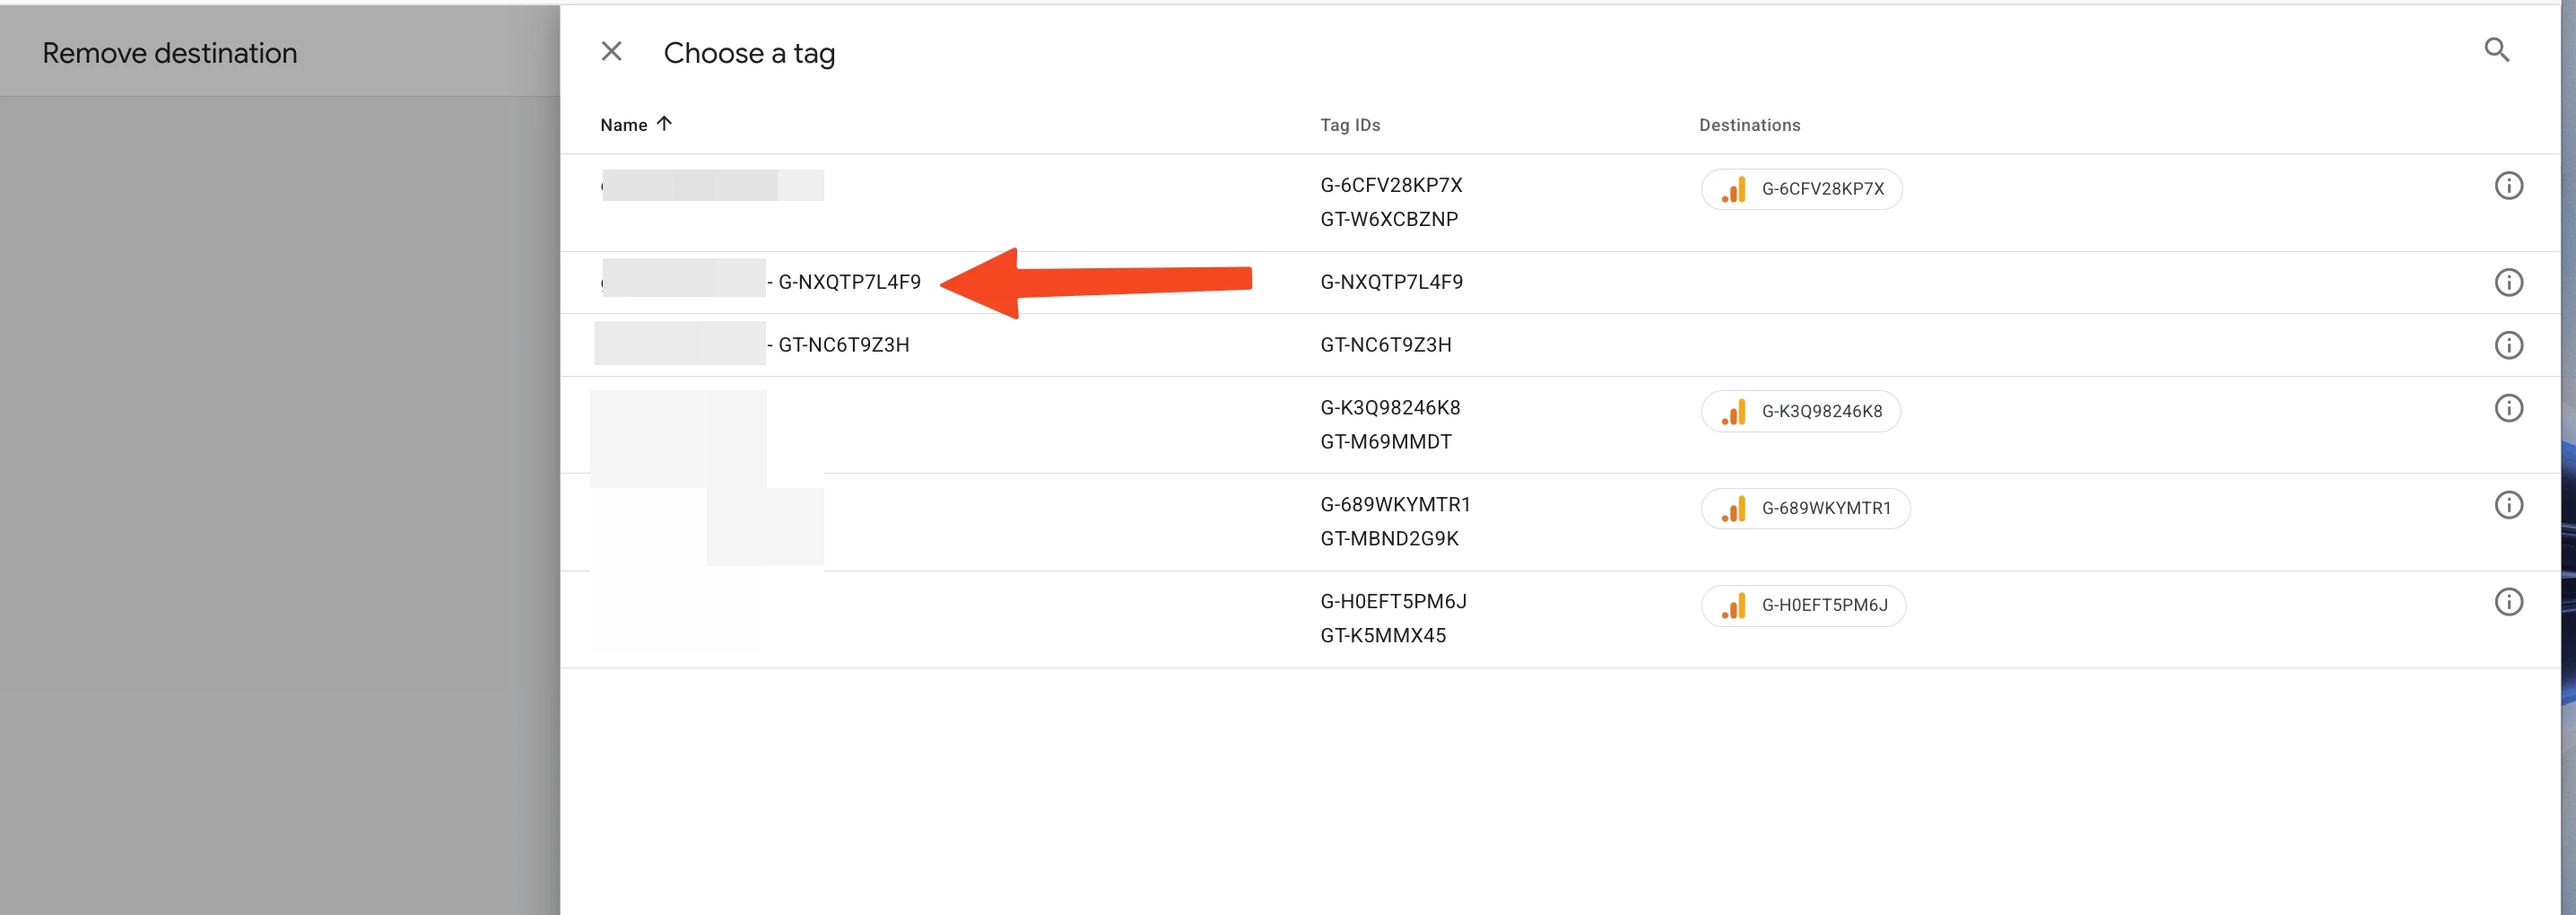
Google suggests verifying that all changes are set correctly (see the screenshot below).
After that, I save the settings.
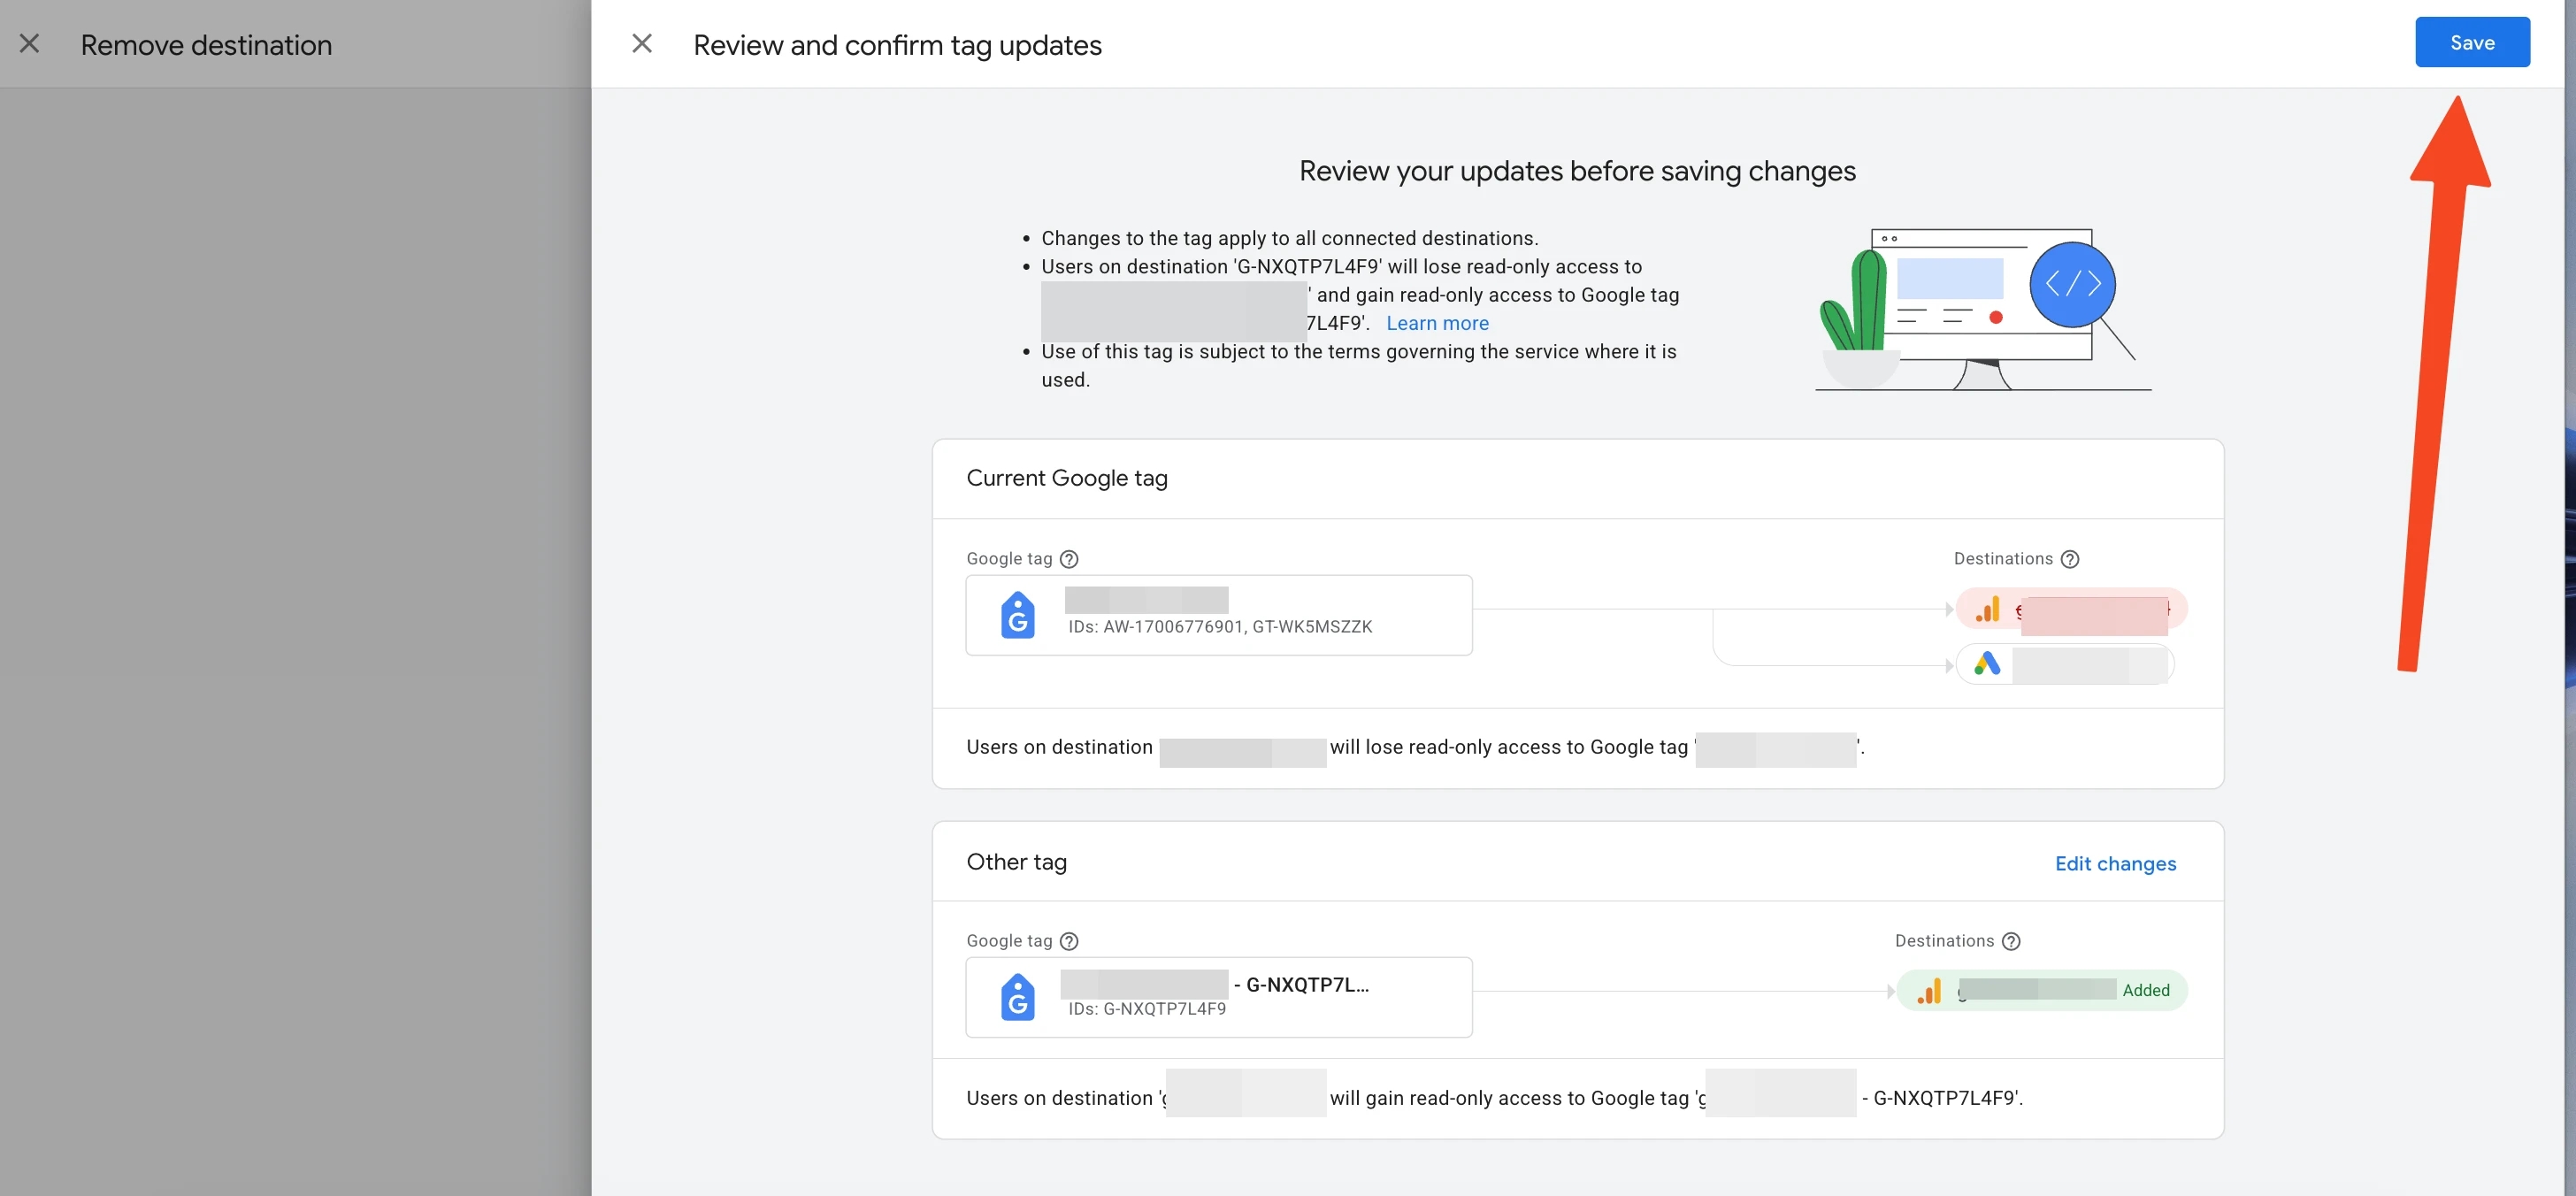
At this point, the configuration of the Google Ads tag is complete — we have left here the tags according to our plan.
There is only one final step left — for GA4.
I return to the tags menu, select the newly created tag for GA4, click Combine with another tag, and combine it with the corresponding Google Tag GT-NC6T9Z3H.
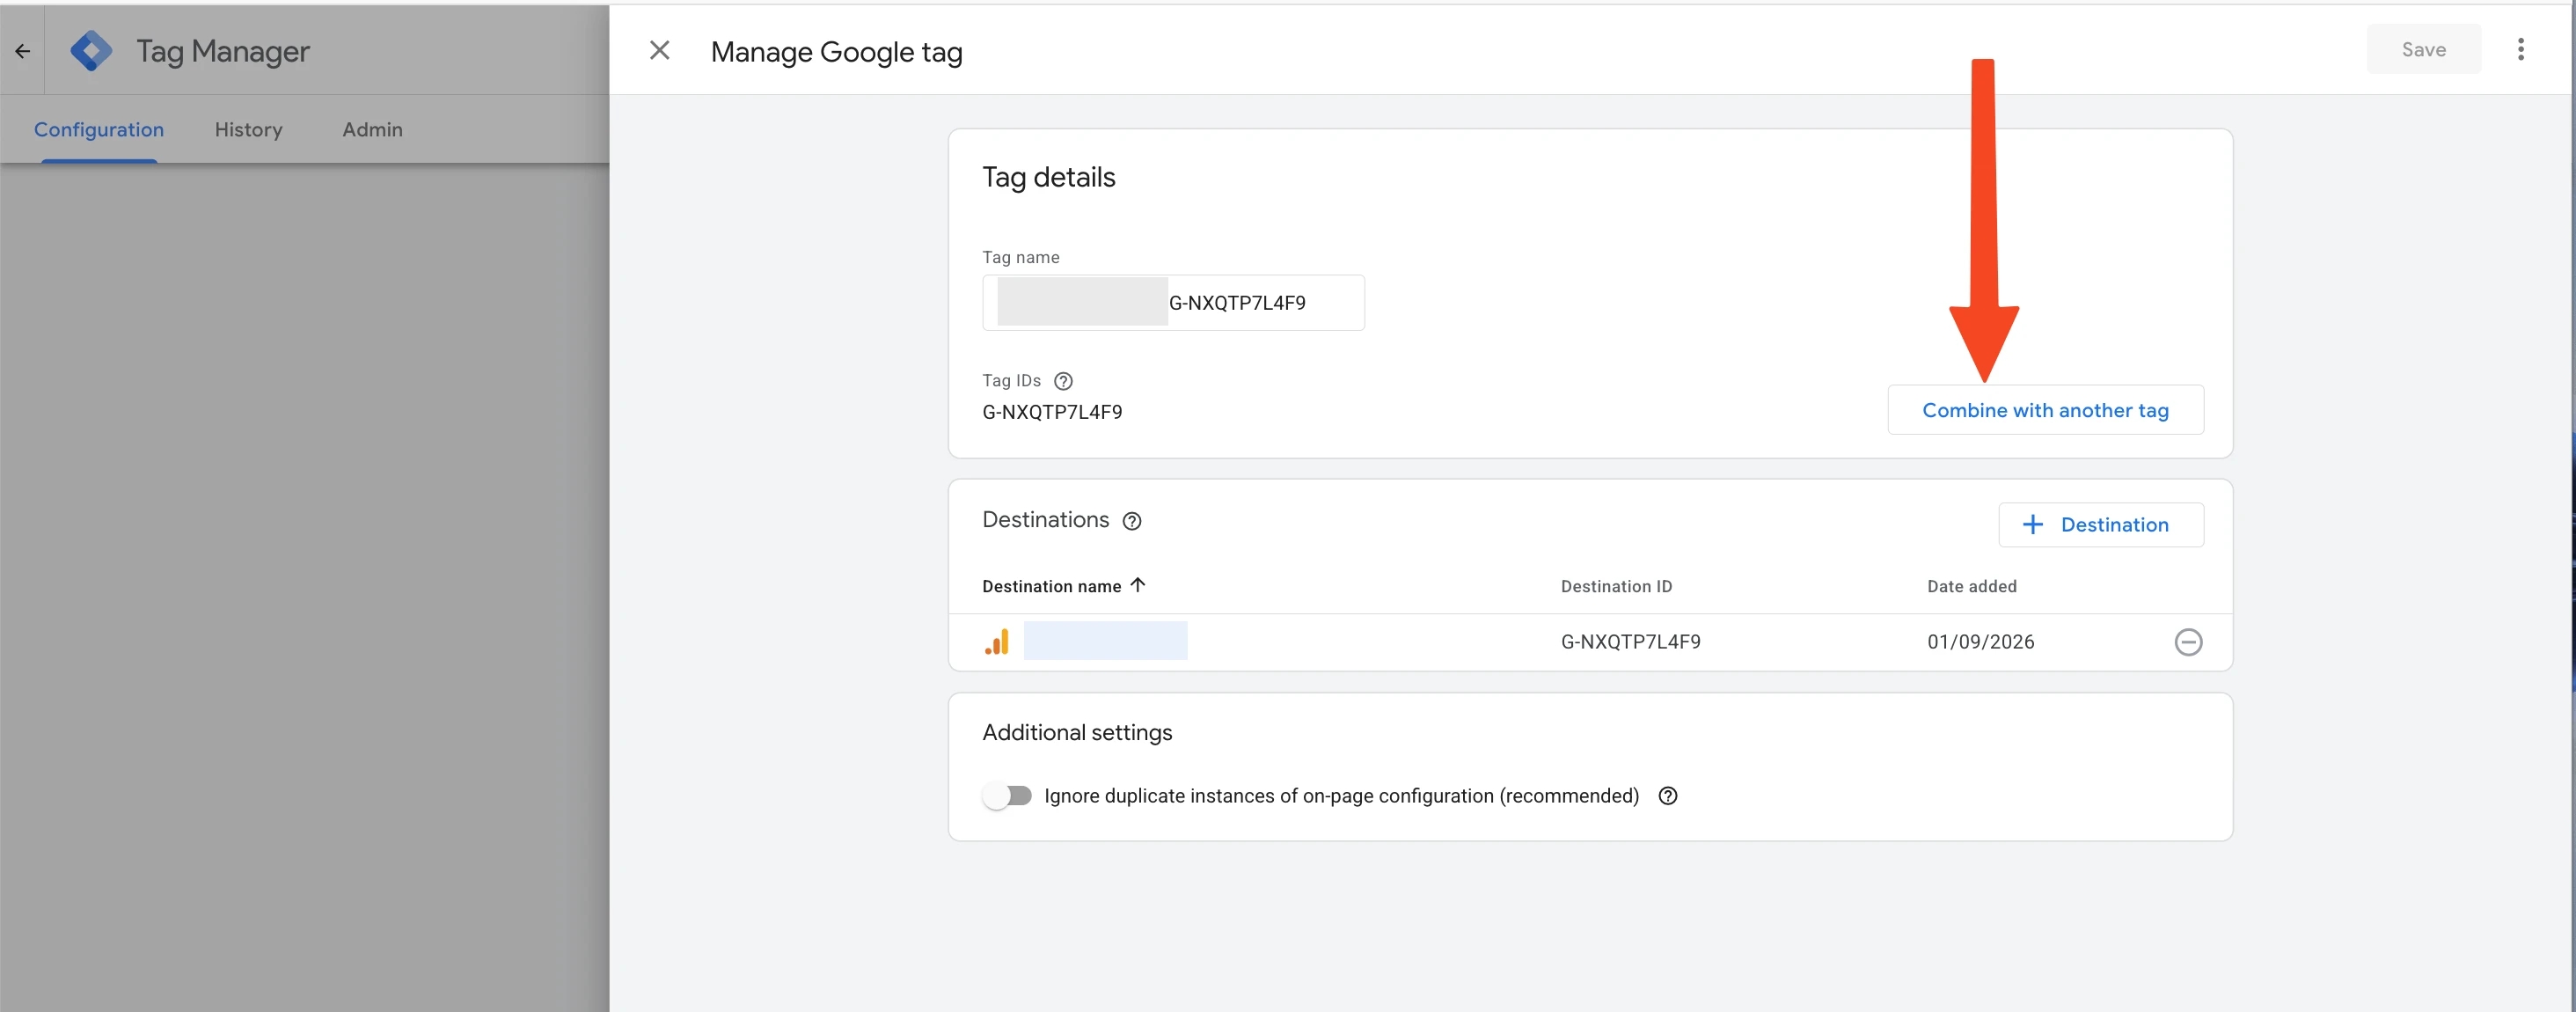
We select the required tag in a couple of clicks:
- one;
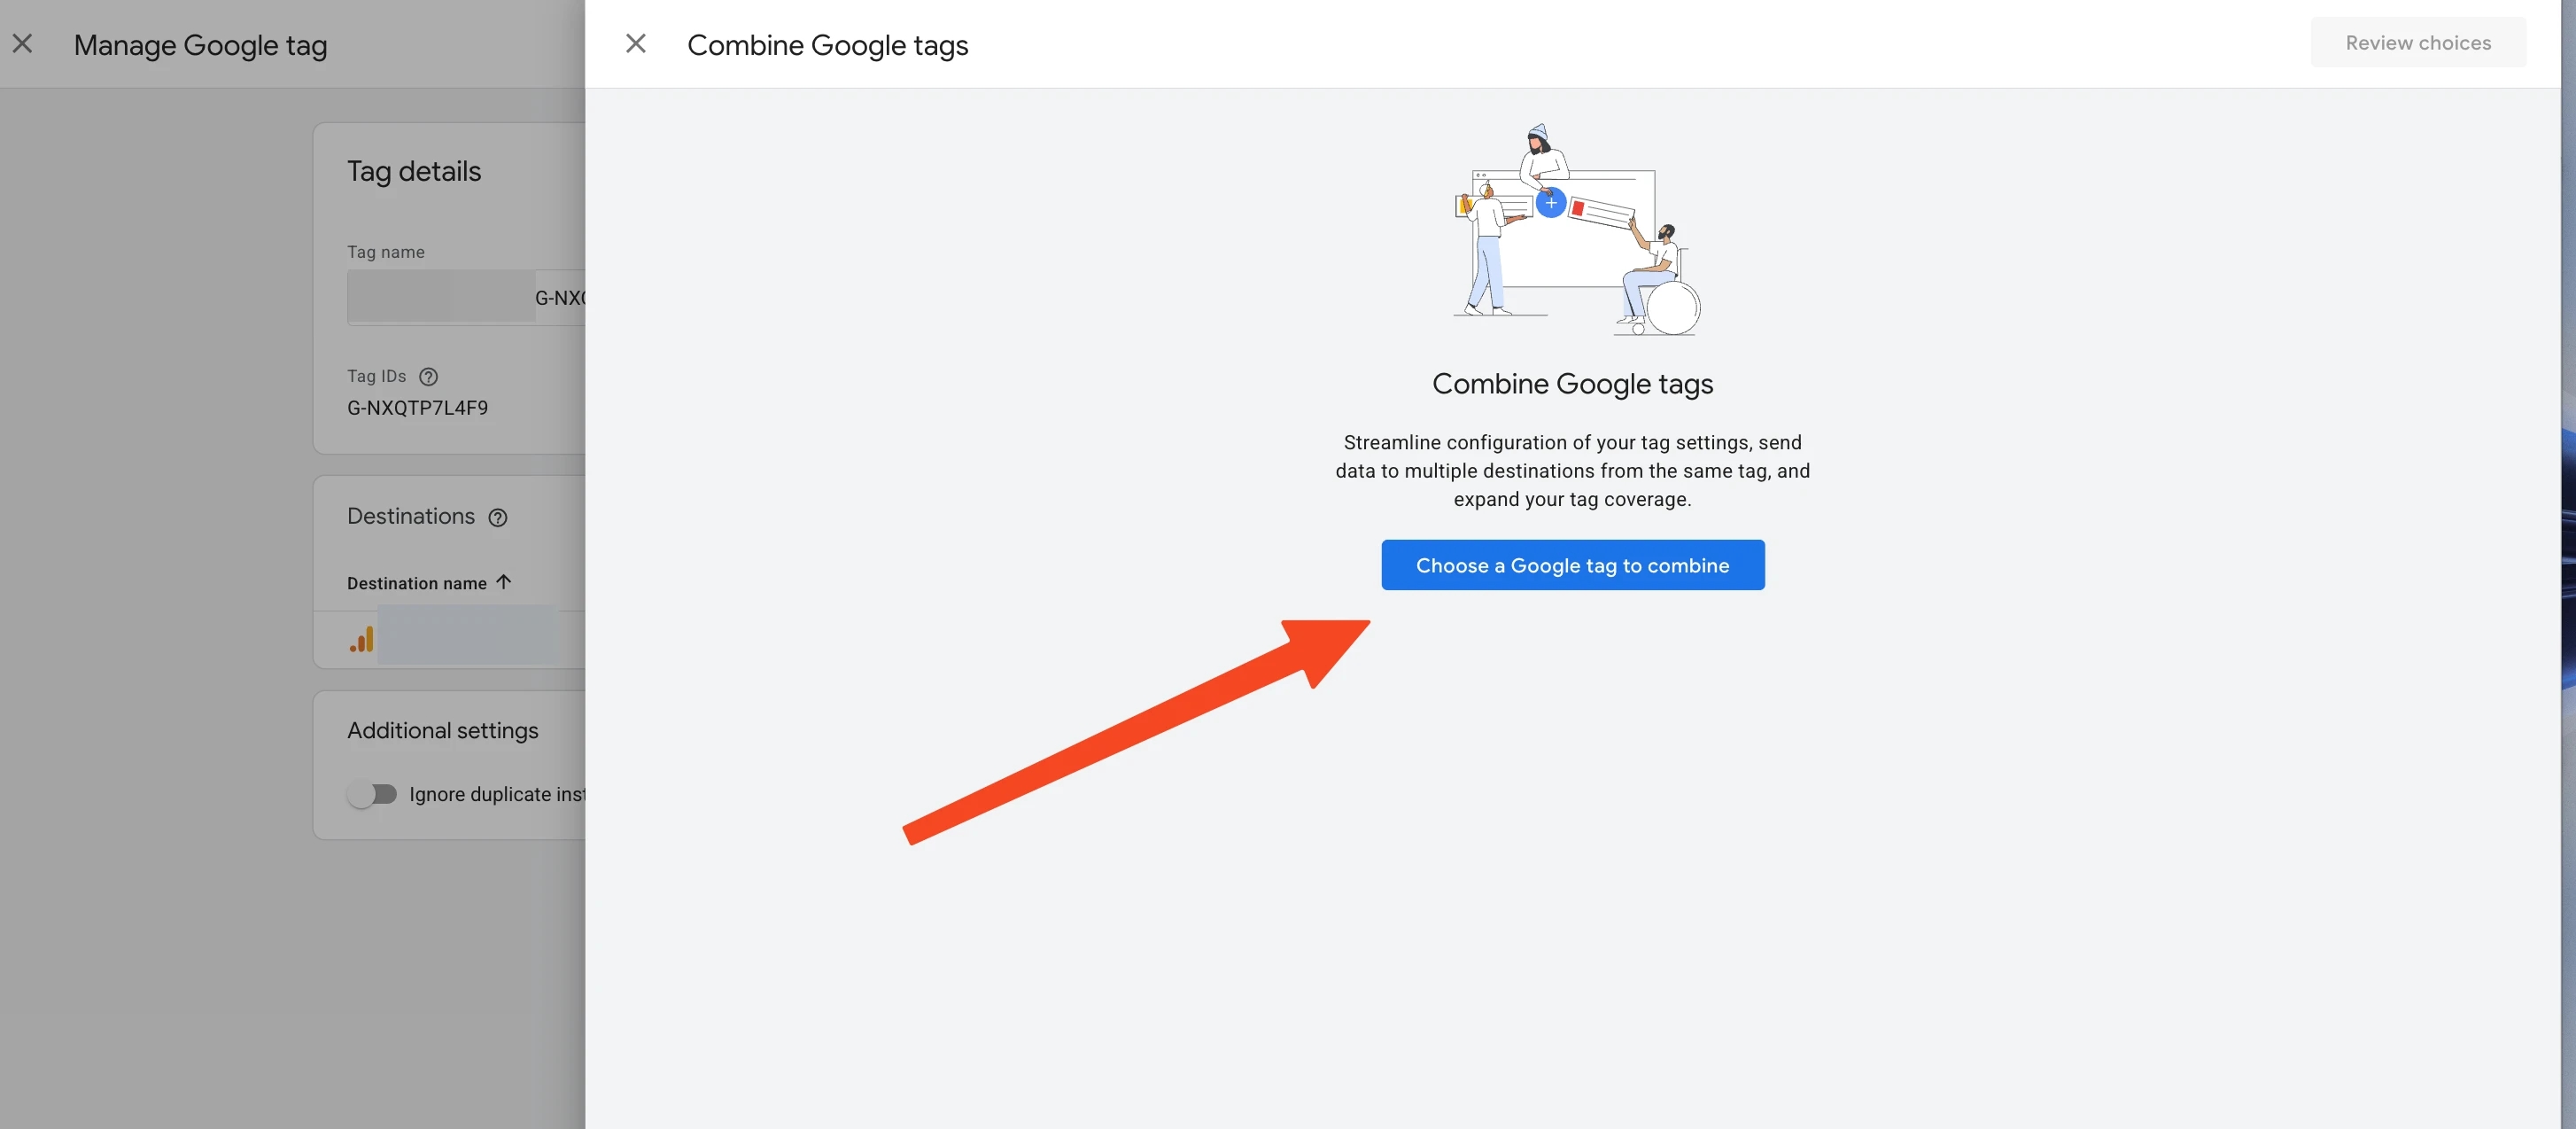
- and two.
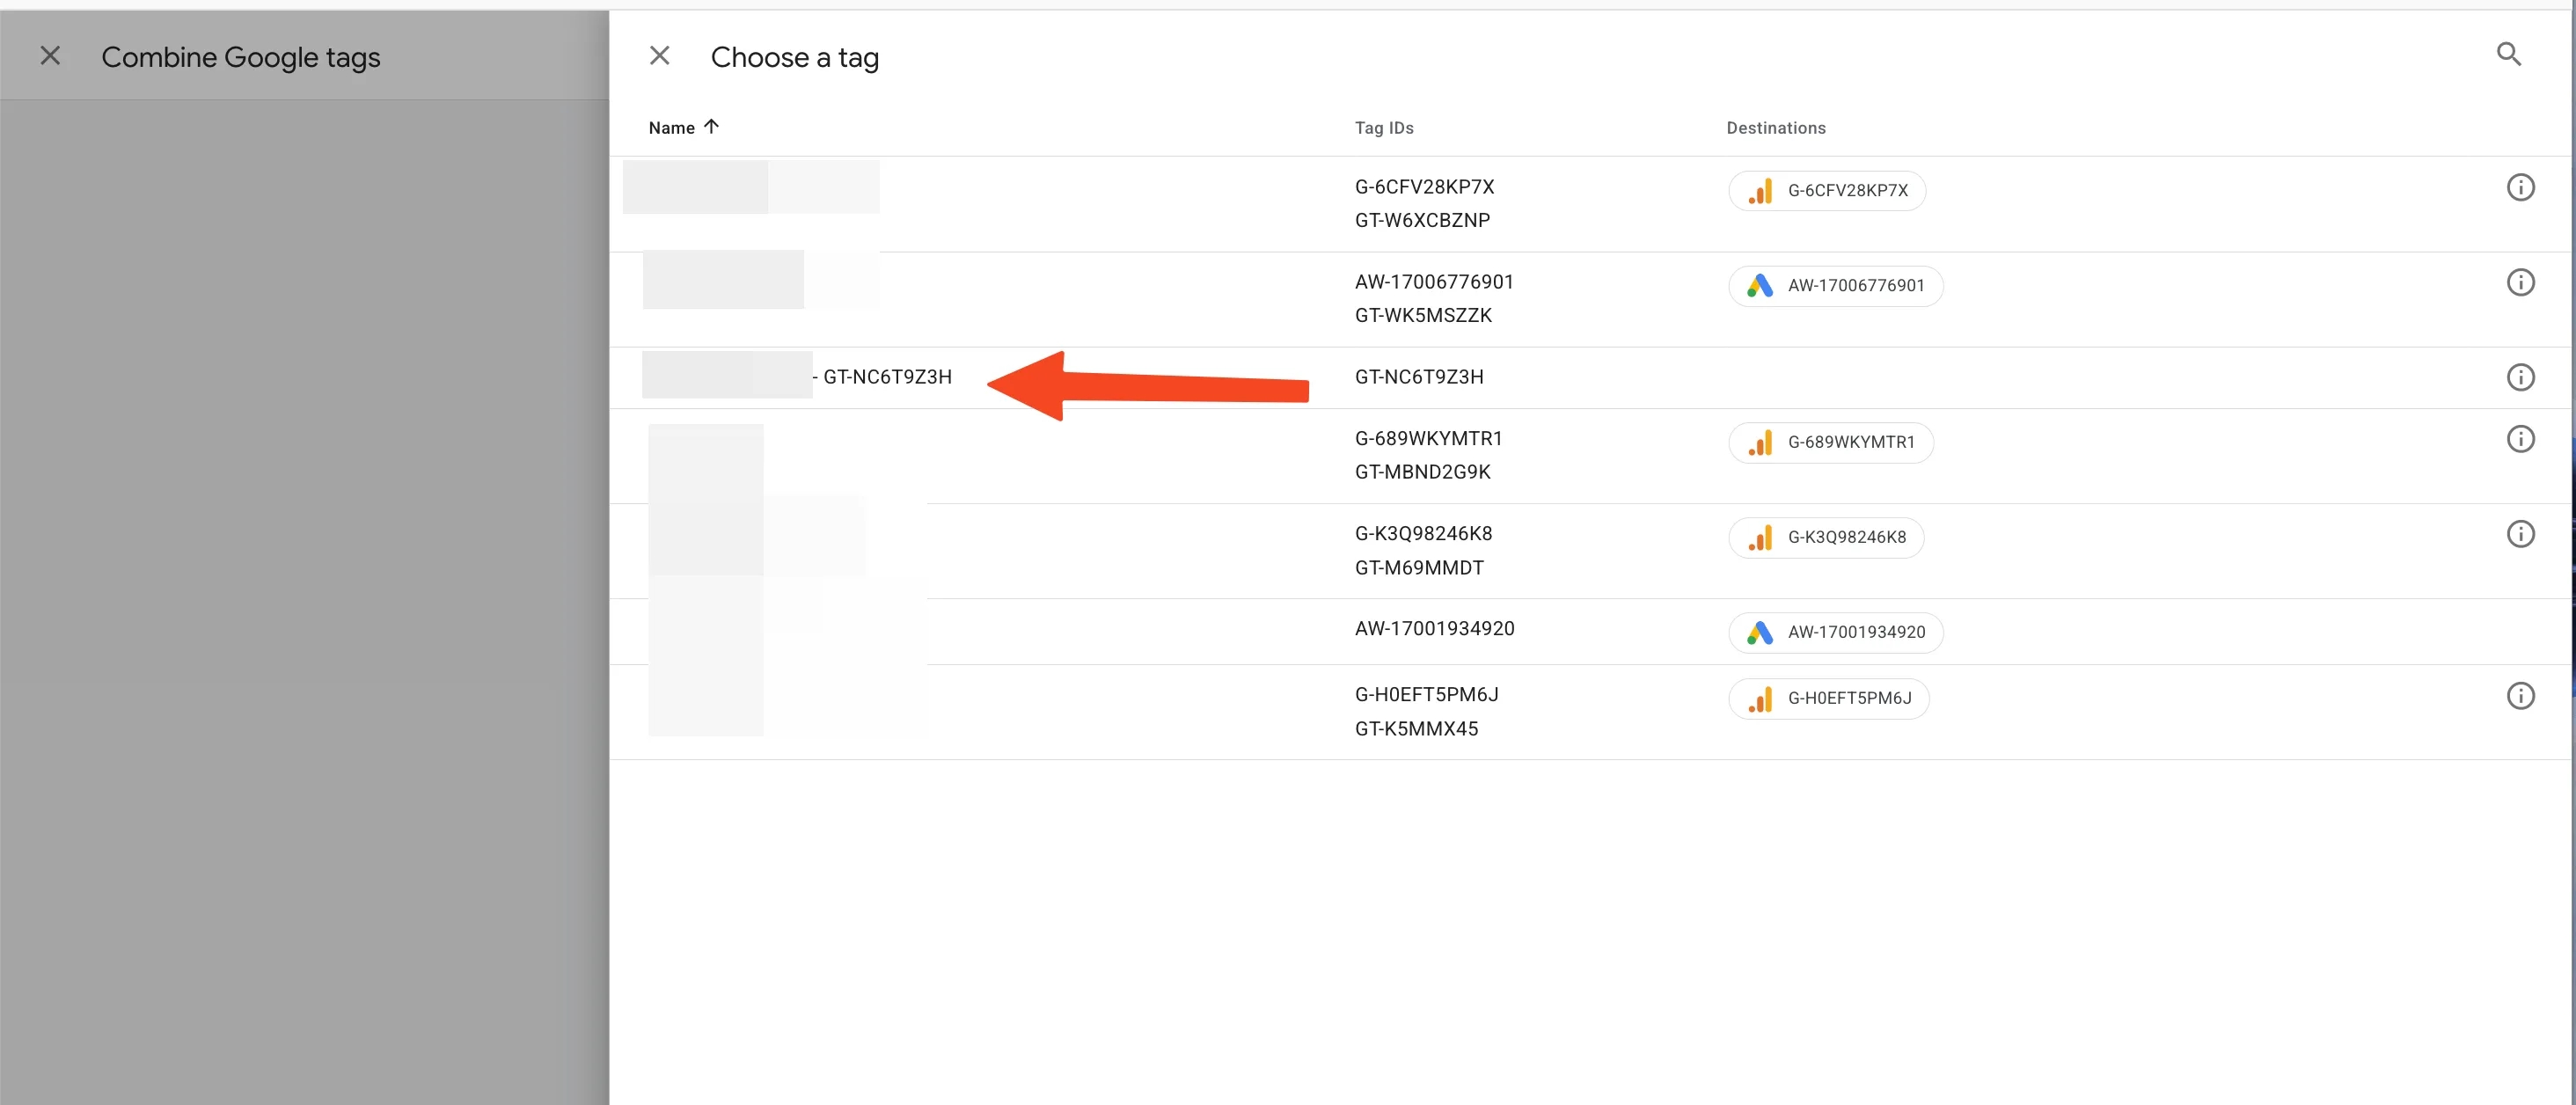
We check the configuration — Tags to combine.
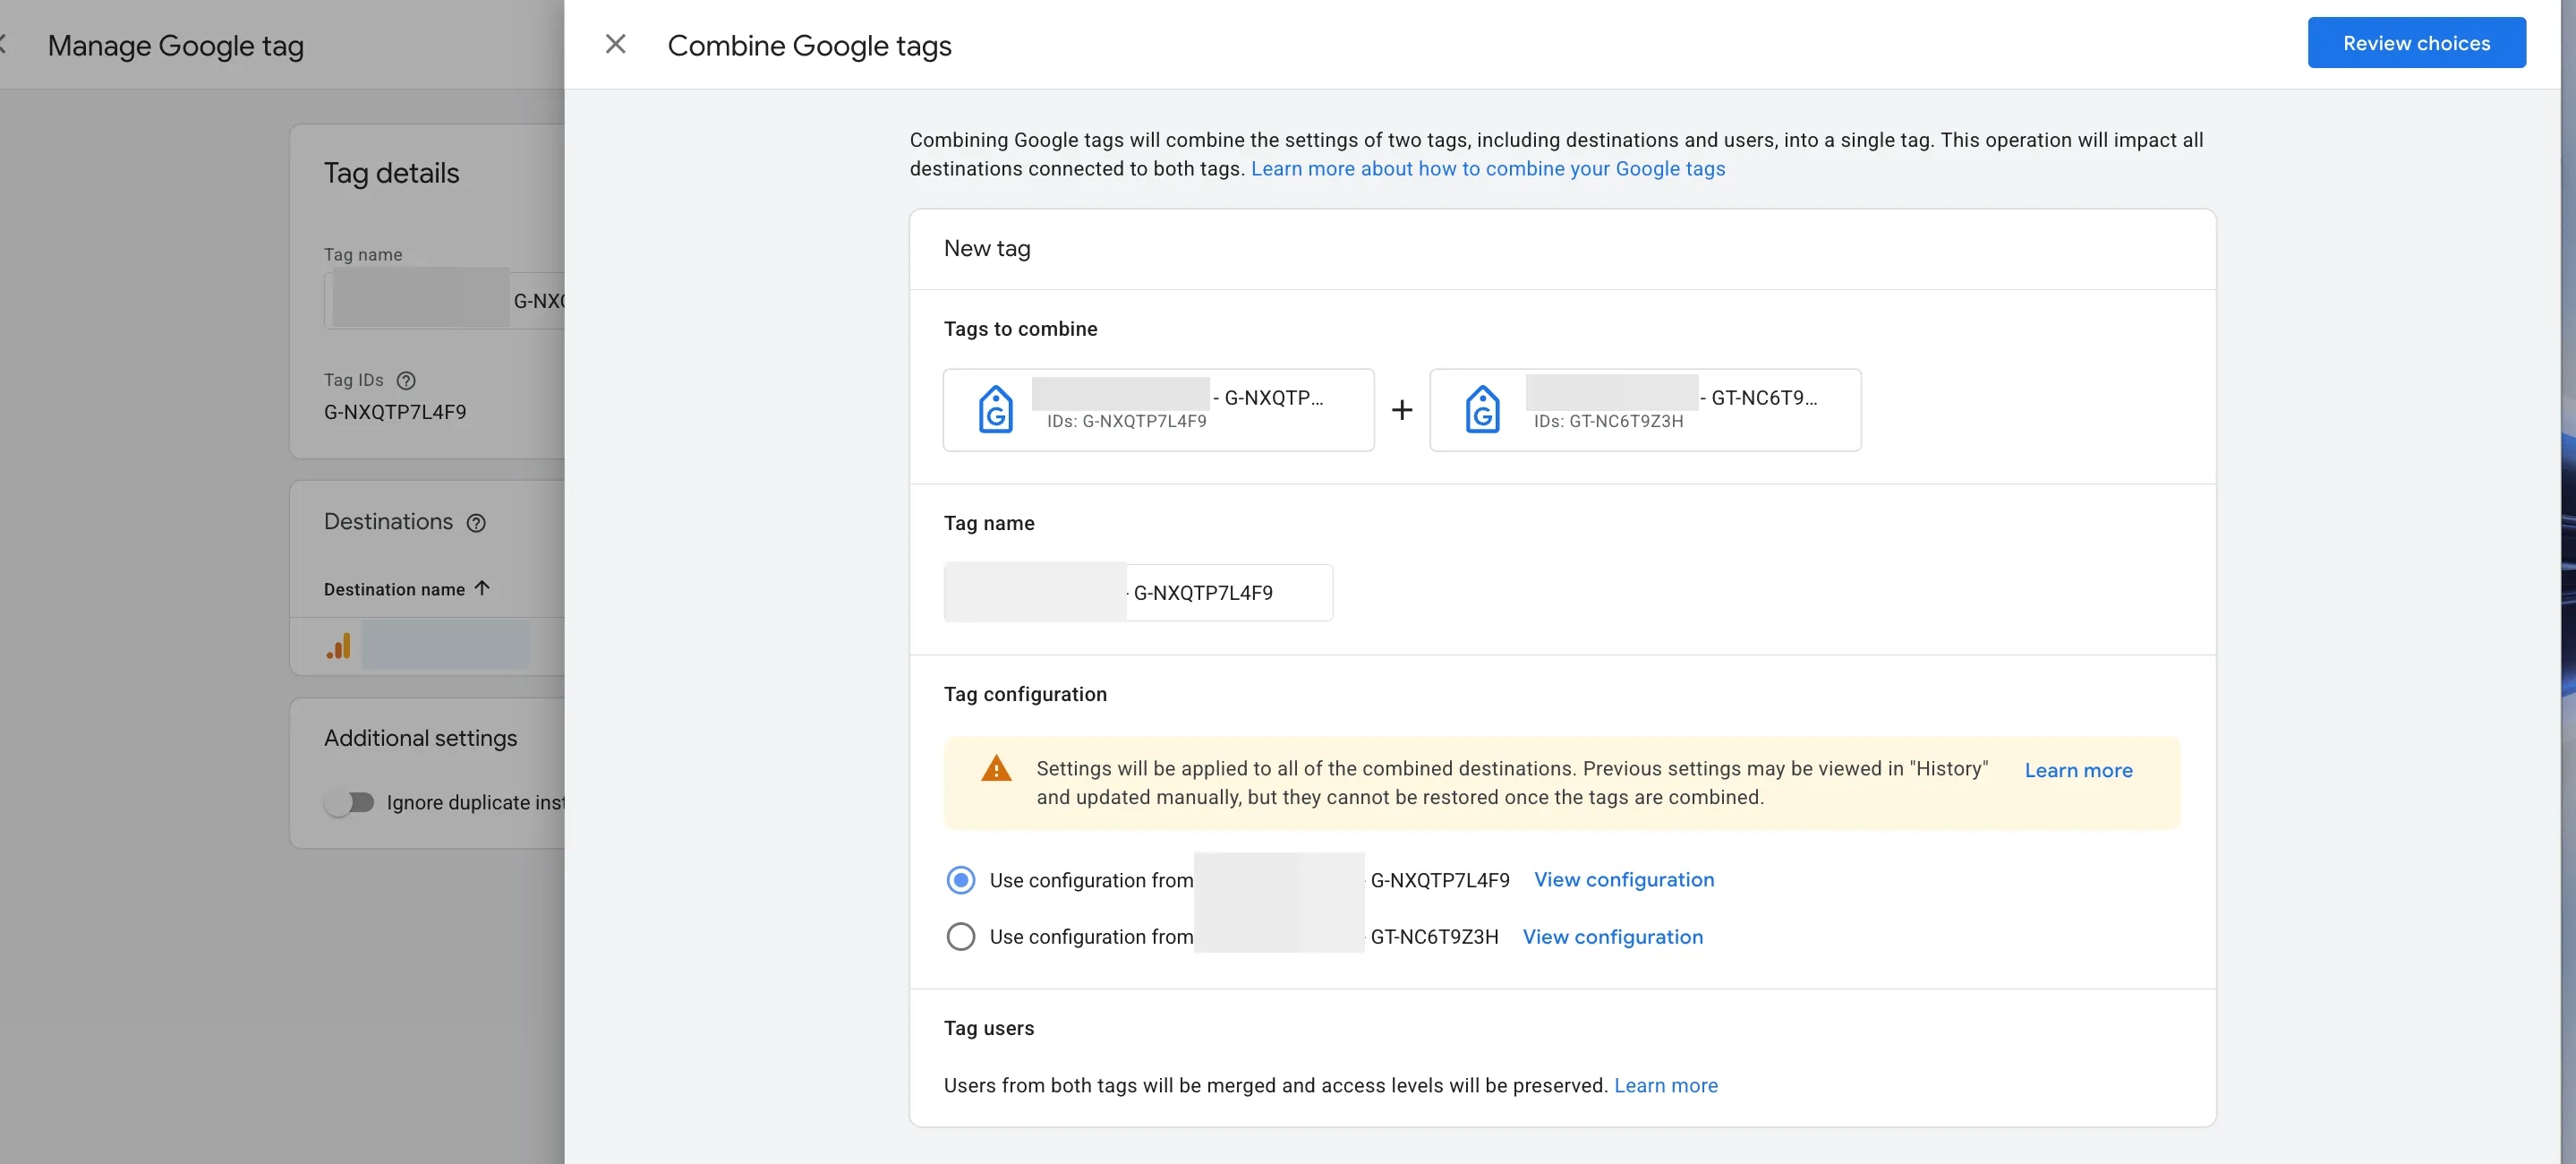
We choose the configuration of one of the tags for further work. If there are any doubts about which configuration to keep, you can click View configuration next to it and review the settings. After that, Google will once again prompt you to confirm your choice :)
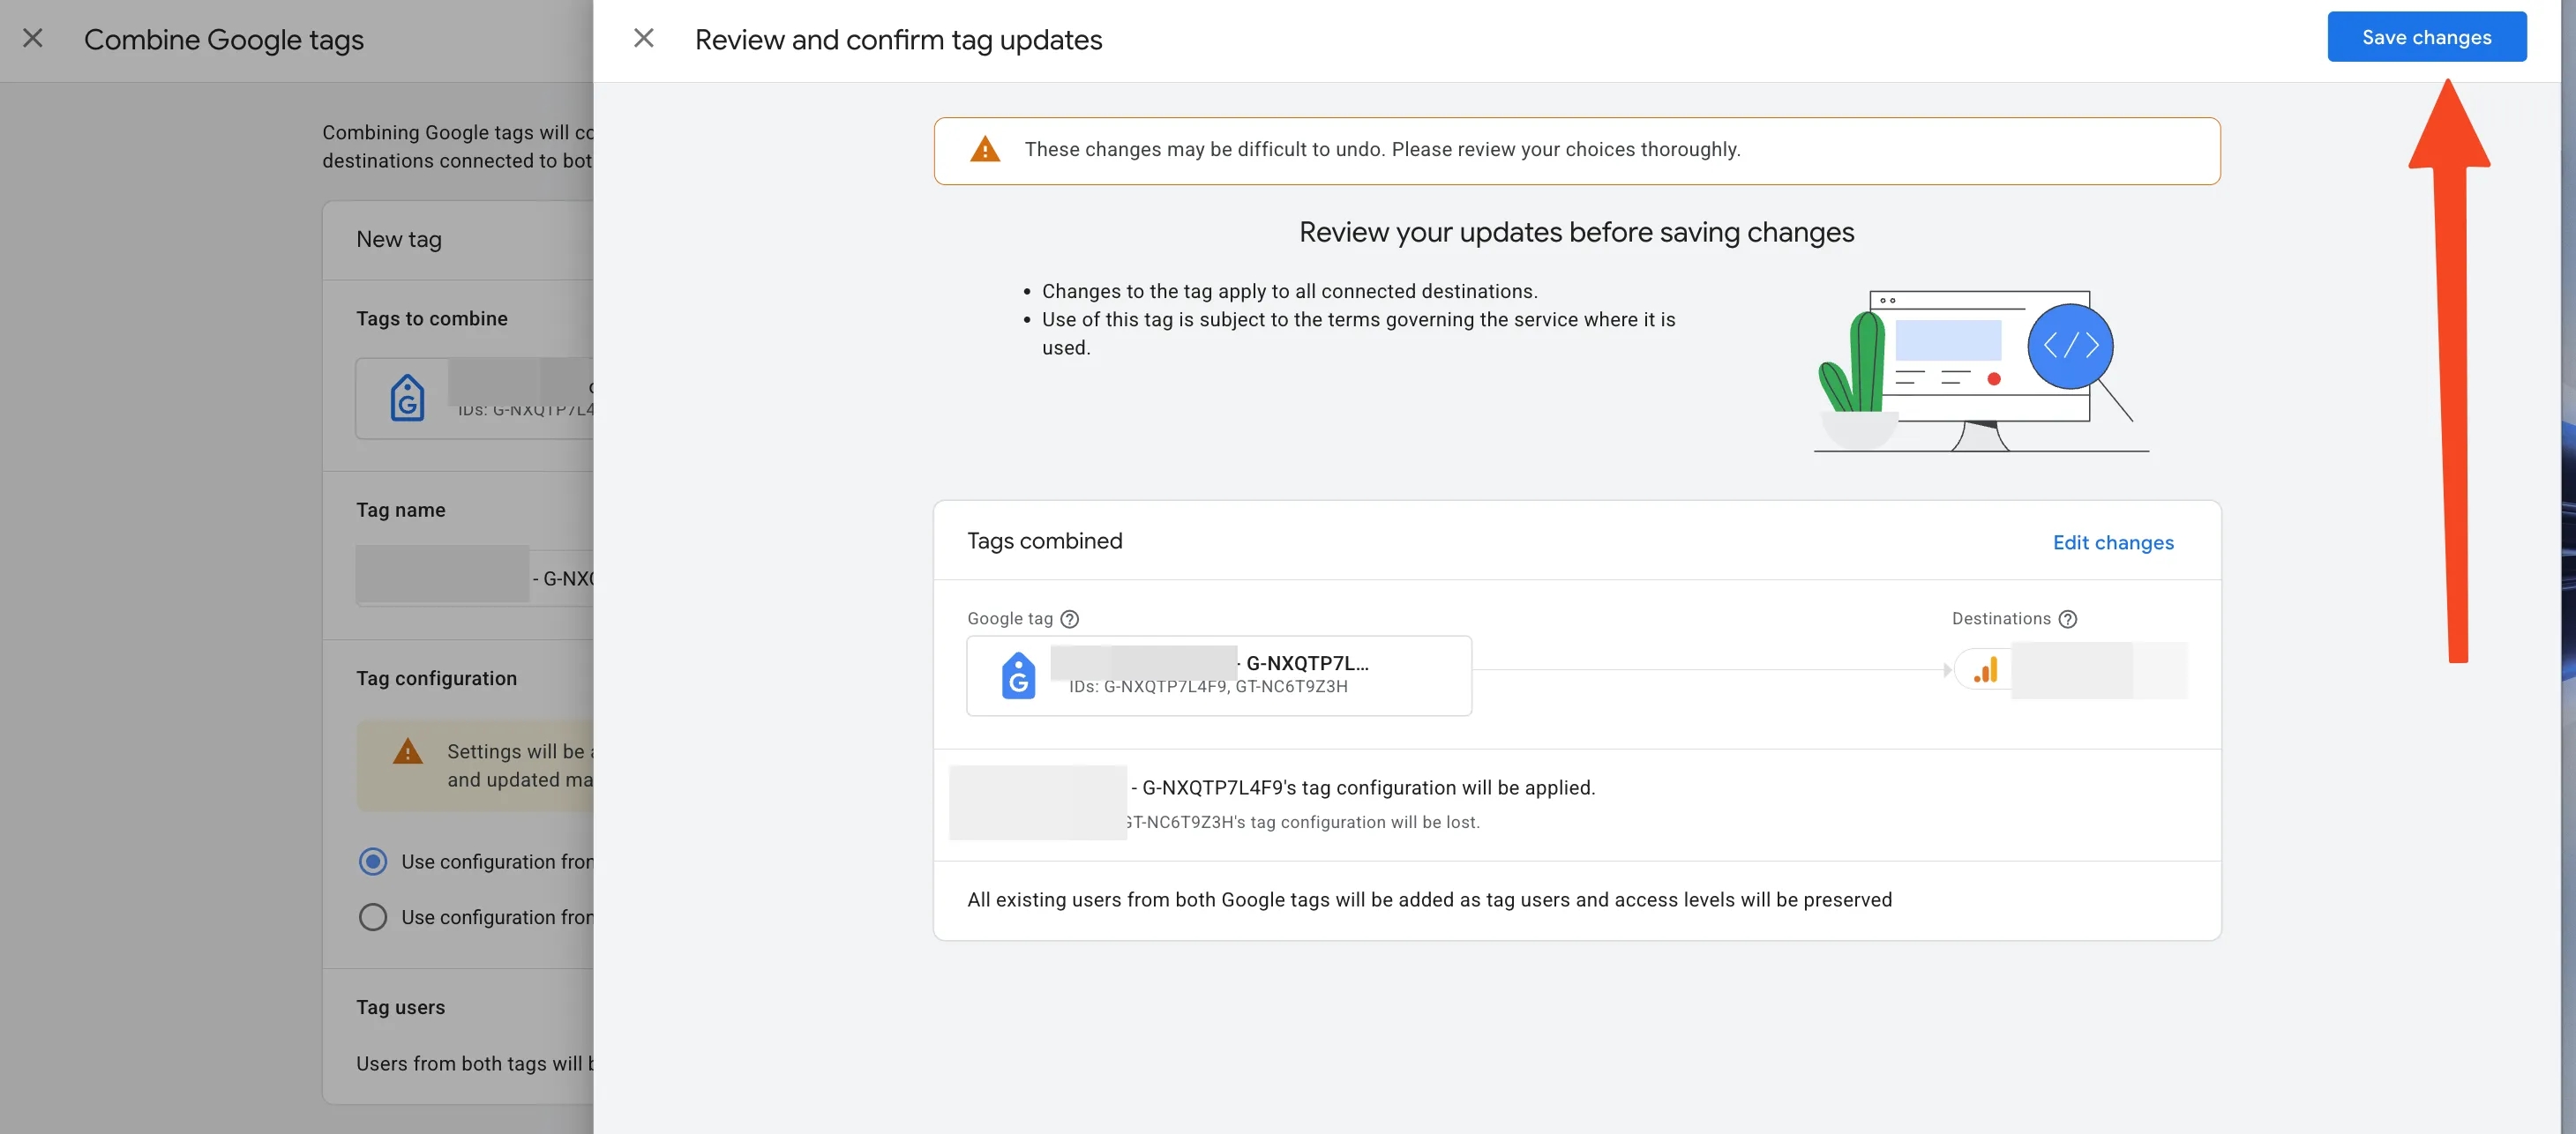
Save the changes — that’s it.
I honestly don’t understand why there is so little solid information about this in the public space. Content about how and why to combine Google Tags is immediately at the top of AI overviews. But when it comes to what to do if the tags are already combined and errors occur, there is almost complete silence.
I hope this article will be useful to you, especially now, during yet another round of changes from Google. Of course, it’s possible that everything will work smoothly in the future, but for now, it’s worth knowing how to act.
Loading comments…