
Today’s article is one that’s been waiting in the wings for quite a while. For some reason, the topic of mobile app analytics is covered far less frequently than web analytics — even though, in many industries, mobile app traffic has long outpaced web traffic.
If you've been following me for some time, you probably know that my subscribers, students — and maybe even you yourself — have pushed me to finally start diving into this topic. If you're curious, I’ll share a bit of the backstory below — why I kept postponing it, and why I’m finally ready to go all in. If you're not into stories, just scroll down to the content plan. After that, we’ll jump straight to the practical part.
A little bit (or maybe not so little) of backstory.
If you know how I work, you know I like to dig into details. And no, I’m not one of those people who wants to know absolutely everything — I understand that’s just not realistic. What I do want is to understand why we do what we do, and what limitations affect the systems we work with. That’s why, when working with web analytics, I spent a lot of time studying how websites, browsers, and the internet in general function. I truly believe every web analyst should understand these processes, know JavaScript at least at a basic level, be comfortable with browser developer tools, and be familiar with many other technical nuances. Only by going deep into these details can you fully grasp how data collection works in analytics and marketing systems — and which limitations impact or might impact this data. And only by truly understanding what kind of data we're collecting can we analyze it correctly and draw meaningful conclusions that lead to better results.
So, what’s my point? In my opinion, if you want to write about something — let alone teach it — you need to go through the entire process yourself, from the inside out. And while I had a solid understanding of how things work on the web — open the browser, write some code, debug, observe — when it came to mobile app analytics, I wasn’t sure how to approach it on that same deep level. Of course, the process is similar: open Android Studio or XCode, write code, debug, observe… But still, we’re dealing with different programming languages, different frameworks, and a completely different environment.
But the world has changed. Nowadays, with tools like ChatGPT, you can throw together a simple mobile app in just a few hours. Sure, it probably won’t be climbing to the top of the app charts — but for research purposes, it’s more than enough.
So with this post, we’re beginning to chip away at this stone. Over the coming year, I’ll be publishing a series of posts featuring step-by-step guides for setting up mobile analytics, along with insights from my own research. It’ll be deep technical content — but from an analyst’s perspective, not a developer’s. The goal is to help web analysts dive into the world of mobile apps enough to understand how data collection works and what limitations can affect it. These posts won’t follow a strict schedule, but they will keep coming. If you don’t want to miss anything — subscribe to the LinkedIn newsletter.
We’ll start with Android apps. I’ve already written a small game in Kotlin — a lightweight text-based quest — to serve as the foundation for our experiments.
In today’s article, I’ll walk you through the process of connecting Firebase to an Android app. In future posts, we’ll dive into standard and custom events, their parameters, user properties, and — once I finish building the in-game store with ChatGPT — we’ll also explore Ecommerce events.
All I have at this point is a mobile app I called EscapeTheDungeon. You’ll most likely be working with your own app. From here on, we’ll go through every step together. Here’s our plan:
- Creating a Firebase project in the Firebase Console
- How to add Firebase to your Android app
- Connecting basic analytics to your Android mobile app
- How to create a virtual device in Android Studio to test your Firebase Analytics setup
- How to view Firebase events in the Firebase console
- How to enable Debug mode for Firebase Analytics in Android Studio
- How to connect raw data export from Google Analytics 4 (including mobile app data) to Google BigQuery
- Instead of a conclusion
- FAQ
Creating a Project in the Firebase Console
Firebase is a platform by Google that provides tools for mobile app developers. However, it’s also highly relevant for web analysts, as it includes robust analytics capabilities specifically for mobile apps.
For us — as analysts — the most important part of Firebase is Firebase Analytics (or, more precisely, Google Analytics for Firebase, which is now integrated into GA4). This integration is what enables data collection in GA4. So, to begin any analysis in GA4, you first need to set up data collection in your app via Firebase.
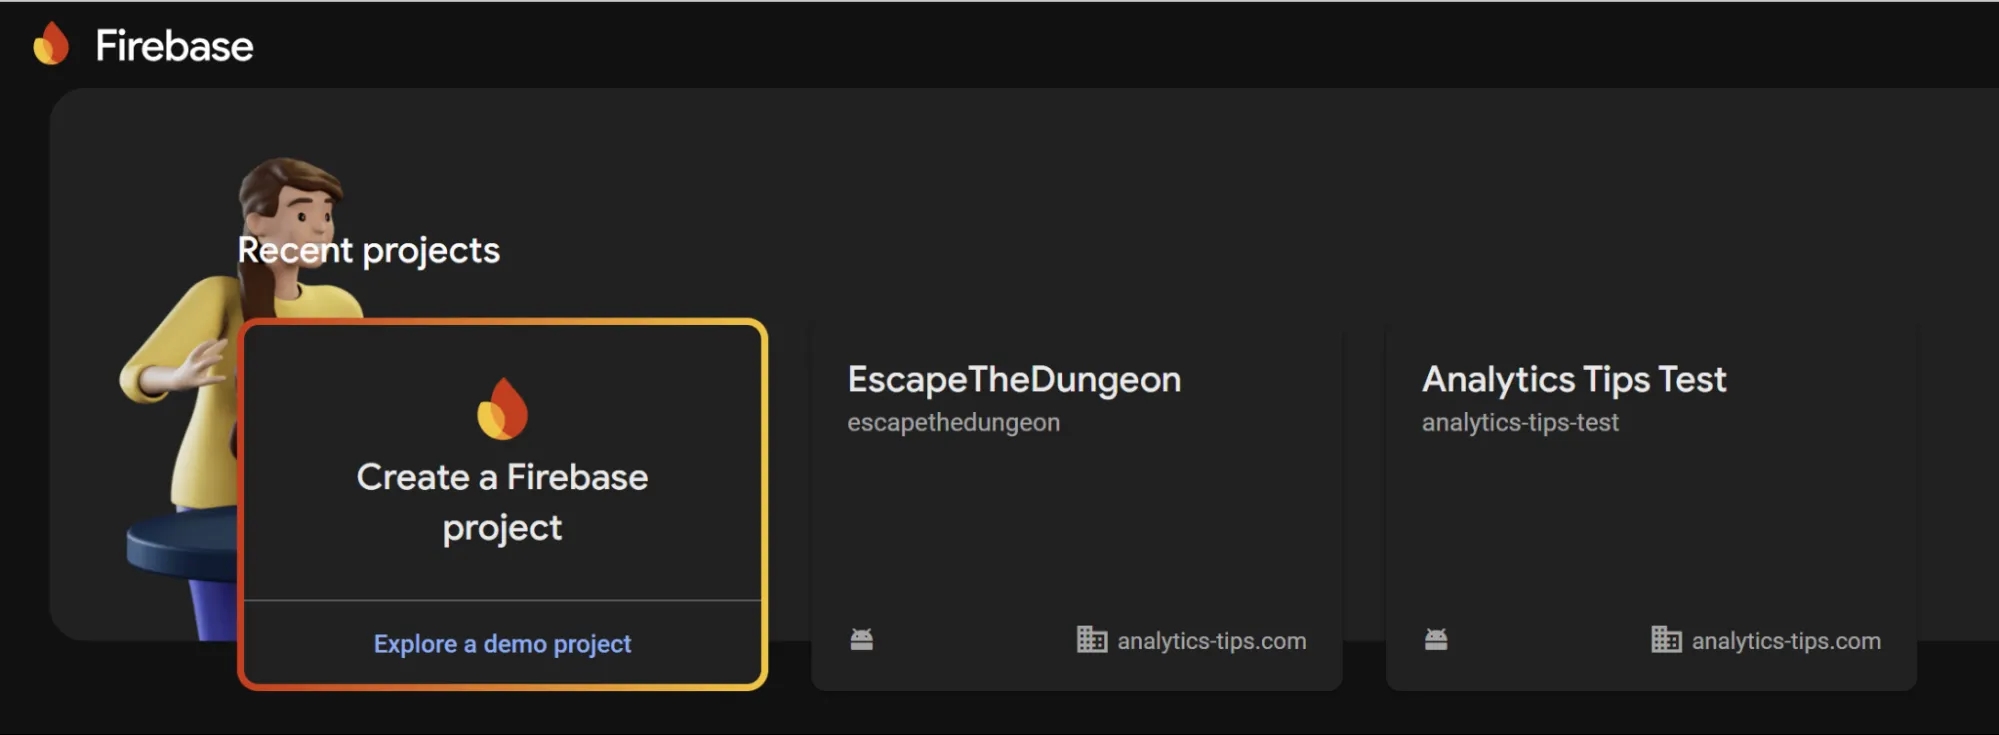
First, go to the Firebase Console and click Create a Firebase project.
Next, enter your project name and click Continue. In my case, I named it EscapeTheDungeon Test.
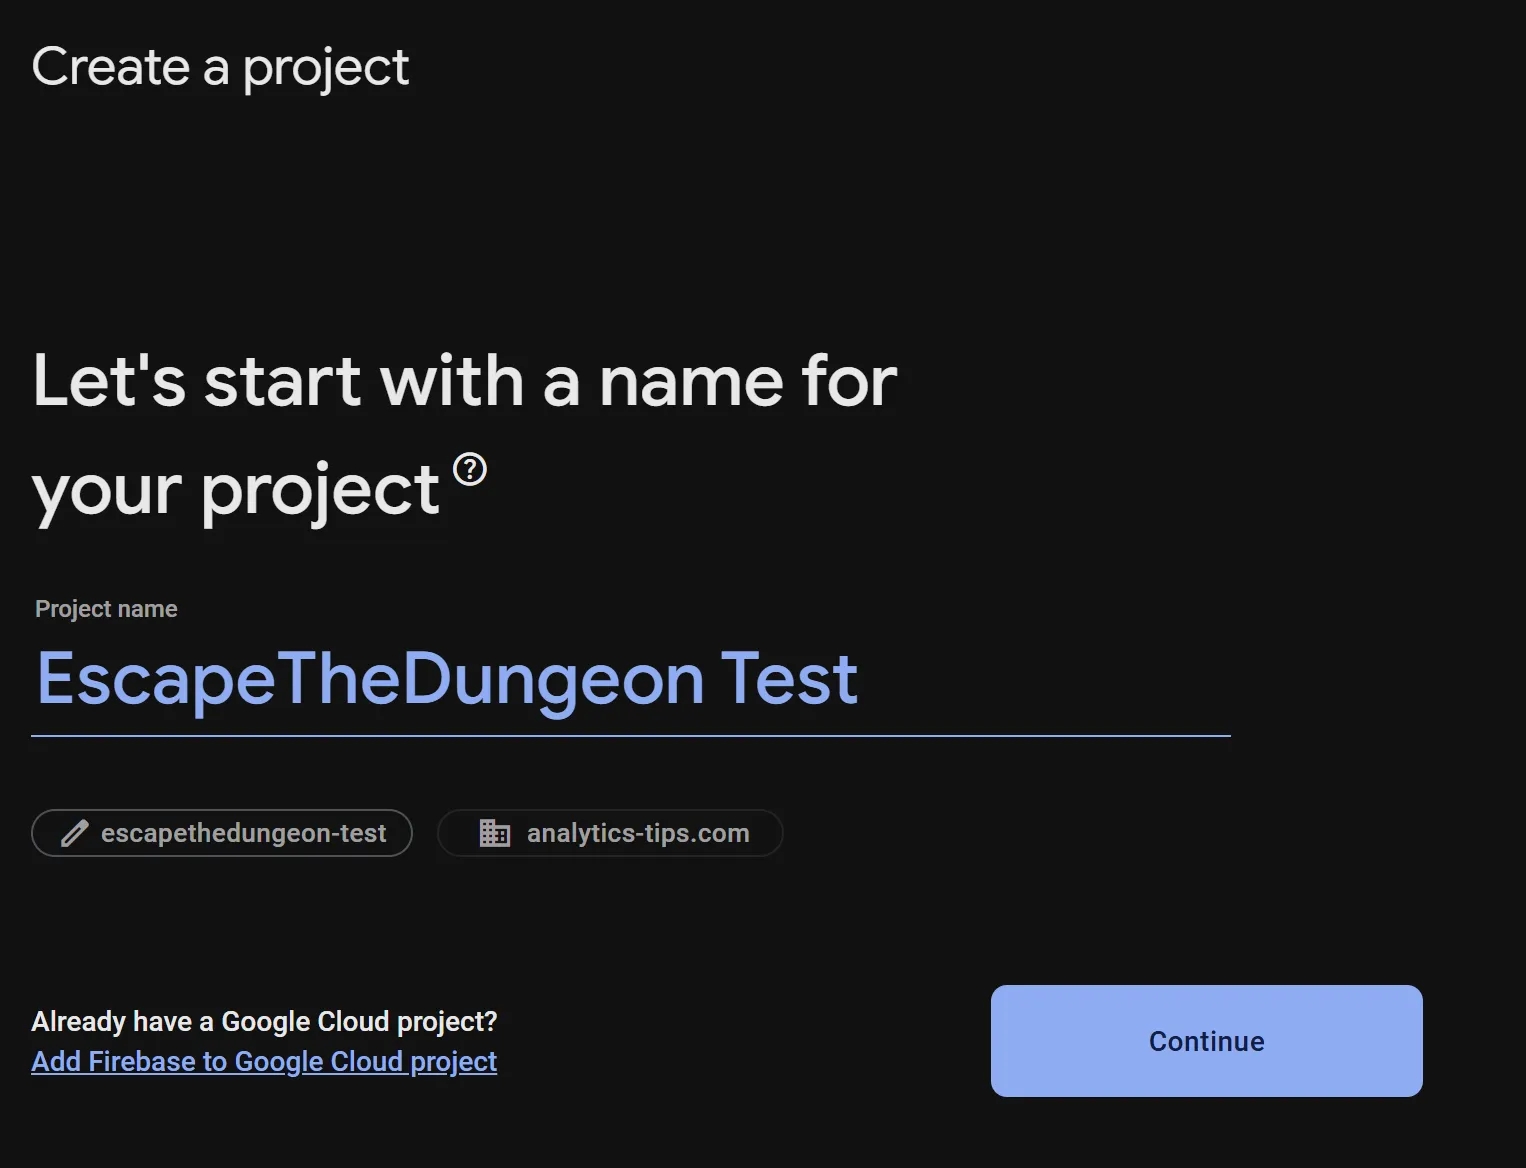
At this stage, you can choose not to create a new project but instead connect an existing Google Cloud Platform (GCP) project. However, if you already have a project in GCP, I’m sure you’ll figure out that part on your own ;) For now, we’ll continue by creating everything from scratch.
The next step is very important if we want to set up analytics properly: make sure the toggle for Enable Google Analytics for this project is turned on. If everything looks good, click Continue again.
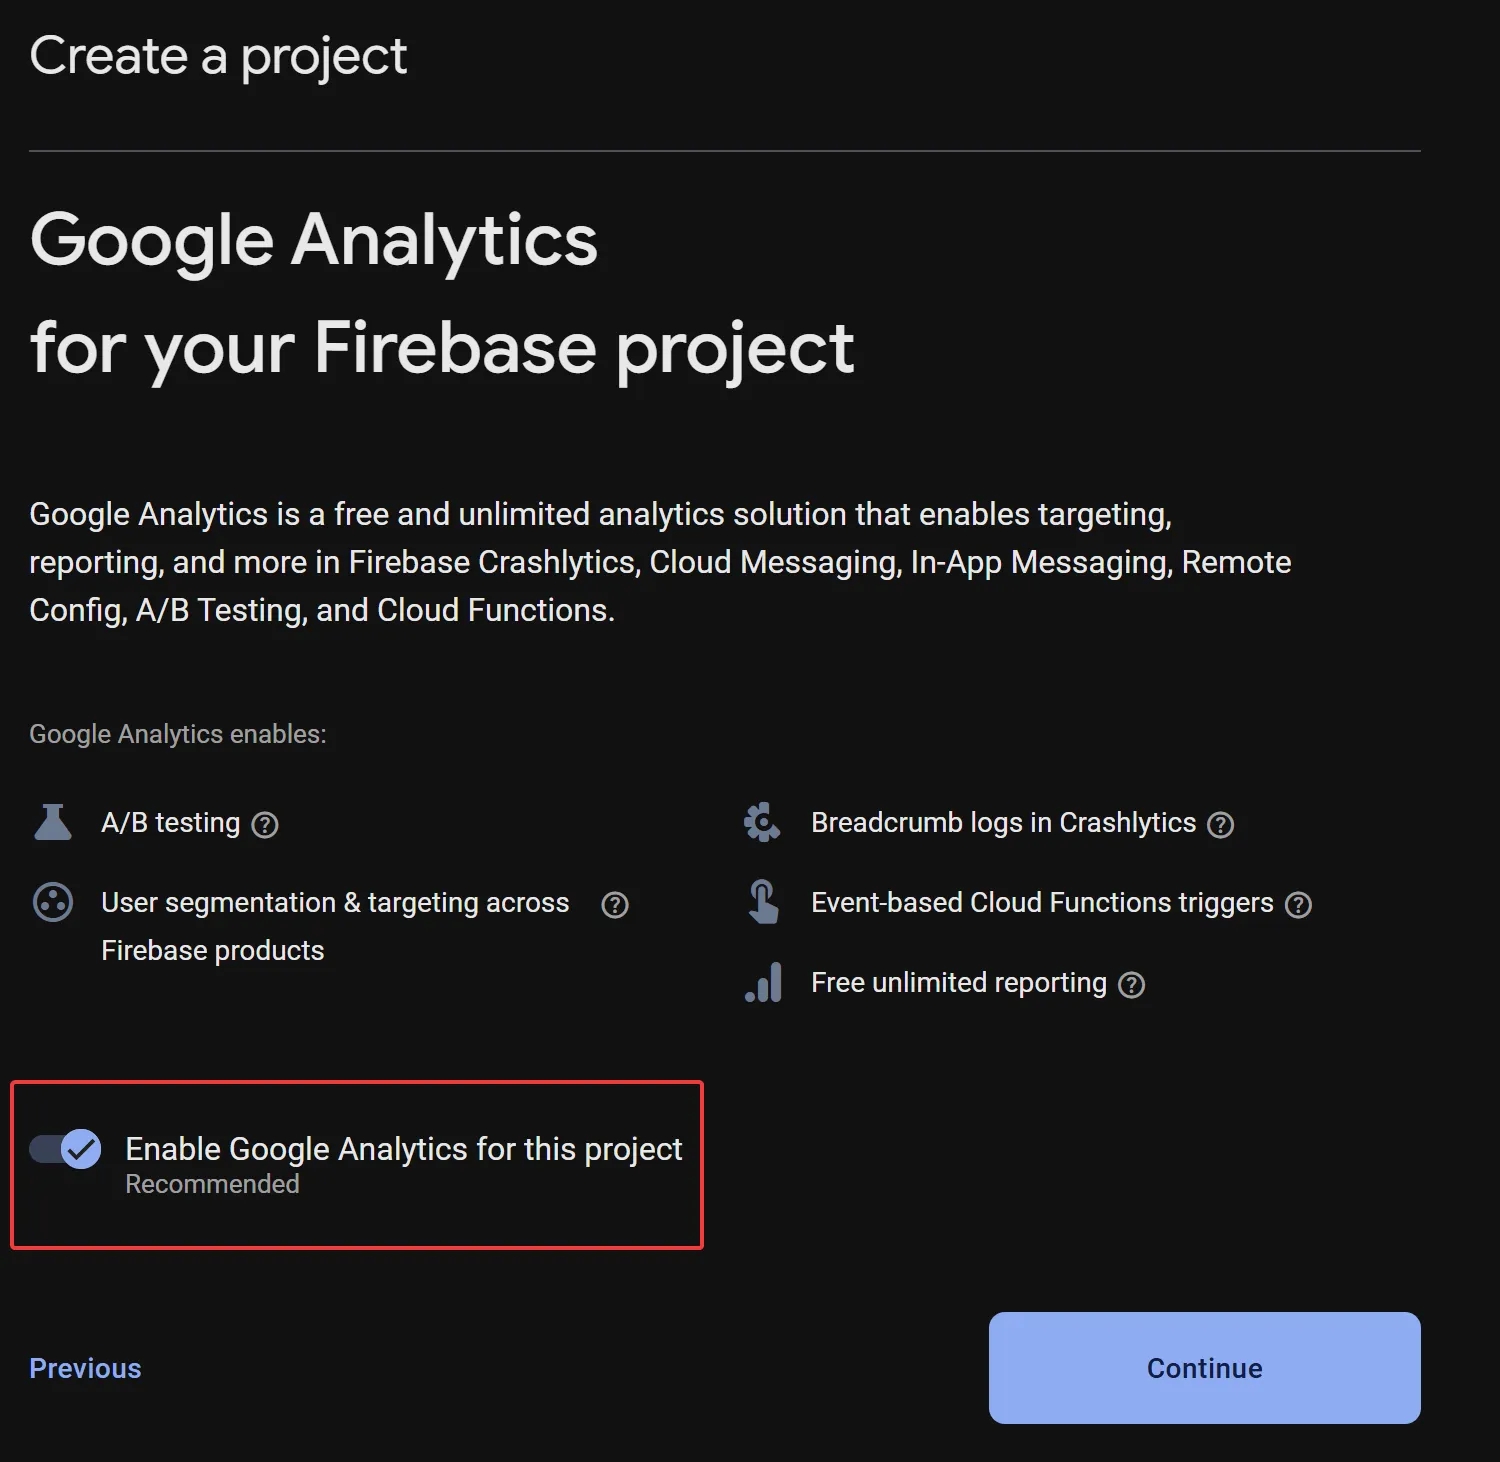
Of course, you’ll still be able to link your GA4 account to your Firebase project later via the Project settings > Integrations tab — but why not just take care of it now?
At this point, we need to connect the appropriate GA4 property. You have a few options:
- Create a new Google Analytics 4 account
- Link the project to an existing Google Analytics 4 account
Creating a New Google Analytics 4 Account
If you don’t have a website and your only current product is a mobile app, go ahead and create a new GA4 account. To do this, scroll down the dropdown menu and look for the Create a new account button.
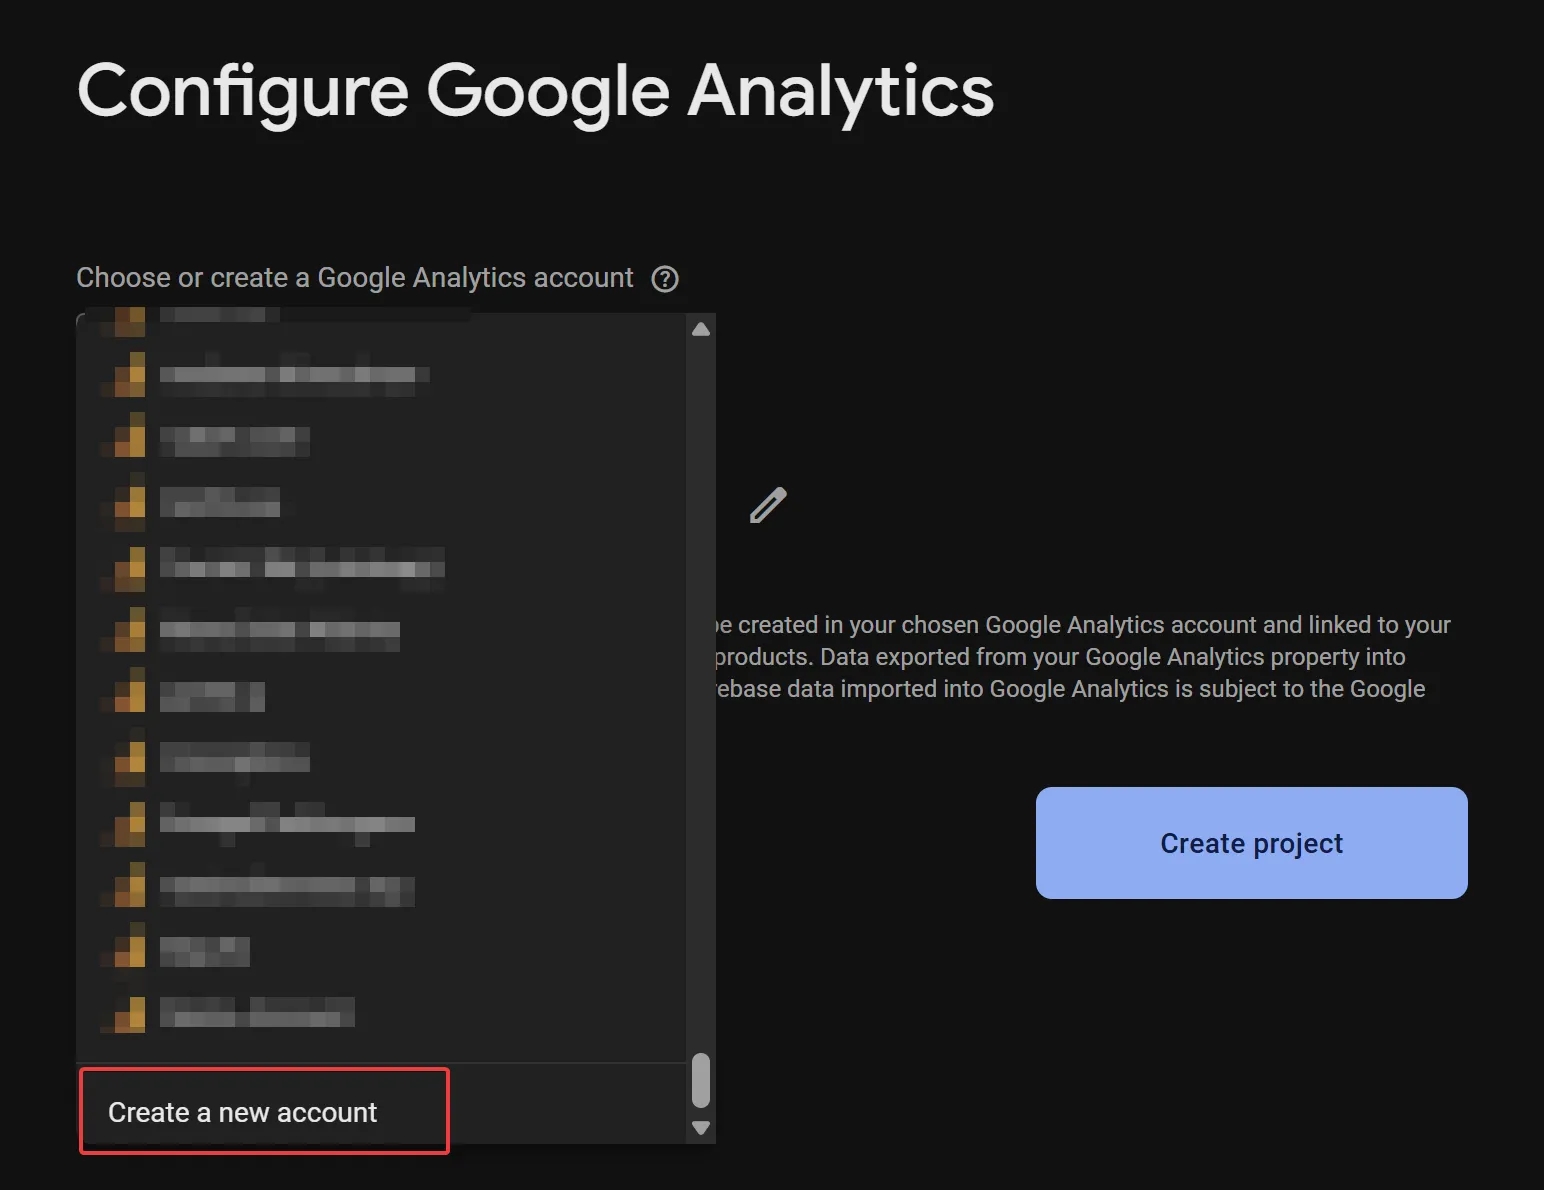
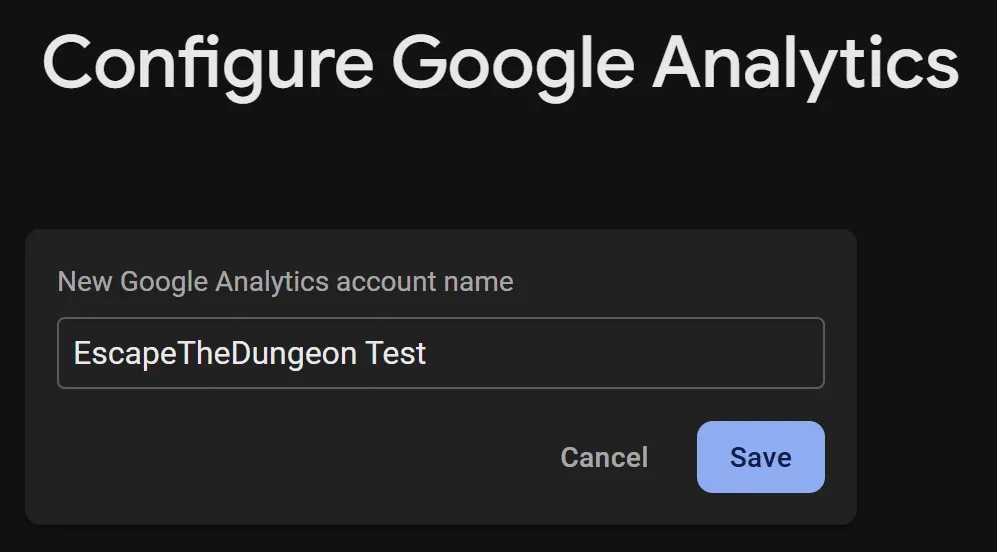
Next, you’ll need to enter a name. I recommend using the same name you gave your Firebase project.
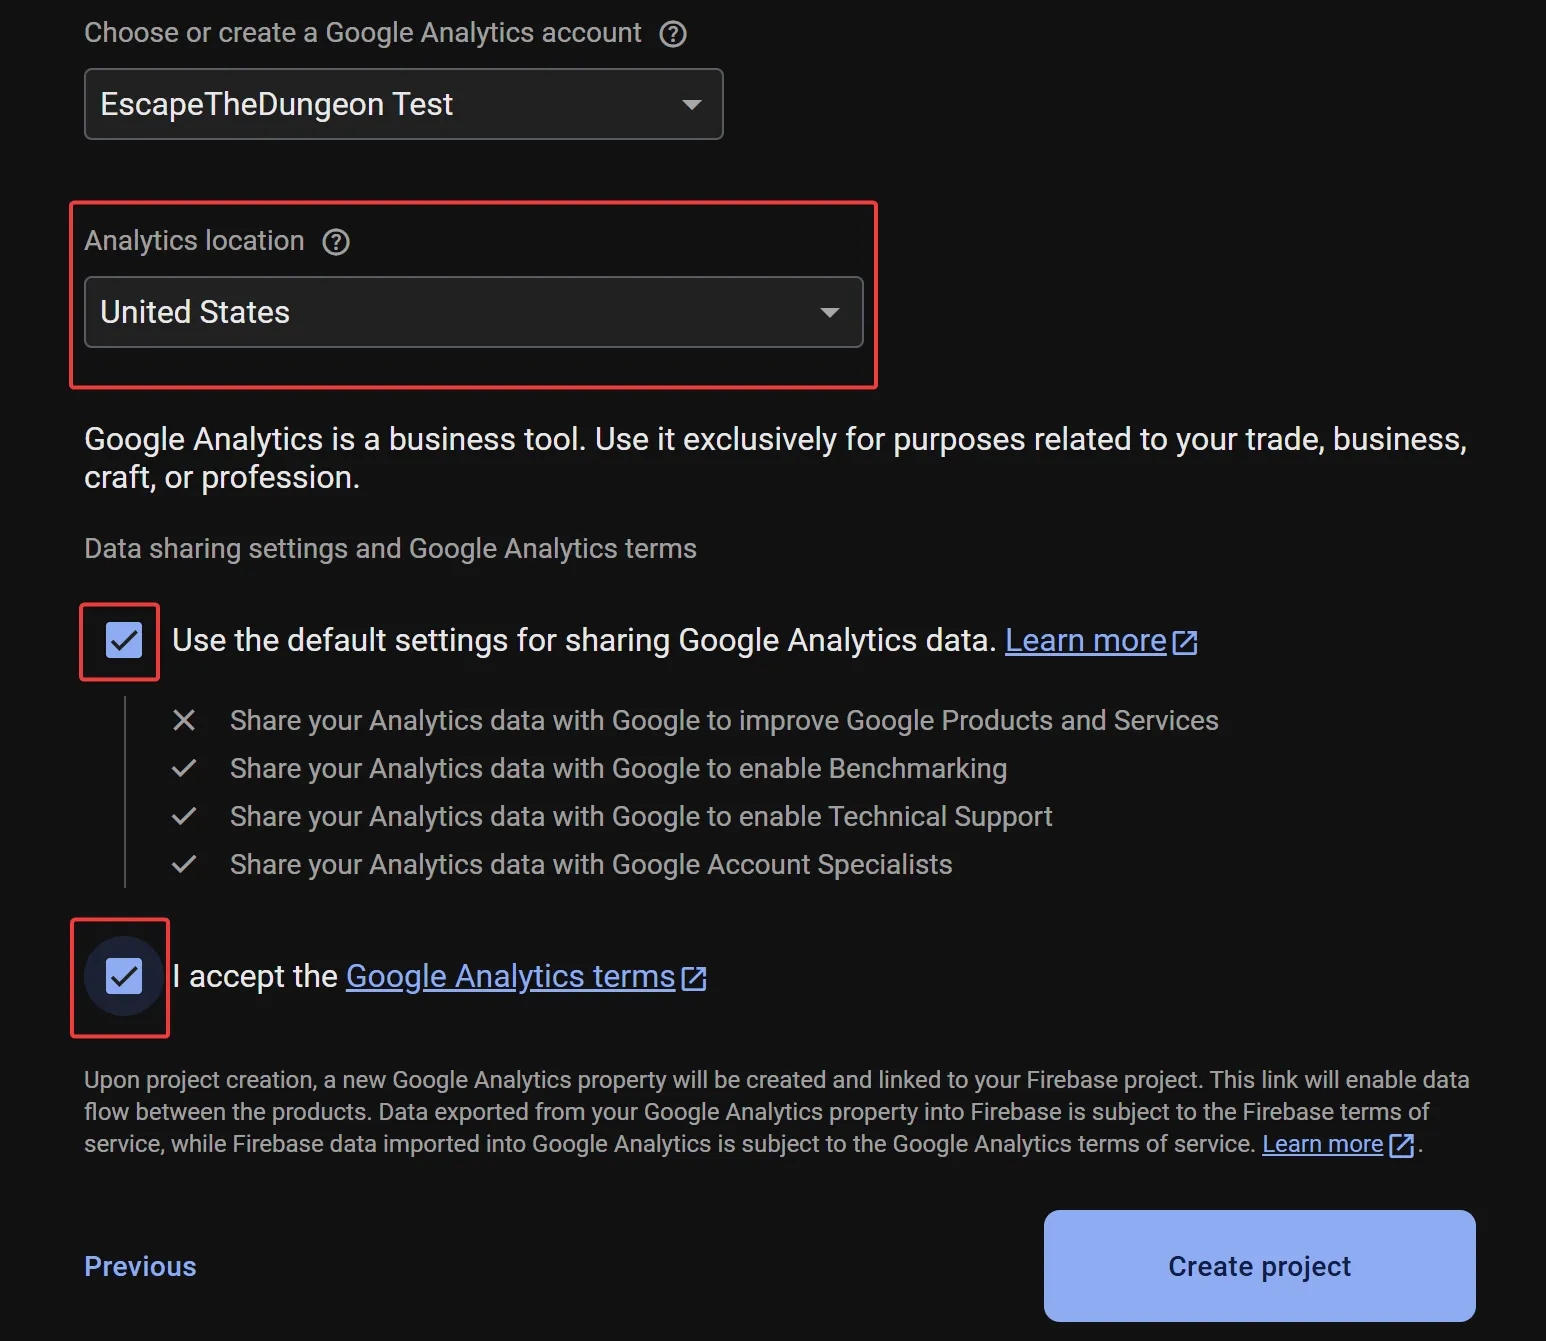
After that, you’ll be prompted to select a location and agree (or decline) to the collection and processing of certain data. I’ve already explained what each of these permissions entails in my article on GA4 setup — feel free to refer to it for details.
Note: The location setting in GA4 does not affect where Google processes or stores customer data for Firebase. This setting applies specifically to GA4 and mainly influences the currency in which your app’s revenue will be displayed.
How to Link a Firebase Project to an Existing Google Analytics 4 Account During Setup
If you already have a website related to the same business as your mobile app, I recommend linking Firebase to your existing GA4 property. To do this, select the appropriate account from the dropdown menu, then in the section labeled Automatically create a new property in this account, click the pencil icon and choose an existing property instead.
Important: Be sure to select an existing GA4 property that already contains your website data. This option will allow you to unify user interaction data across your website and mobile app into a single flow.
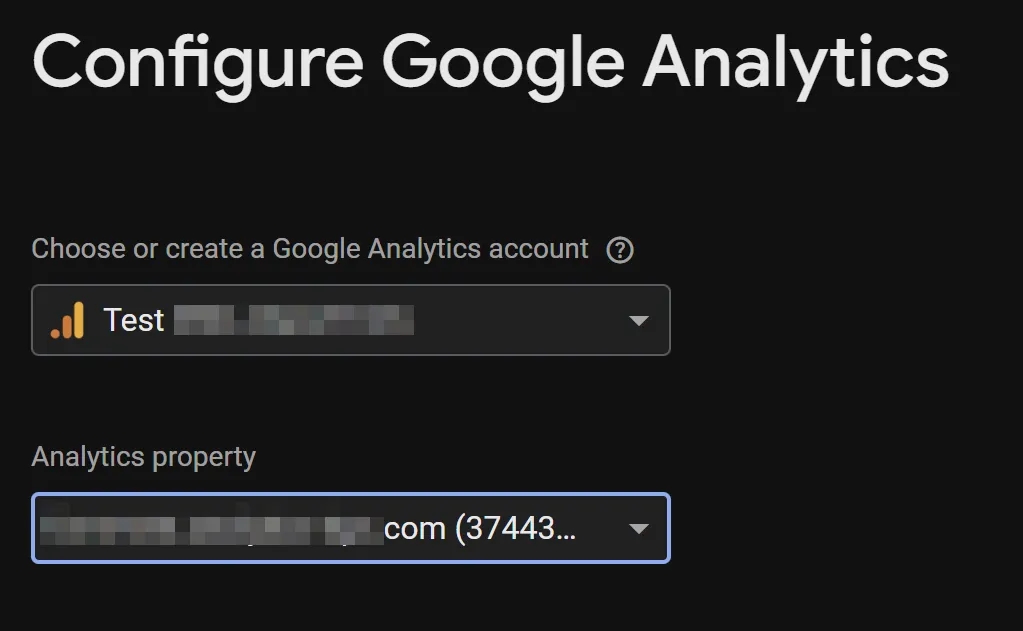
Whether you choose to create a new GA4 property or connect to an existing one, the next step is the same — click Create project and wait about a minute for your Firebase project to be set up.
If everything goes smoothly, you’ll see a confirmation message.
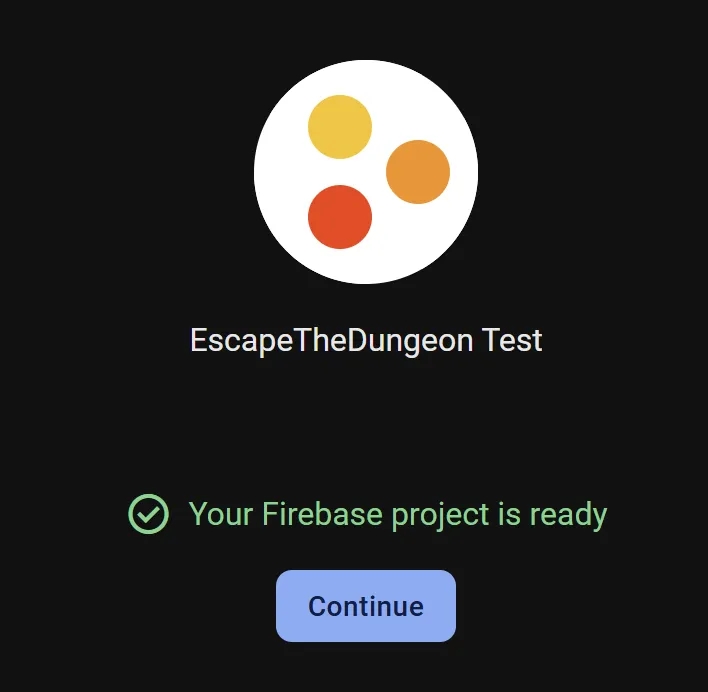
To continue adding Firebase to your Android app, click Continue.
And with that — congrats! You’ve completed the first step.
How to Add Firebase to Your Android App
To get started, open your app in Android Studio.
Android Studio is the primary development environment for building Android apps. It’s exactly where we’ll be able to do the following:
- Add Firebase to the app
- Verify that events are being collected
- Run the app on an emulator or physical device
To put it simply — if you can’t imagine setting up web analytics without using your browser’s DevTools, then configuring analytics for an Android app without Android Studio is just as unimaginable.
Even if you’re “just an analyst” on a project with a mobile app — trust me, you’ll definitely need Android Studio for debugging.
Once you’ve got Android Studio open, go to the Project Overview screen in the Firebase Console and select Android as the app platform.
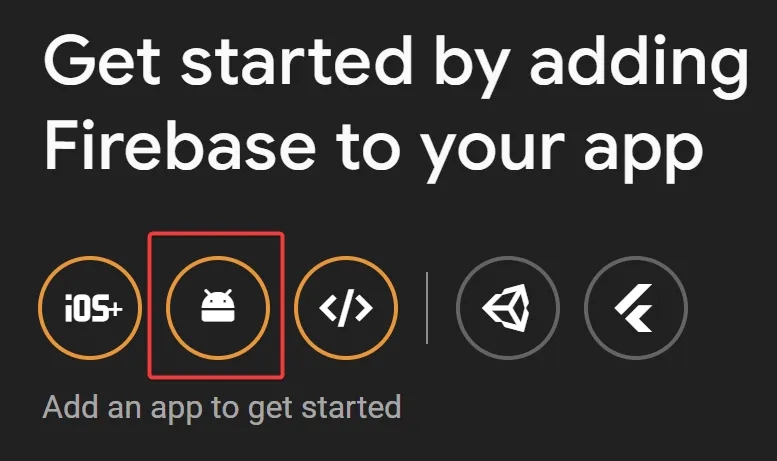
Now we’ll go through three main steps:
- Registering the app
- Downloading and adding the configuration file
- Adding the Firebase SDK
Let’s go through them one by one:
- Register app
На цьому етапі потрібно заповнити три поля, два з яких є опціональними:
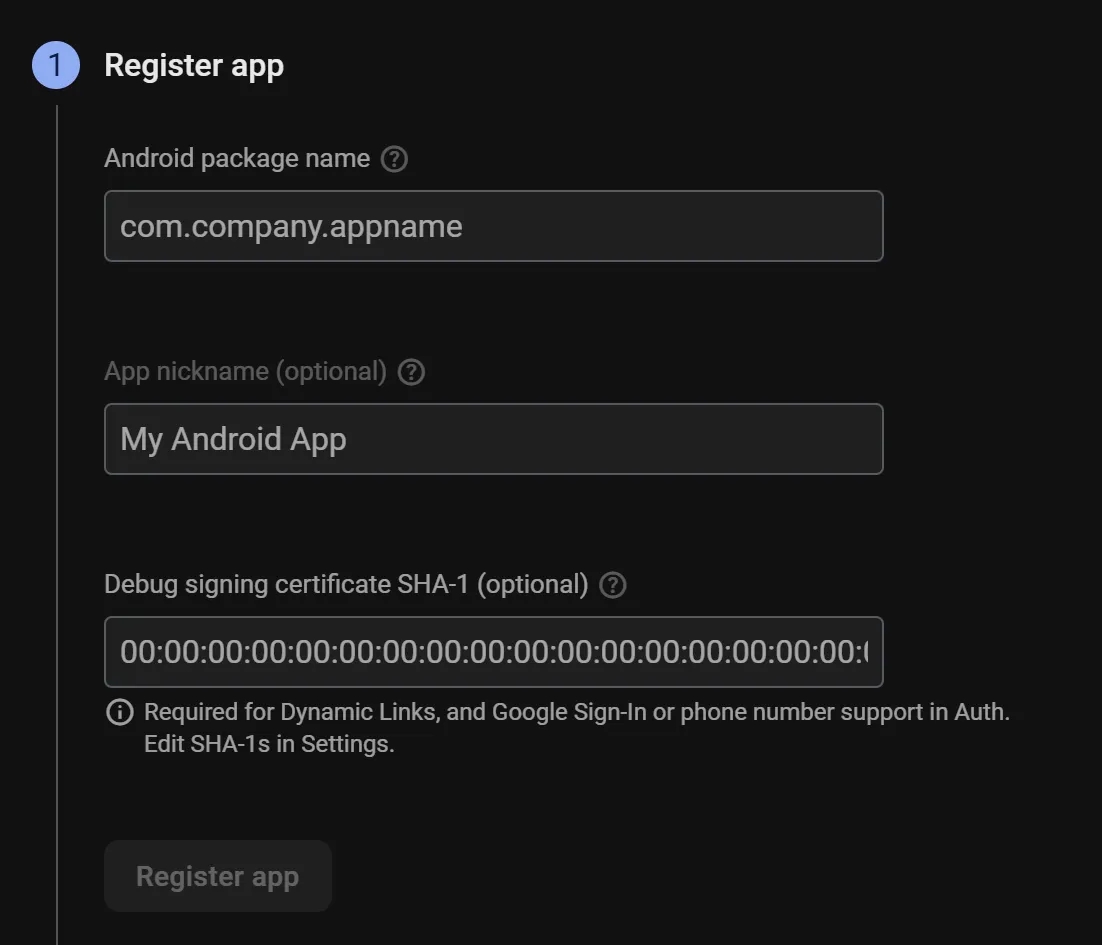
- Android package name - This is the name of your app package (also known as the app ID). You can find it in the Gradle file (within the app module). In my case, it’s:
com.example.escapethedungeon
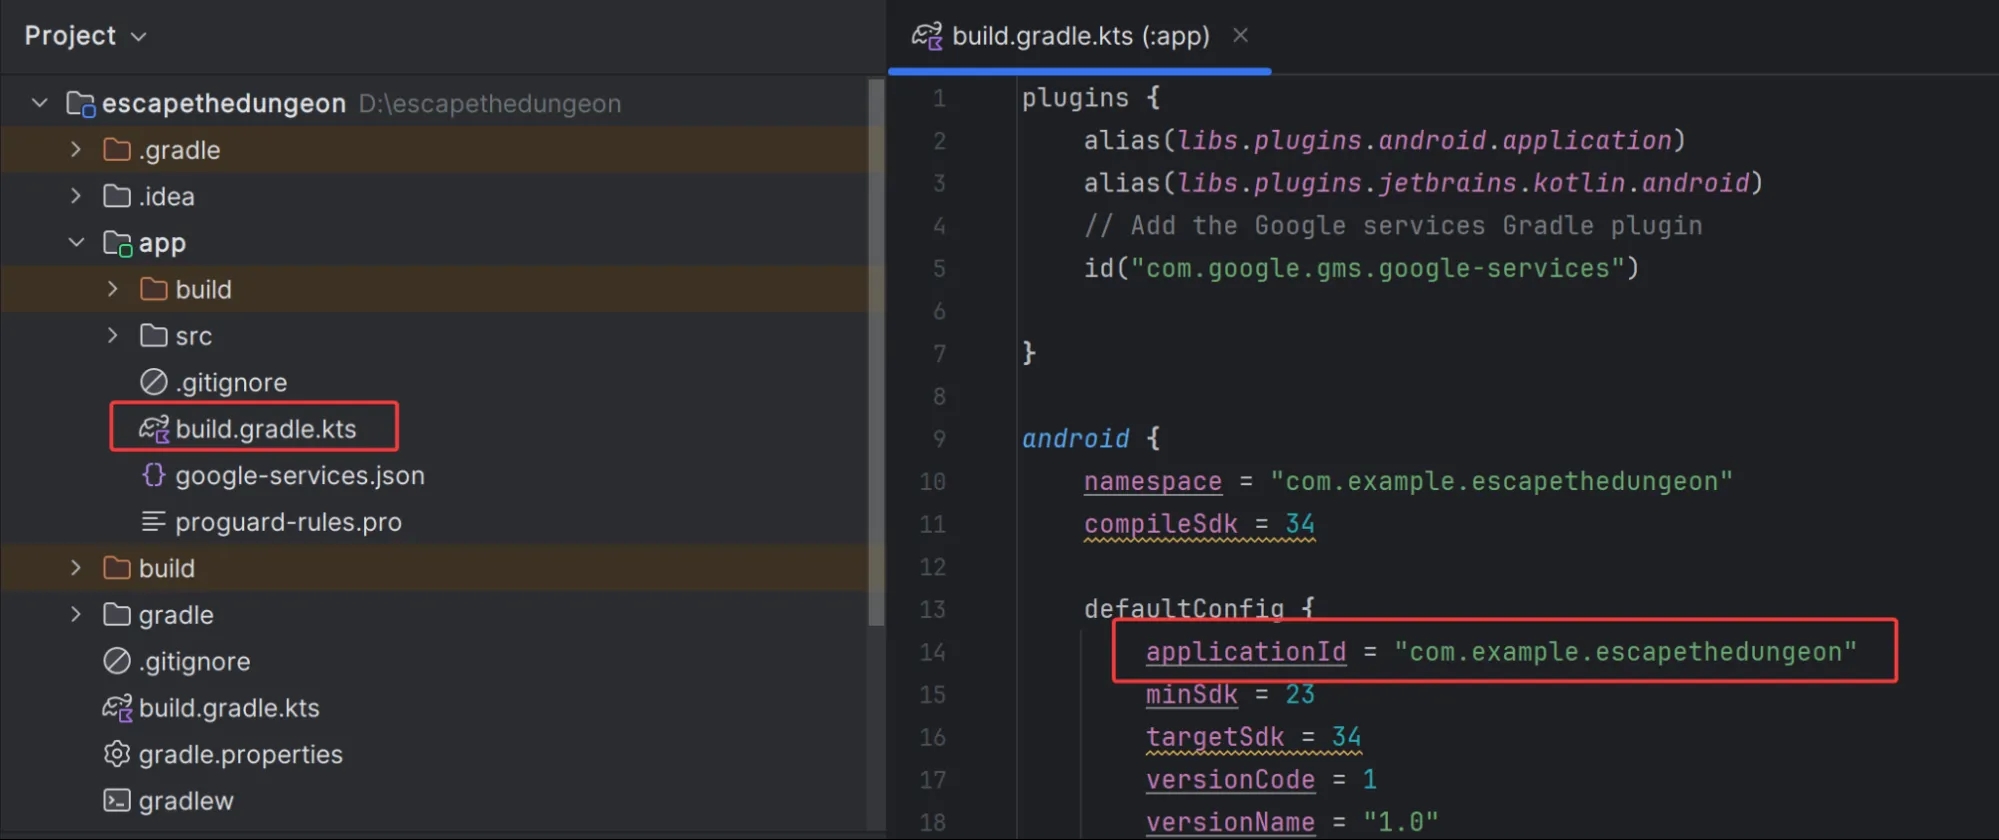
The package name uniquely identifies your app on the user’s device and in the Google Play Store. It typically uses the reverse format of your company’s domain followed by your app name.
For example, if your company’s domain is example.com and you’re creating an app called myapp, the package name would look like:
com.example.myapp
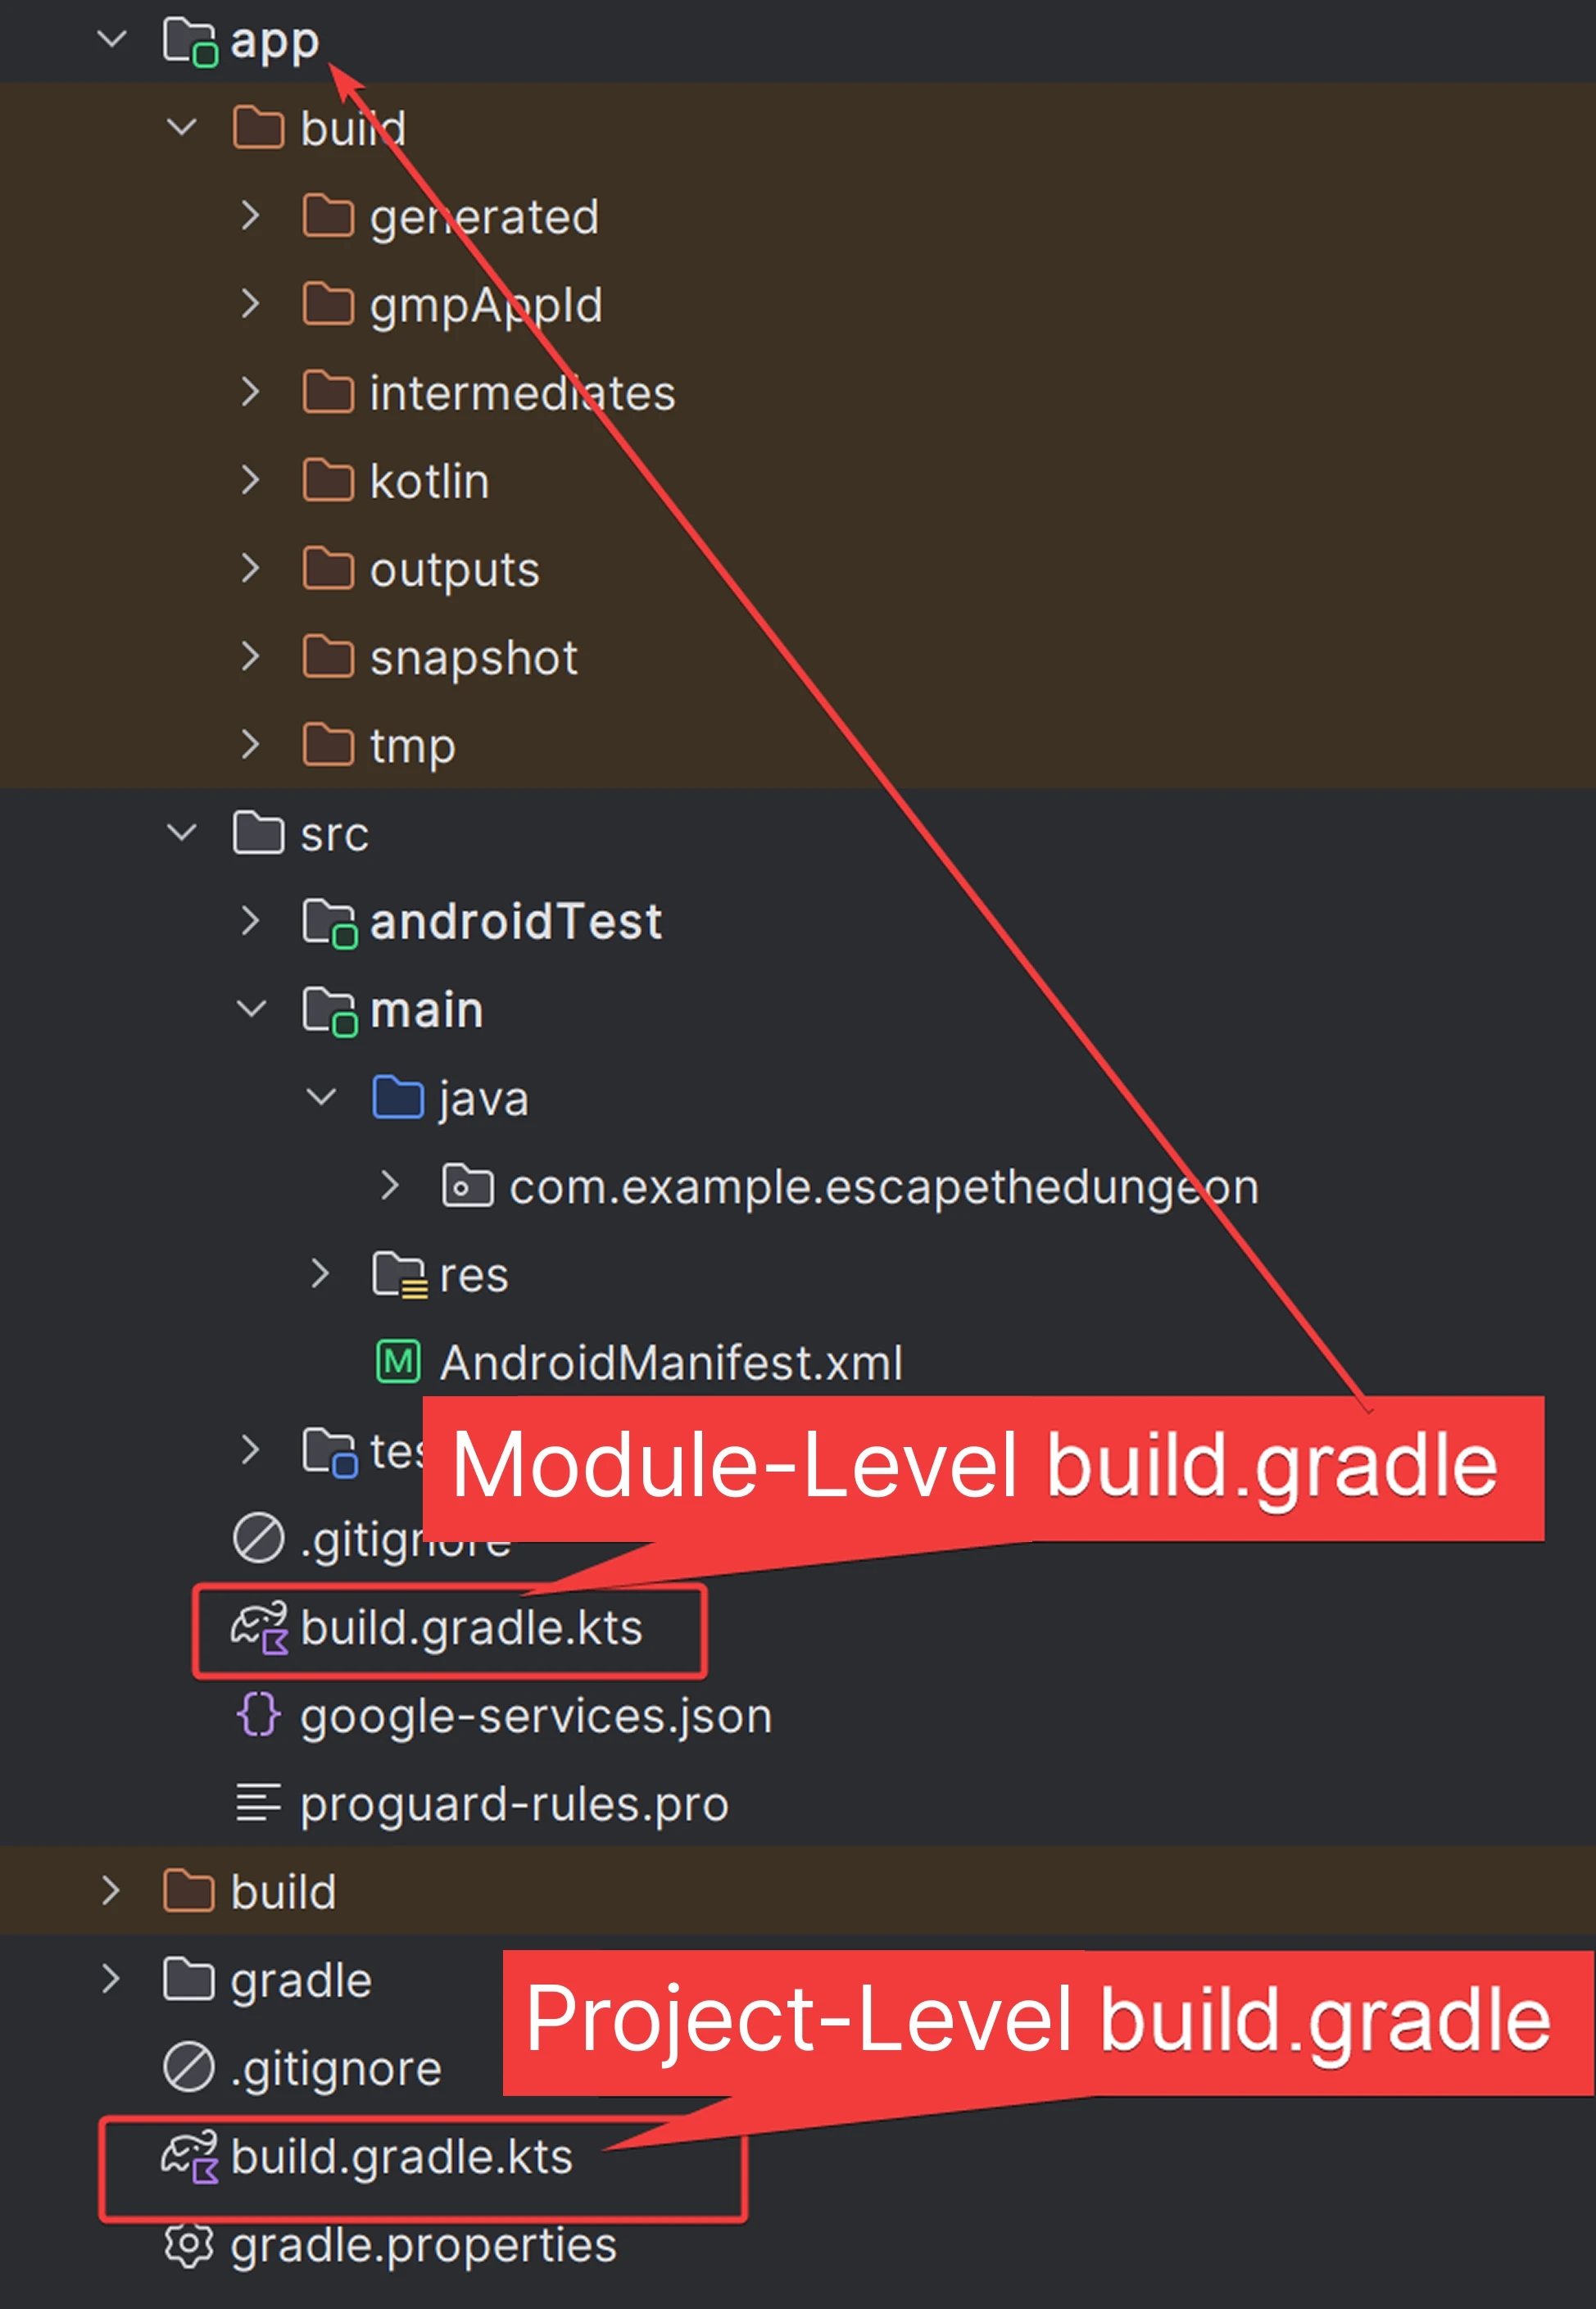
Note: Earlier I mentioned you can find this in the Gradle file “at the app level” — and this detail is very important.
Gradle is a build system that helps manage libraries, compile your code, automate processes, and generate the APK for installation.
In an Android project, there are two types of Gradle files:
- Project-level
build.gradle(or in my case,build.gradle.ktssince I’m using Kotlin DSL) — located in the project root. This file manages global project settings like the Gradle Plugin version, shared repositories, and global dependencies. - Module-level
build.gradle— located inside theapp/directory (usuallyapp/build.gradle). This one controls the configuration of the specific module and includes its dependencies. This is where we’ll be adding Firebase shortly.
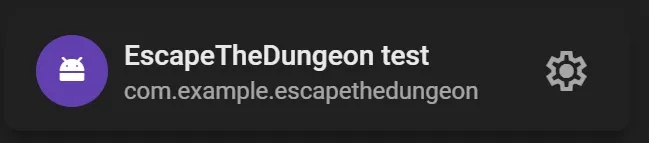
- App nickname – This is the name that will be displayed in your Firebase interface. On the screenshot below, you’ll see the App nickname at the top and the package ID below. I recommend adding it for your own convenience.
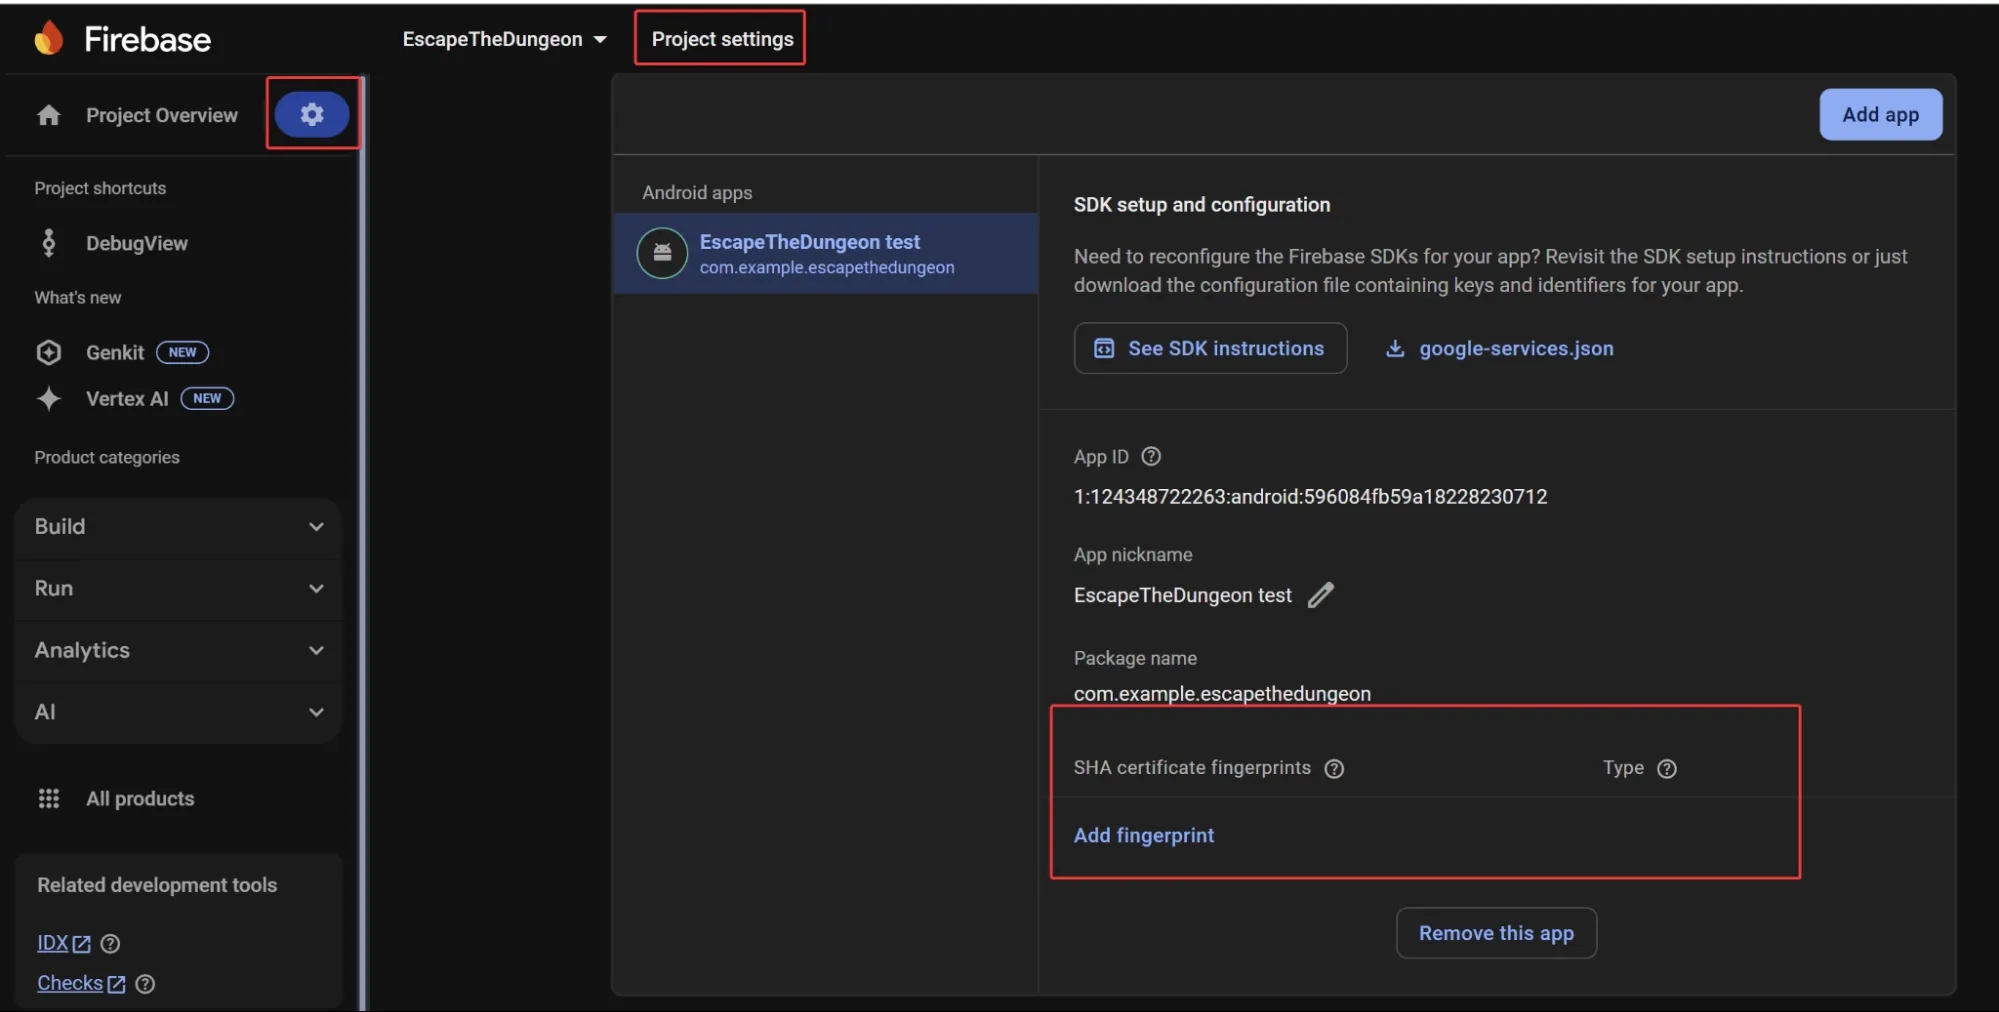
- Debug signing certificate SHA-1 – This is optional. It’s required for Firebase features like Dynamic Links or Google Sign-In. For now, we won’t need it, so you can leave it blank. You can always come back and fill it in later from your app settings — just like the nickname.
After filling out the fields, click Register app.
2. Download and then add config file. Once the app is registered, the next step is to download the configuration file and add it to your app. The process is clearly explained on Firebase’s side — I’ve included a screenshot of their instructions below. Just download the file and place it in the correct directory — the same folder that contains the module-level Gradle file (the one where we copied the app ID from).
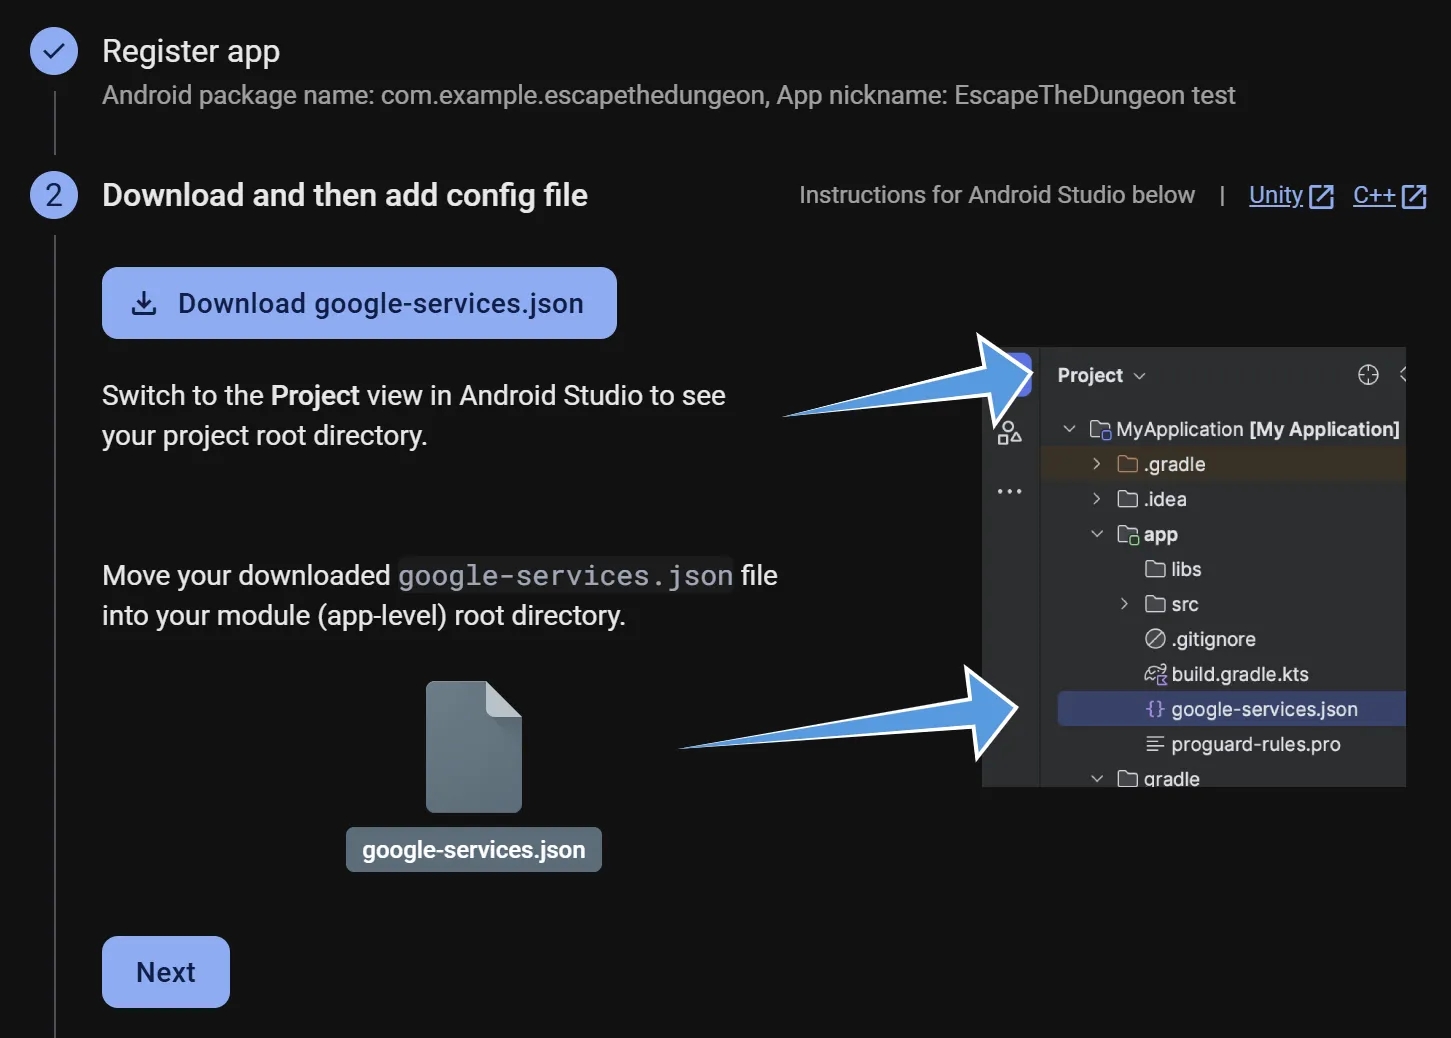
Once the file is added, don’t forget to click Next.
3. Add Firebase SDK.
Again, Firebase provides a very clear guide for this step, outlining exactly what to do and where. Essentially, you just need to add a few lines of code to two separate files. Still, I’ll give you some additional context to help you better understand what’s going on behind the scenes.
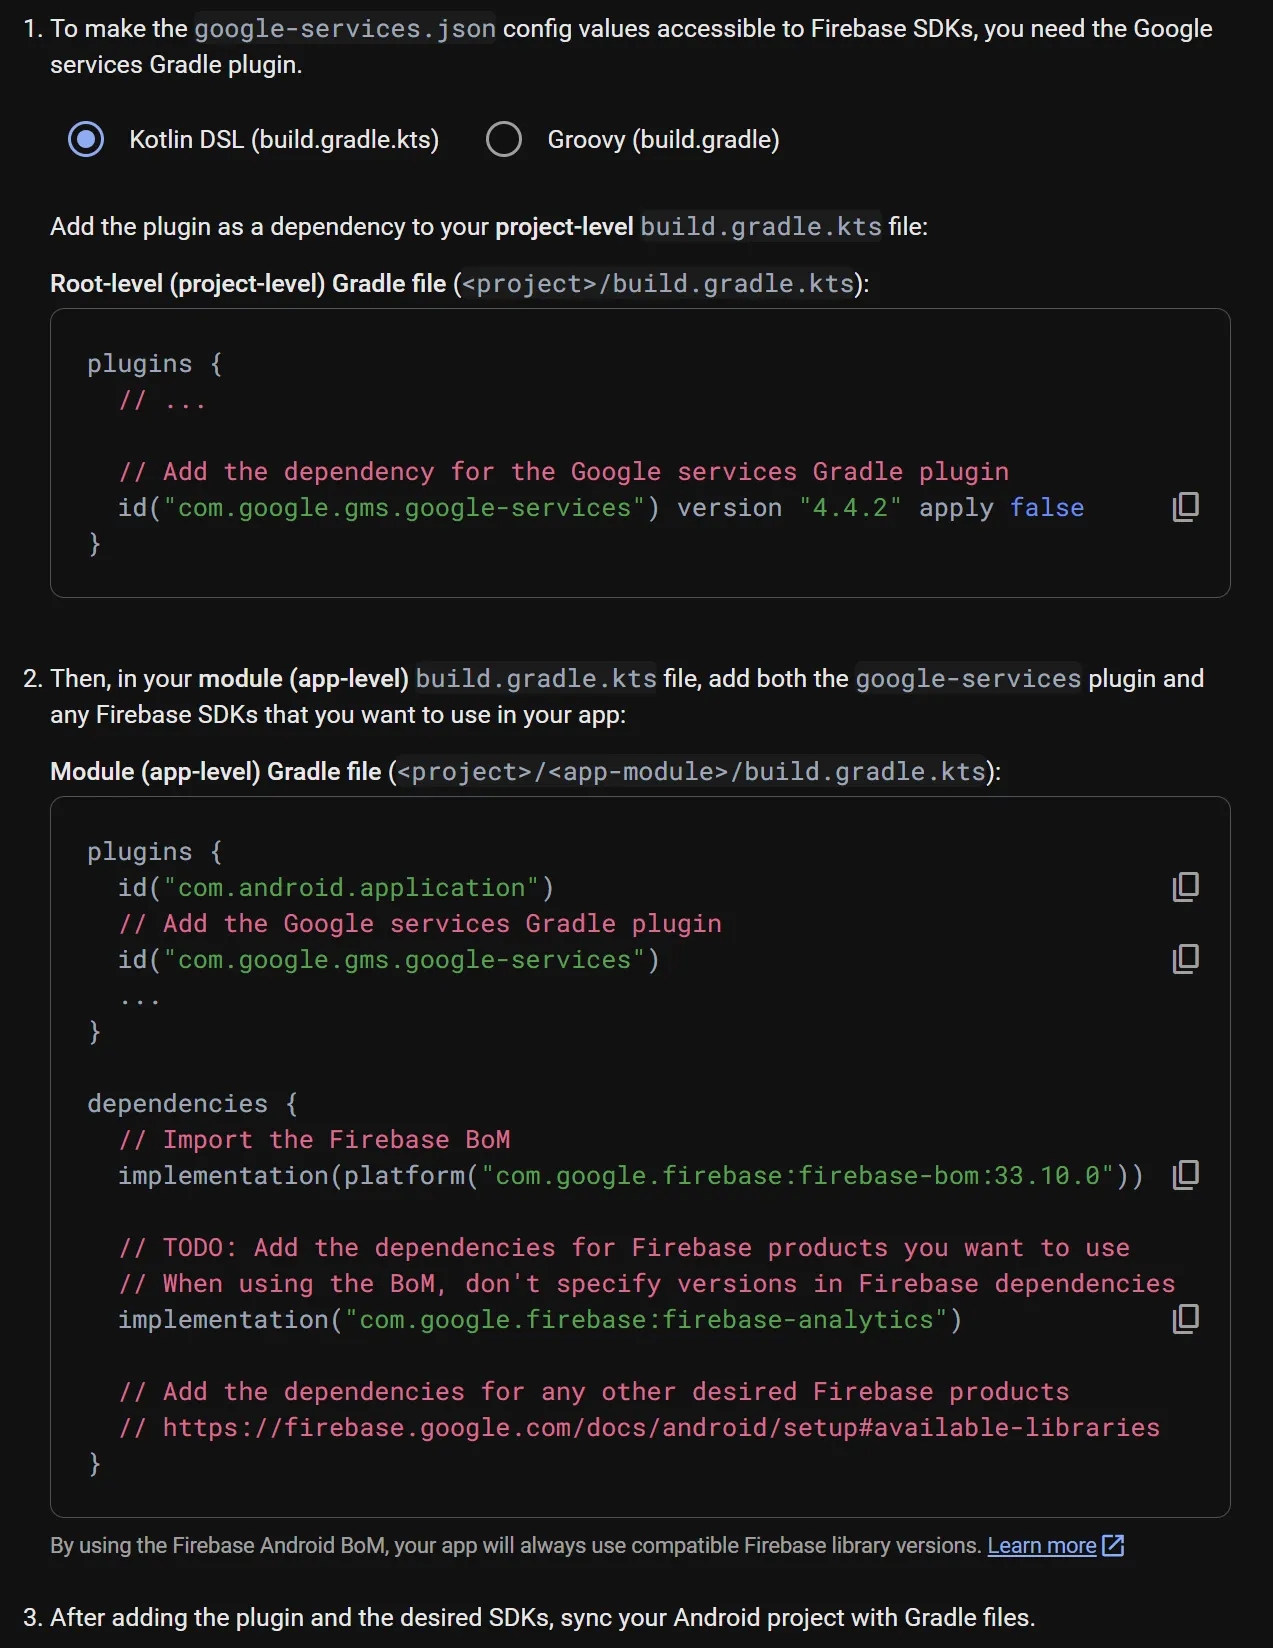
- The first thing to do is add the Google services plugin to your project-level
build.gradle.ktsfile as a dependency. Without this plugin, the Firebase SDK won’t be able to read the configuration from thegoogle-services.jsonfile you just added — and analytics won’t work. Just to clarify, this file is already in your project; you only need to locate it and make the necessary changes.
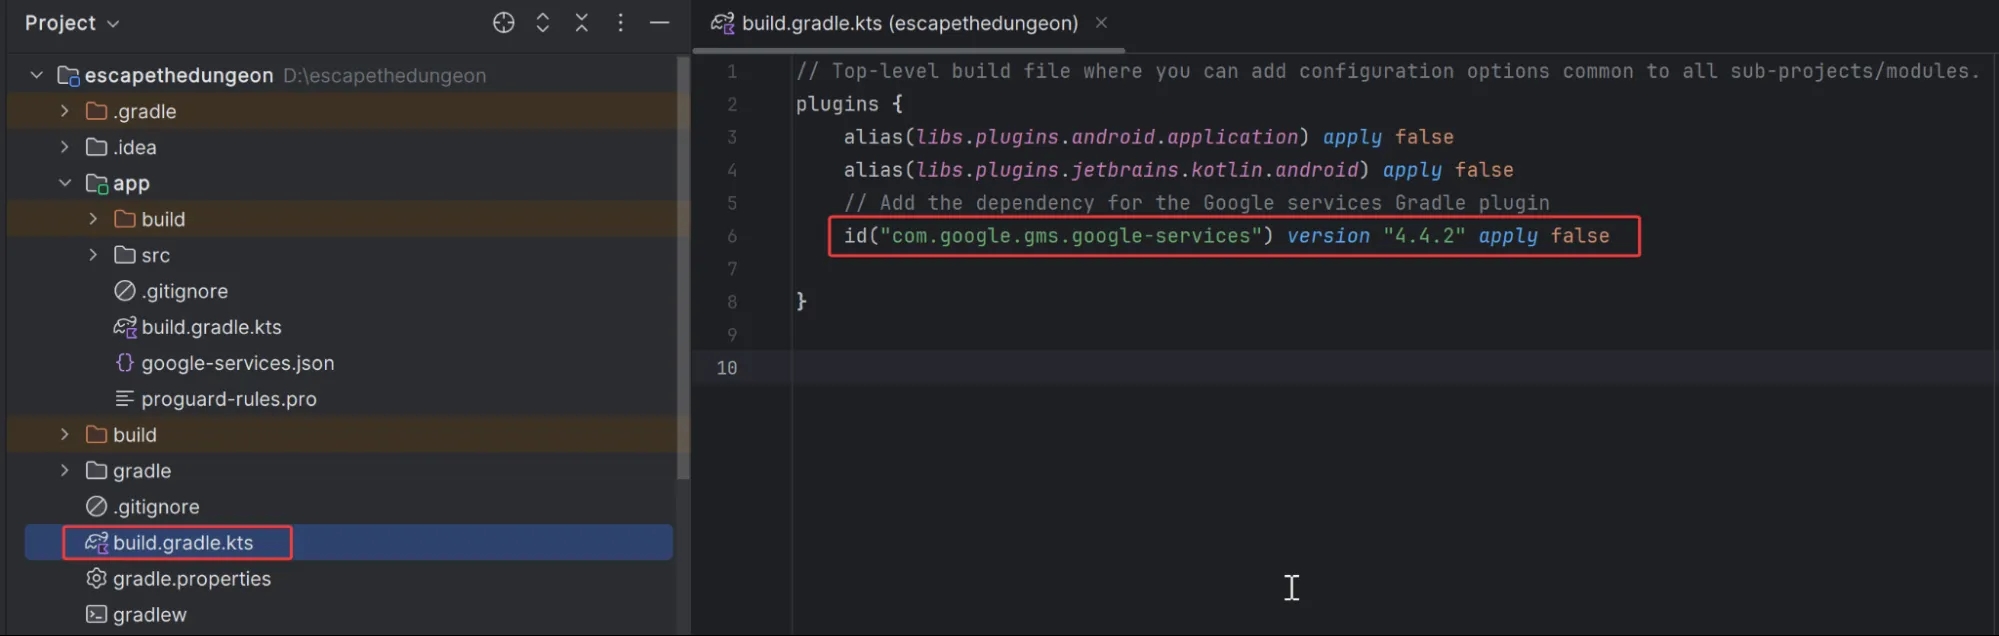
Note: At the end of the plugin declaration, you’ll see apply false. This tells Gradle not to apply the plugin globally — since not all modules may require Firebase. Instead, we’ll apply it selectively within the app/build.gradle (the module-level file). That’s exactly what we’ll do next.

You may notice in my screenshot that the line id("com.android.application") — which Firebase’s official documentation suggests adding — is missing. That’s because this project uses centralized version management. In my case, the equivalent connection is made using this line alias(libs.plugins.android.application). Depending on your project’s setup, either option is valid.
Next, we need to include the specific Firebase SDKs that we want to use in the app.
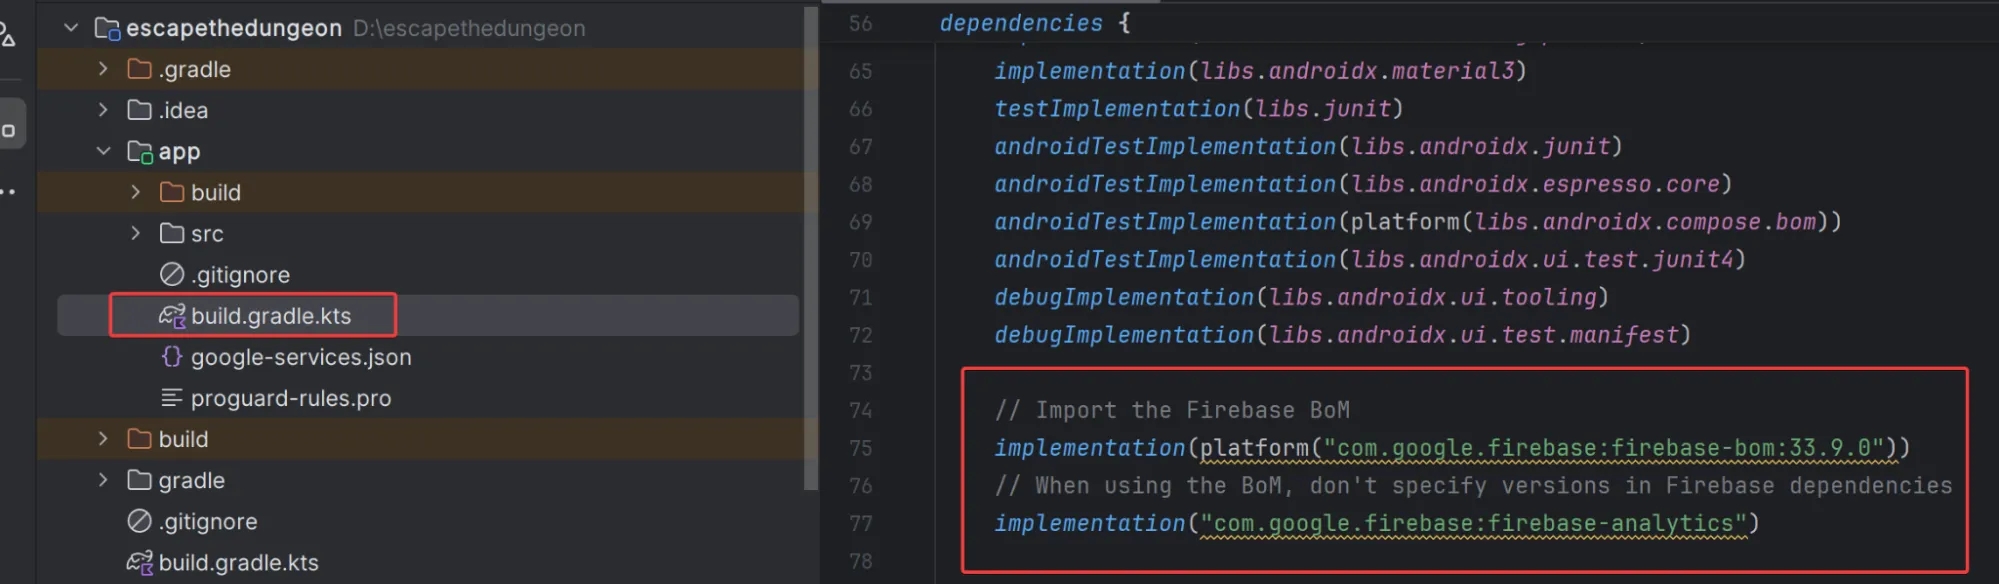
As you’ll see in my example, I first add the Firebase Android BoM (Bill of Materials). The BoM is a dependency management mechanism that automatically pulls in compatible versions of all Firebase libraries — so you don’t have to manually manage each version. Firebase ensures that everything defined under the same BoM version will work together.
Then, I include the Firebase Analytics SDK. Thanks to BoM, the version is determined automatically, so there’s no need to specify it manually.
Once all that’s done, you’ll need to sync your Android project with Gradle — just click Sync Now when the blue banner appears in Android Studio and wait a few moments.

If everything went smoothly, you’ll see a confirmation that the sync was successful.

Congratulations! We’ve successfully added Firebase to the app. But as of now, it’s not collecting any data yet. Let’s fix that next.
Connecting Basic Analytics for Your Android Mobile App
When working with websites, we typically operate within the concept of a web page. In mobile apps, however, this concept is replaced by screens. Of course, it’s much easier to imagine a single-page website than a single-screen app, but for the sake of simplicity, I’ll use that comparison moving forward.
To get Firebase Analytics to start tracking your users, the first step is to declare a com.google.firebase.analytics.FirebaseAnalytics object at the top of your Activity. To do this, add the following line of code:
import com.google.firebase.analytics.FirebaseAnalyticsRoughly speaking, each Activity represents a separate screen in your app. Drawing a parallel with websites, you can think of an Activity as the equivalent of a web page. It’s not a perfect comparison, but it works well for basic understanding. (And if you want a deeper dive into the differences, I highly recommend this resource.)
Start by declaring a variable for Firebase Analytics. Use the following line of code:
private lateinit var firebaseAnalytics: FirebaseAnalyticsThen, initialize Firebase Analytics in the onCreate() method like this:
firebaseAnalytics = FirebaseAnalytics.getInstance(this)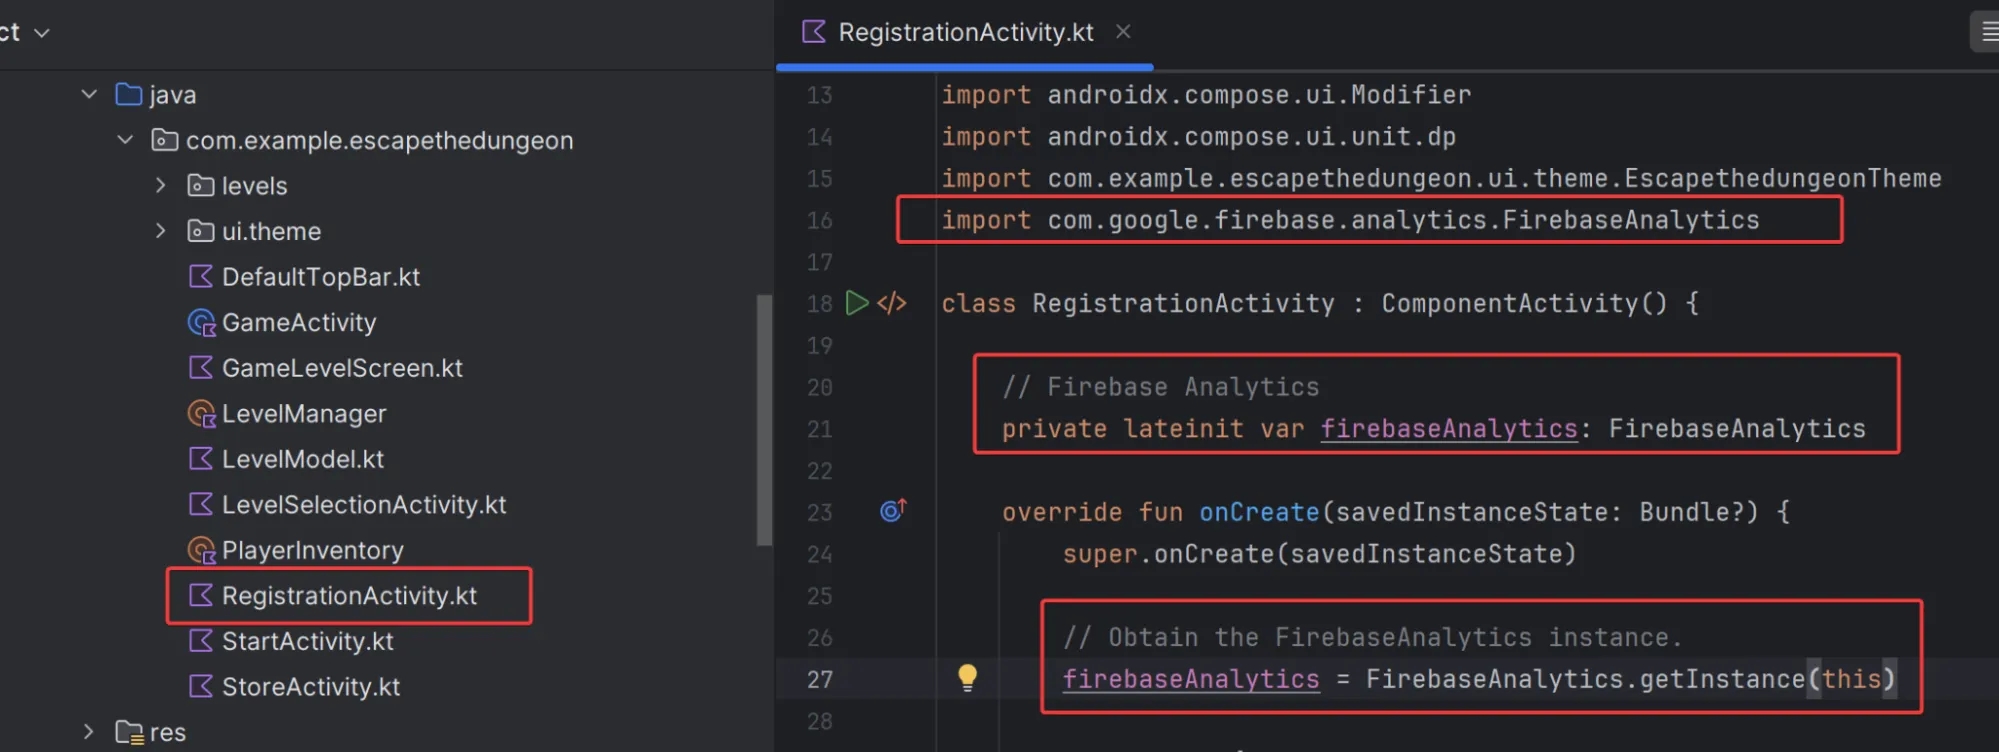
The onCreate() method is the very first method in the activity lifecycle — it runs when the activity is created. So, by initializing Firebase Analytics in onCreate(), we’re essentially adding tracking code at the equivalent of a webpage’s initial load.
You can’t initialize FirebaseAnalytics at the point of variable declaration because it requires a Context (such as access to the current Activity). That’s why we use lateinit — it lets us declare the variable first and then initialize it later in onCreate().
That’s it! Another step is complete. The code has been added — now it’s time to test everything.
How to Create a Virtual Device in Android Studio to Test Firebase Analytics Integration
The easiest way to verify your setup is to create a virtual device. Here’s how to do it:
- Open Device Manager in Android Studio.
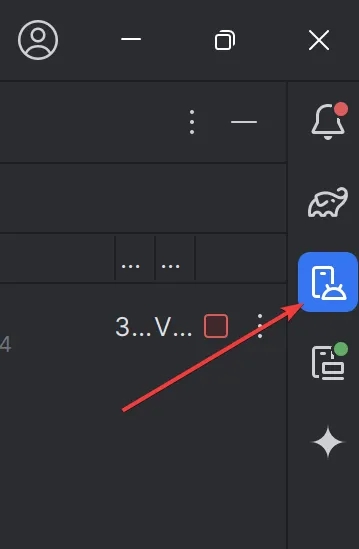
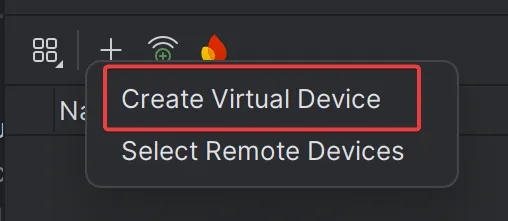
2. Click the “+” icon and select Create Virtual Device.
3. Choose a device you like — preferably one with Play Store enabled (check the Play column). This will be useful later when working with app analytics (not covered in this article). Also, make sure the device supports your app.
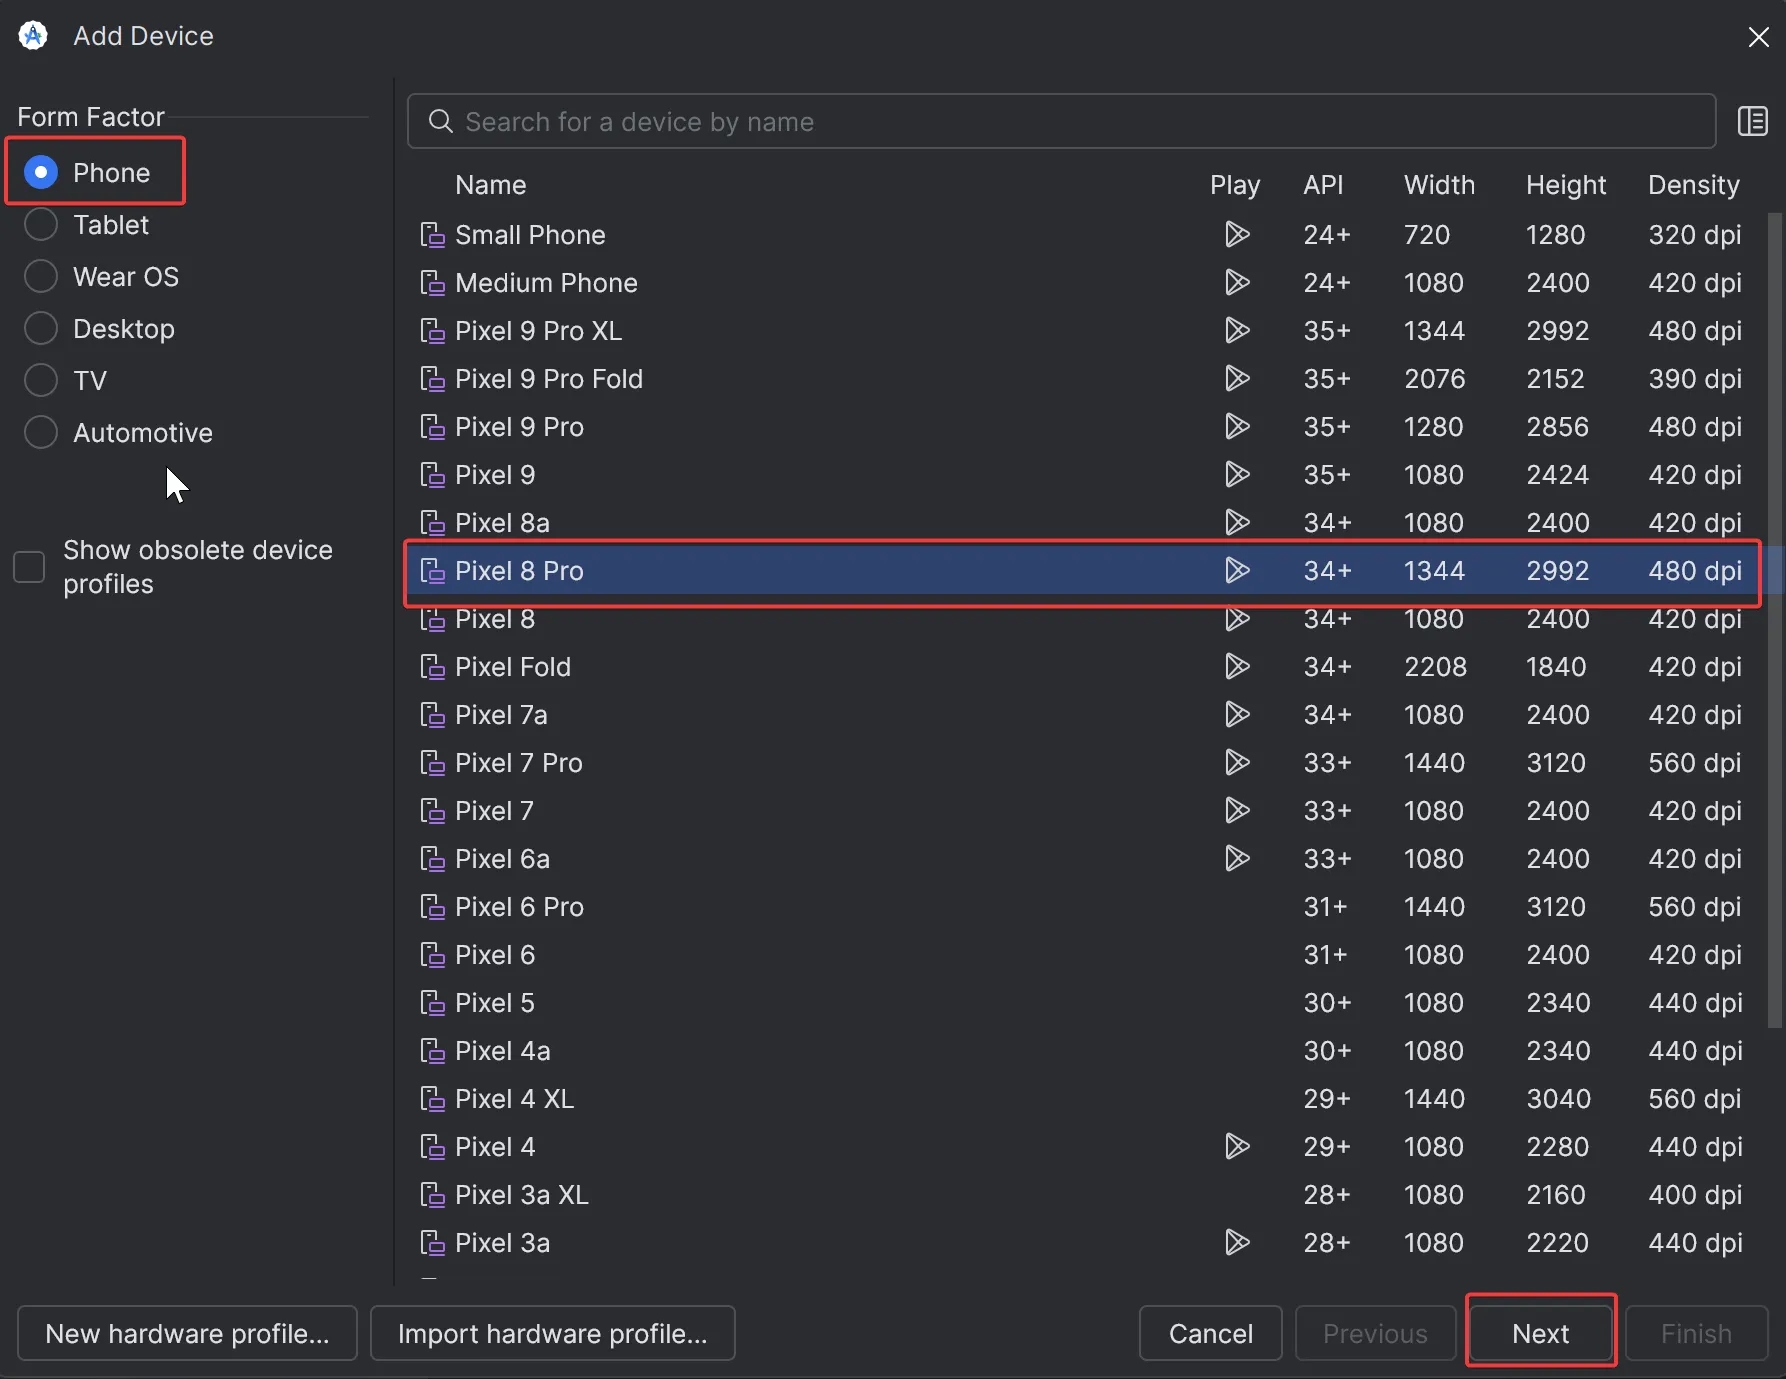
4. Set the necessary configuration options for your virtual device. If you’re unsure what to change, just leave everything as is.
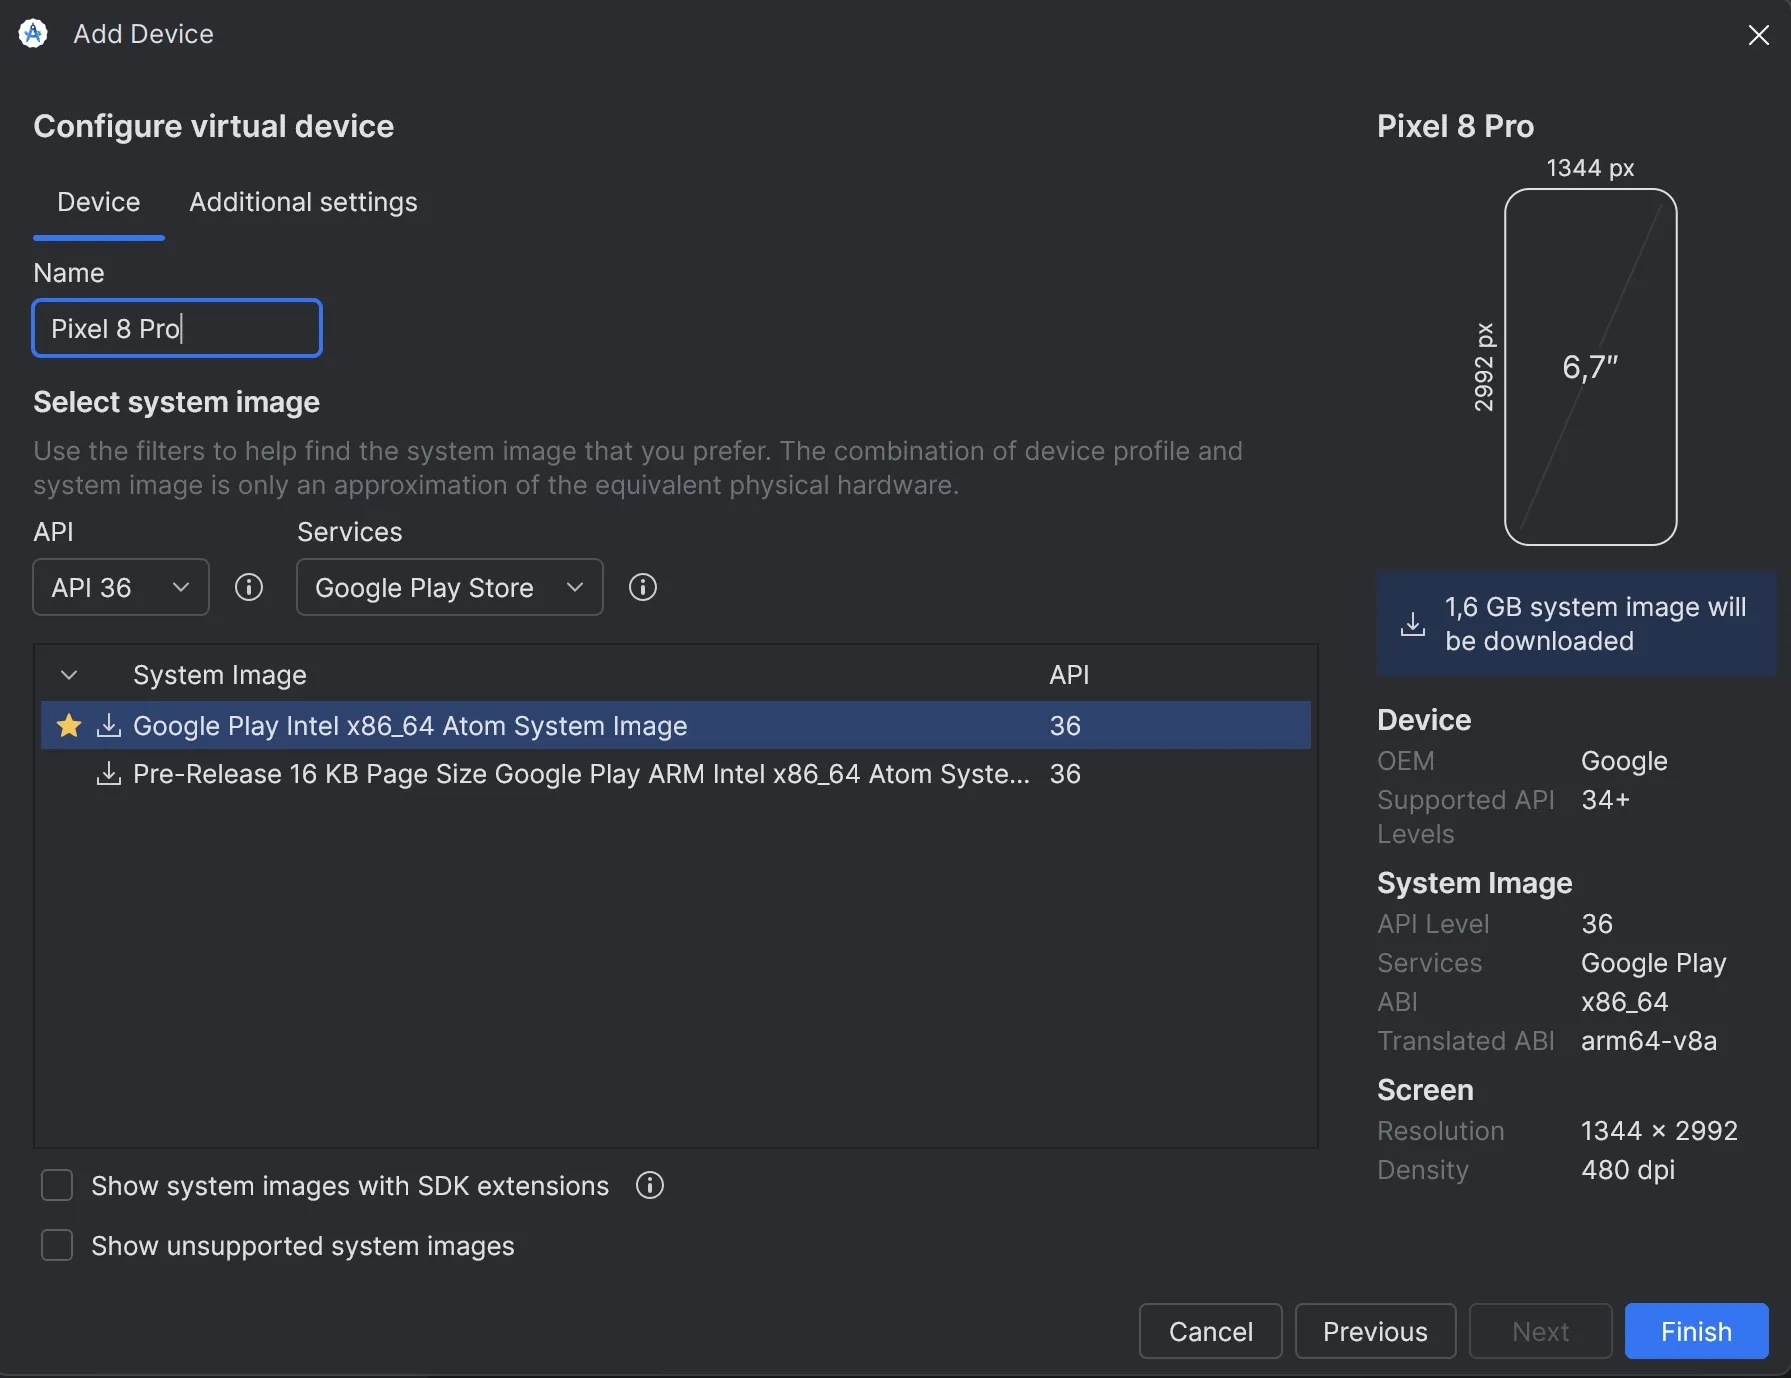
5. Click Finish. At this point, Firebase might start downloading additional files — that’s perfectly normal. Just give it a moment.
If everything goes well, you’ll see your newly created device listed.
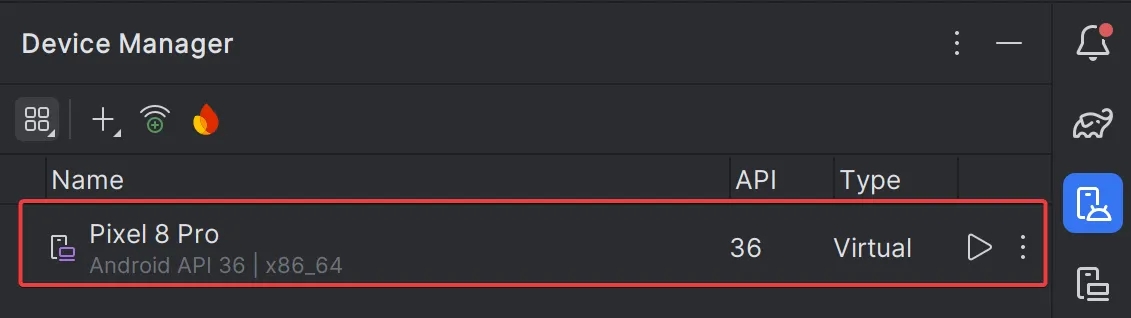
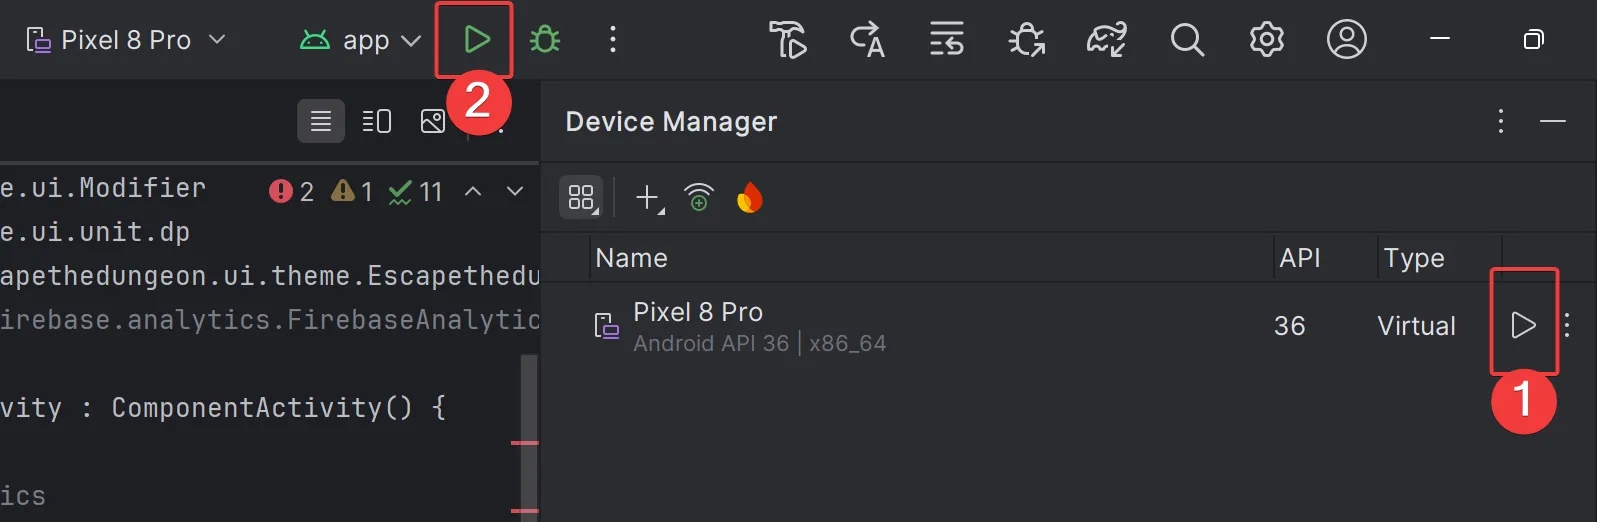
Now you have two options:
- Option 1: Click button 1 (in the screenshot below) to simply launch your virtual device. Once it’s running, click button 2 to install and launch your app on that device.
- Option 2: Click button 2 directly — this will automatically launch the virtual device and install your app in one go.
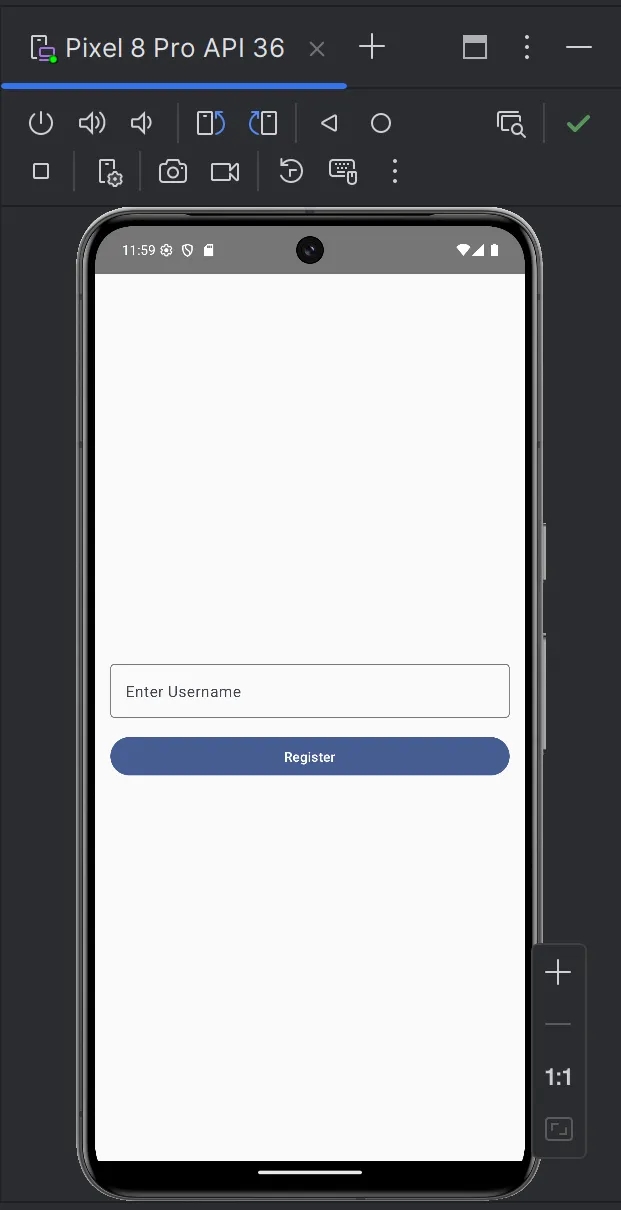
If everything is working properly, you’ll see your Android device with the app running on it.
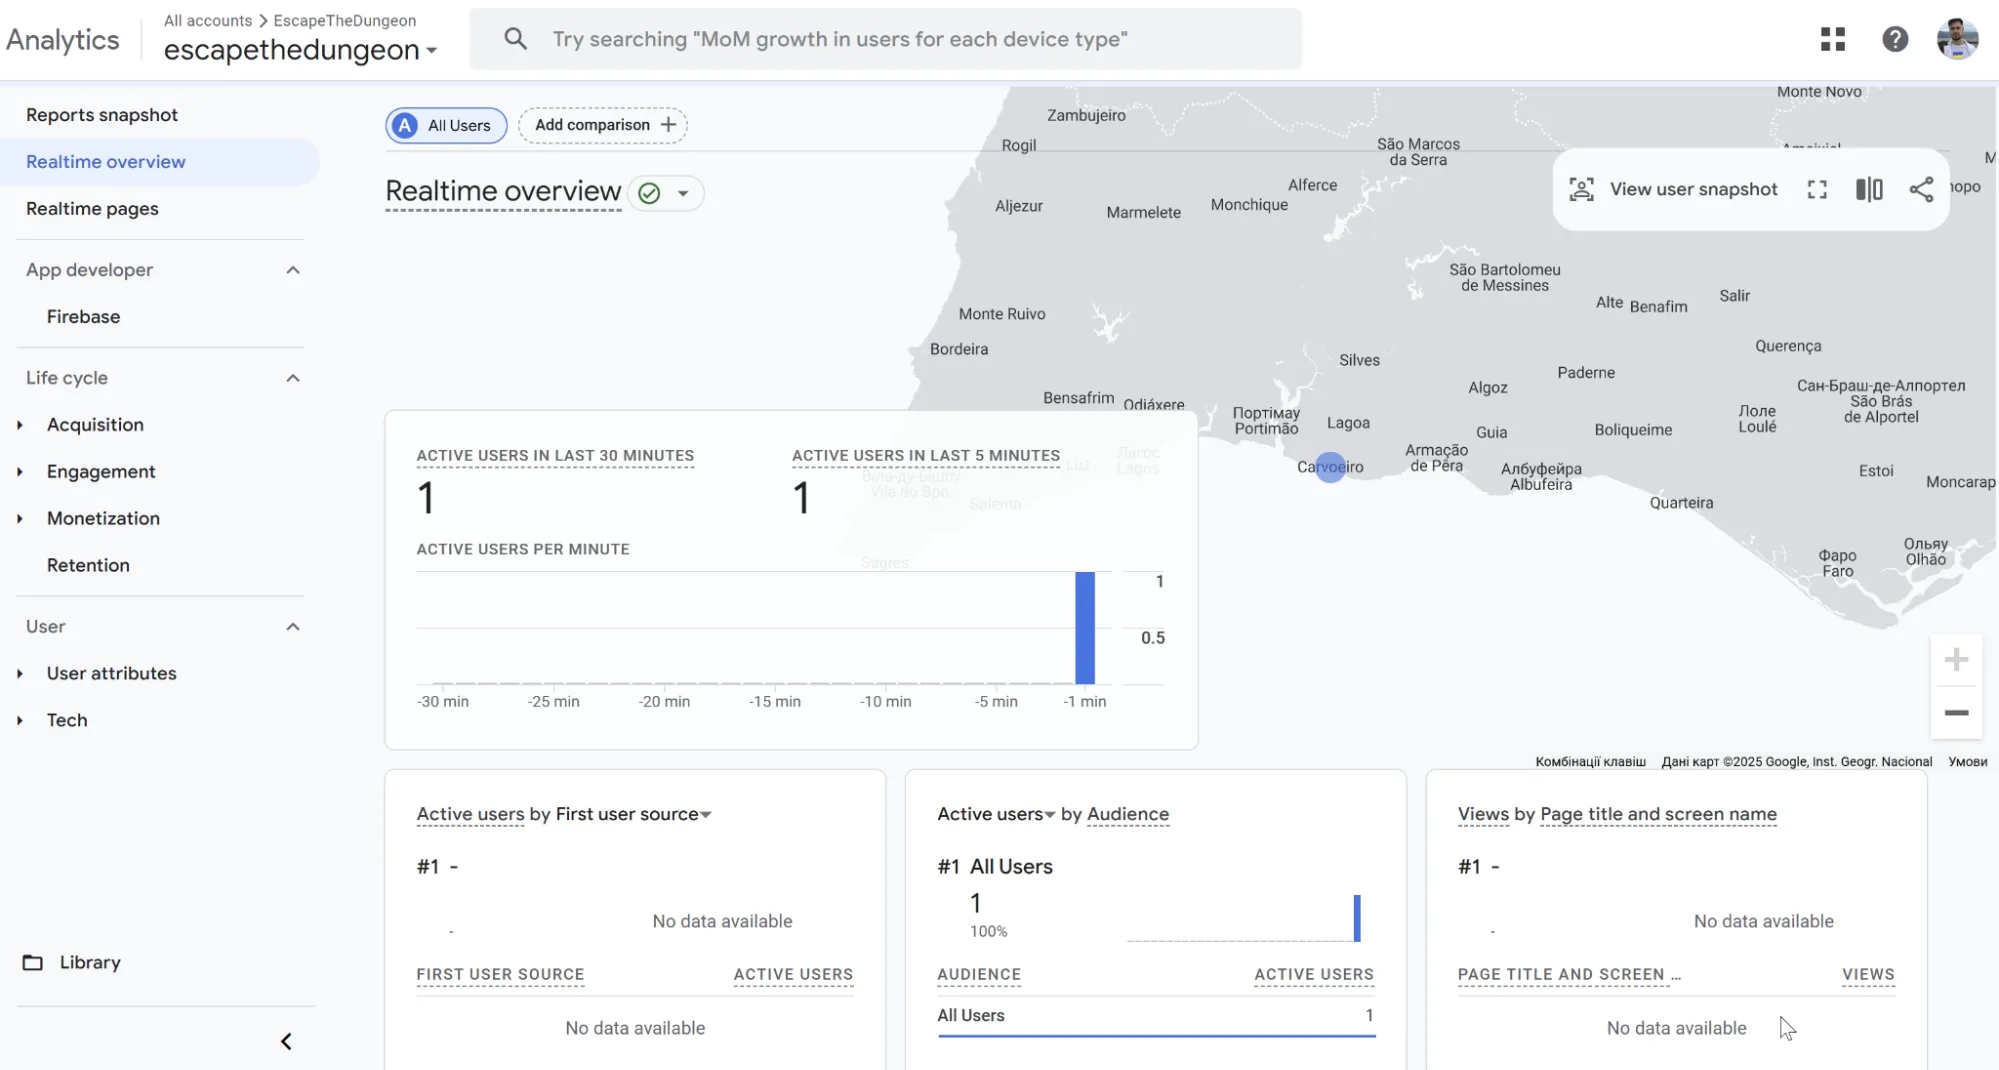
Now, open Google Analytics 4 and go to the Realtime Overview report. You should see one active user.
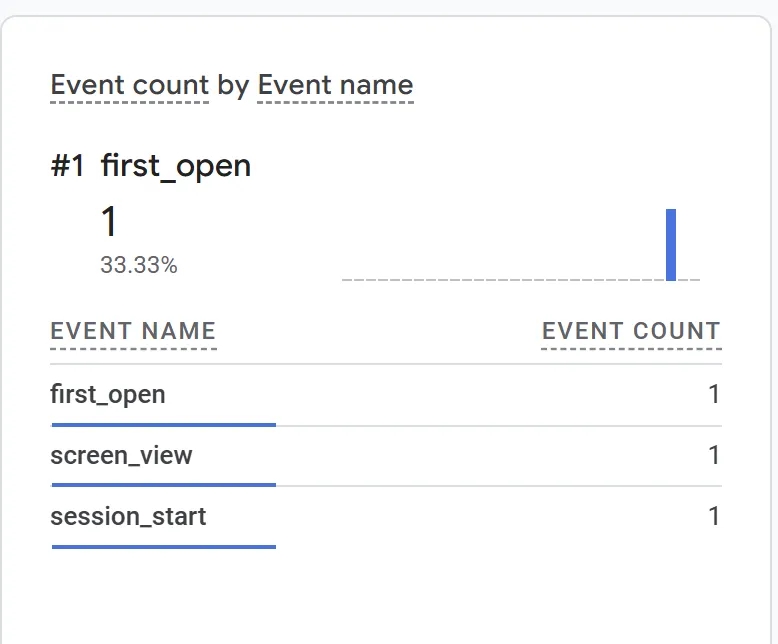
And there, you should see the first three events:
first_opensession_startscreen_view
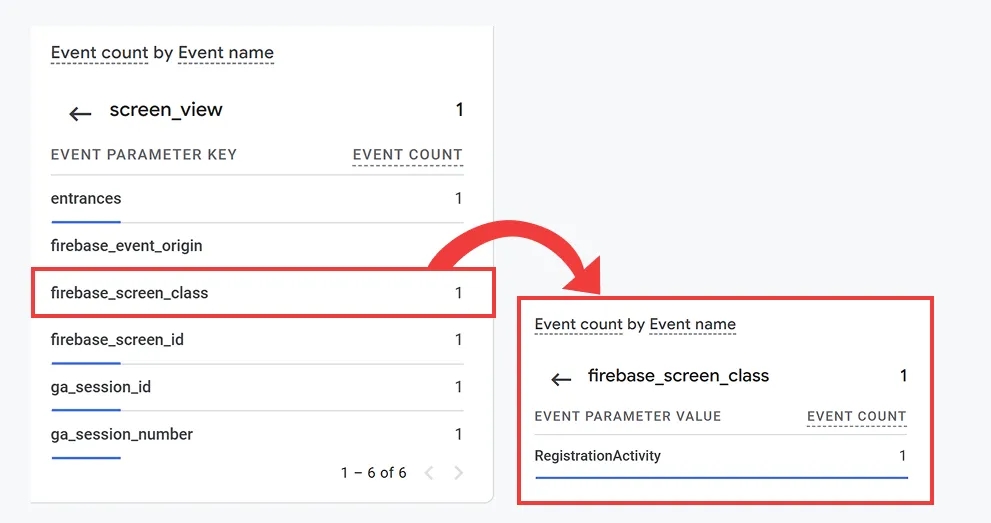
Just like a webpage has a title, a screen in your app can have one too — and you can track it without any additional configuration.
But let’s not get too deep into events just yet — we’ll cover that in the next article.
Now, let’s move on to something else. As you probably know, realtime analytics can sometimes glitch, and many of us are used to checking event delivery via the developer console in a browser. Well, Android Studio has a similar tool — let’s explore it next.
How to View Firebase Events in the Firebase Console
First, let’s agree on terminology — in this context, when we say Firebase console, what we really mean is Logcat. To see Firebase Analytics event data in Logcat, you’ll need to run a few adb commands in the terminal.
Here’s what you should enter:
adb shell setprop log.tag.FA VERBOSE // Enables verbose logging for the FA (Firebase Analytics) tag.
adb shell setprop log.tag.FA-SVC VERBOSE // Enables verbose logging for the FA-SVC tag (the service layer of Firebase Analytics)
adb logcat -v time -s FA FA-SVC // Starts Logcat with filters: -v time — adds timestamps to each log line, -s FA FA-SVC — shows only messages from Firebase Analytics tags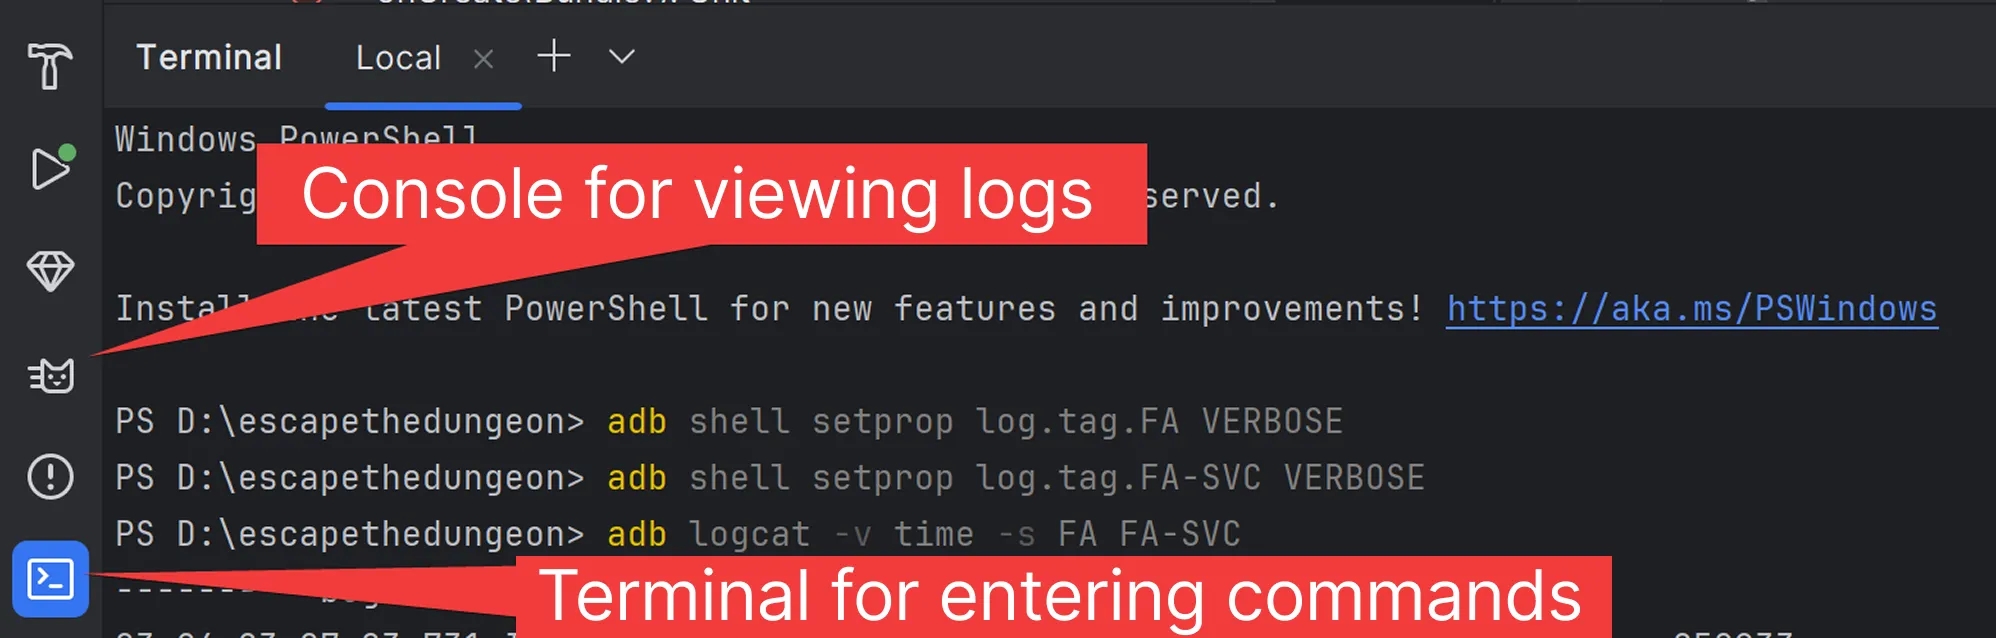
Once you've run these commands in the terminal, restart your app.
If you don’t like how the terminal output looks, you can switch to the Logcat panel in Android Studio. Go to Logcat, and locate the event logs there. For easier navigation, apply a filter by the FA-SVC tag.

Even if you don’t see your event show up in real-time within GA4, the fact that it appears in the logs is already enough to confirm that everything is working correctly.
How to Enable Debug Mode for Firebase Analytics in Android Studio
Viewing logs in the console is great — but naturally, we don’t want those test logs polluting our production analytics. That’s why it’s a good idea to send events with a special _dbg = 1 parameter. This marks the events as debug-only, making them easy to filter out from reports later on.
To enable Firebase Analytics debug mode on your Android device, run the following command in your terminal:
adb shell setprop debug.firebase.analytics.app PACKAGE_NAMEIn my case, it looks like this:
adb shell setprop debug.firebase.analytics.app com.example.escapethedungeonOnce this is set, all events you trigger will include the _dbg = 1 parameter.
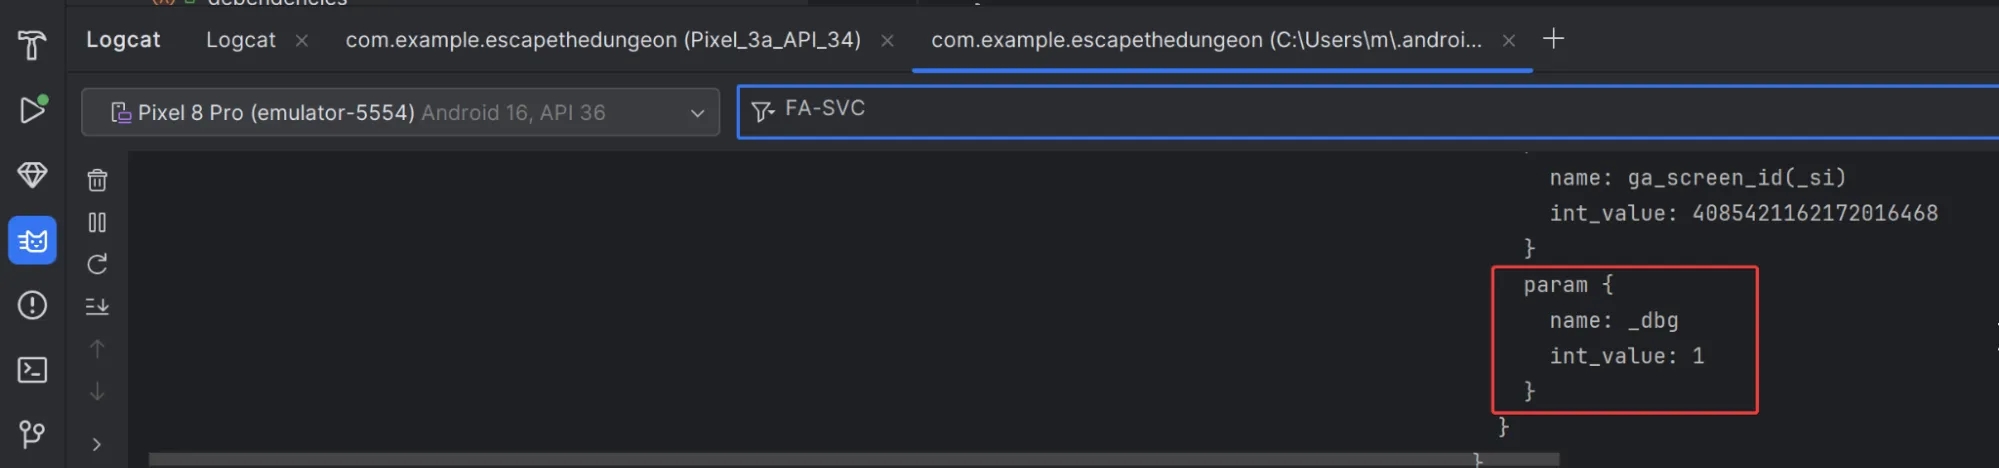
These debug events will appear in DebugView within the Google Analytics 4 interface.
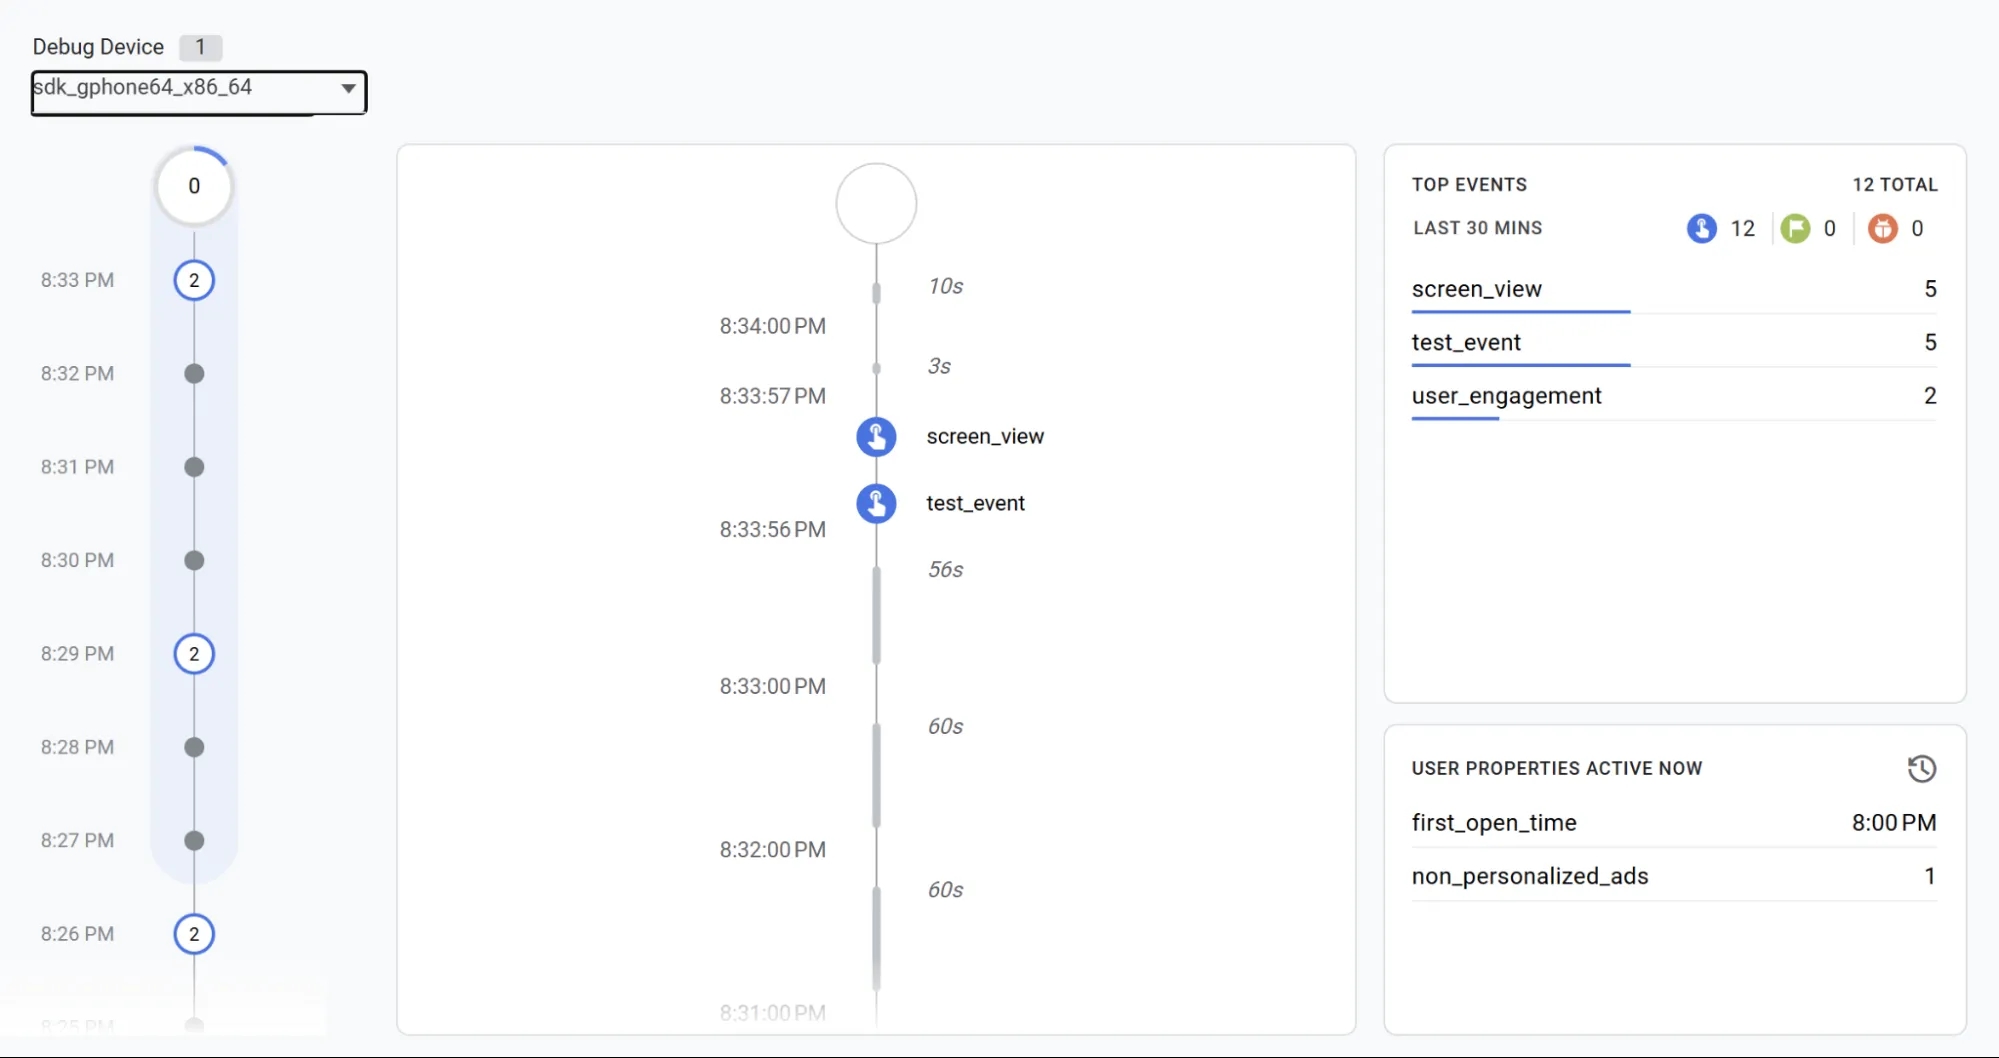
I get it — parsing raw logs isn’t always fun. But keep in mind that DebugView can sometimes be buggy, so the best practice is to enable debug mode (to avoid sending test data to your main reports) but continue verifying events through Logcat.
To turn off debug mode when you're done, run this command:
adb shell setprop debug.firebase.analytics.app .noneHow to Connect Raw Data Export from Google Analytics 4 (Including Mobile App Data) to Google BigQuery
When it comes to comprehensive website analytics, and even debugging with real data, it’s hard to imagine doing that without using BigQuery. So, the last thing we’ll cover today is setting up data export and streaming from Google Analytics 4 to Google BigQuery.
To set this up, follow these steps:
- Open GA4, then go to Admin > Product links > Product links.
- Follow the instructions in the link to establish the connection.
Make sure to enable export for the mobile app stream.

For a better understanding of the setup process, you can also enable streaming.

Note: Activating streaming will lead to the use of paid features from Google Cloud Platform. If you're unsure, it’s better not to enable it just yet.
Instead of a Conclusion
As I mentioned earlier, this article is just the beginning. Consider it the foundational starting point for a deep dive into mobile analytics. Therefore, there will be no final conclusion — we haven’t even started the full journey yet!
If you found this helpful and want more, please let me know in the comments. Your feedback will motivate me to work faster on new material. Since this is my first time writing about mobile analytics, I’m especially interested in hearing how well the material was understood.
No need to mention that the article is very technical — to properly collect data and understand the nuances of the process, you need a deep understanding of how everything works.
I’ll see you in the next articles in this series ;)
FAQ
How do I connect an existing Firebase project to Google Analytics 4?
You can do this from the Firebase settings, under the Integrations section.
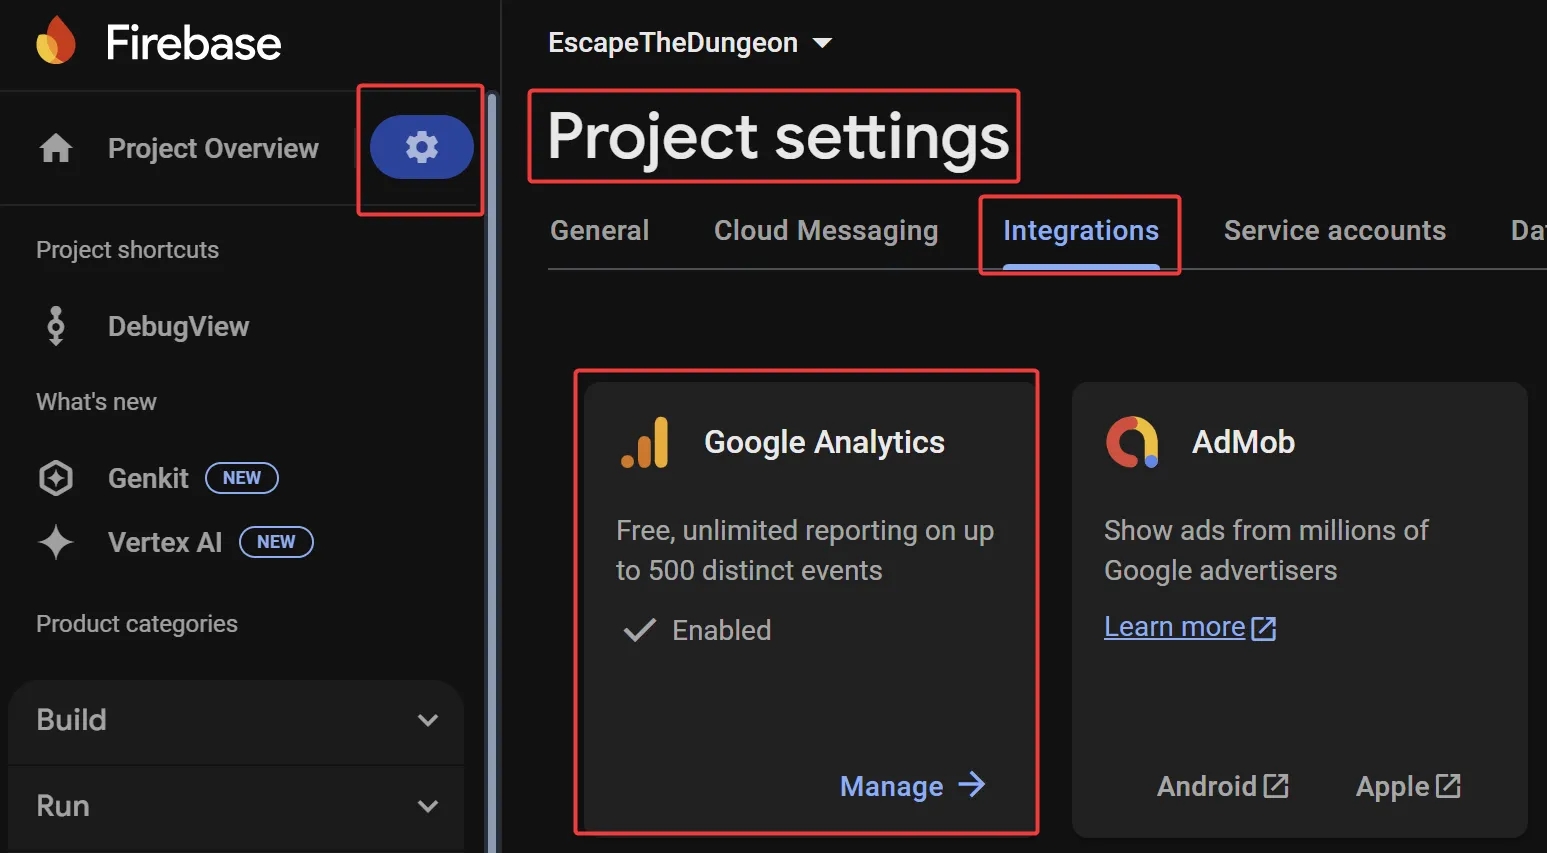
Note: This integration can only be configured from the Firebase side. It’s not possible to set up the connection from within GA4.
Can I link my Firebase project to multiple GA4 properties?
Currently, this is not possible. The integration works on a 1:1 basis.
I have multiple apps. How should I structure my Firebase projects and GA4 accounts/properties?
If you have multiple apps — whether they’re entirely different apps or just platform-specific versions of the same app — it’s worth reviewing Firebase’s best practices for app variants. Here’s the link.
Here’s the short version:
- One app across multiple platforms = one Firebase project
For example, an e-commerce app with one version for iOS and another for Android should live within one Firebase project. - Different apps = separate Firebase projects
If it’s a completely different app, then create a separate Firebase project for it.
Also worth noting: Firebase recommends using a separate Firebase project for each environment (development, staging, production) in your development workflow.
Loading comments…