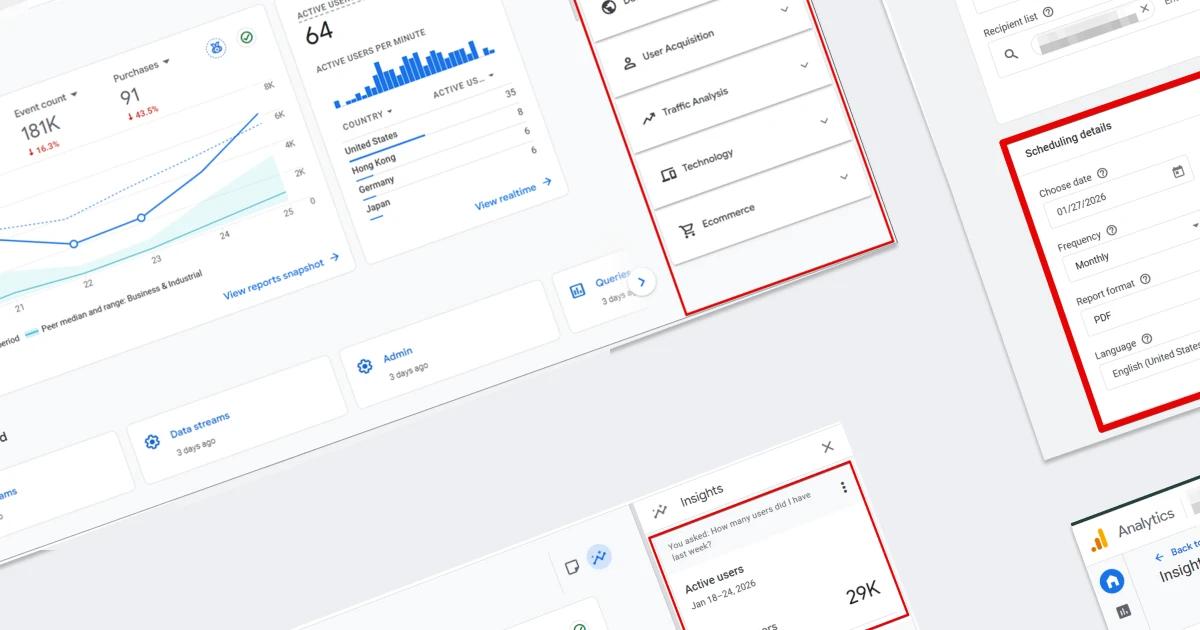

How often have you encountered the following situation: “You or your colleague open your GA4 property and see that transactions / registrations / {insert any other important action on your website} have stopped being tracked”? Everyone panics and tries to understand: what happened, when it happened, and how to fix it.
Personally, throughout my professional career, I’ve seen this happen quite often. A classic scenario — updates were rolled out to the registration page, analytics codes were accidentally removed along the way, and now we’re dealing with data loss. And it’s good if it’s noticed the next day. But there are cases when days go by before someone finally pays attention to it (yes, I understand that it’s good practice to notify the analyst before making website changes, but let’s be realistic: how often are you actually warned about this?!).
In today’s article, I’ll walk you through a solution that will help you react to such issues much faster. You’ll know about it within an hour. Here it is:
- What GA4 Insights is and why it matters
- Where to find Insights in the GA4 interface
- Custom GA4 Insights settings (How to set up email notifications)
- Sending an email notification when the GA4/GTM code is removed from the website
- Tracking issues with purchase tracking on the website
- Sending a notification if there was no revenue yesterday
- Instead of a conclusion
What GA4 Insights is and why it matters
GA4 Insights is a “quick access” tool that helps answer common questions that regularly arise in business and marketing: what’s happening with your audience, traffic, and key metrics. Google states that its strength lies in the fact that it doesn’t force you to build complex reports right away: first, you get a short answer, and only then — if needed — you can dive deeper into reports.
In my opinion, the part of the Insights functionality that focuses on data analysis itself is not really worth analysts’ attention and will be more interesting to business owners. If you belong to the latter — keep reading. If you’re in the first group — click here to jump straight to the section where, thanks to Insights, you can set up email notifications in case something goes wrong.
Where to find Insights in the GA4 interface
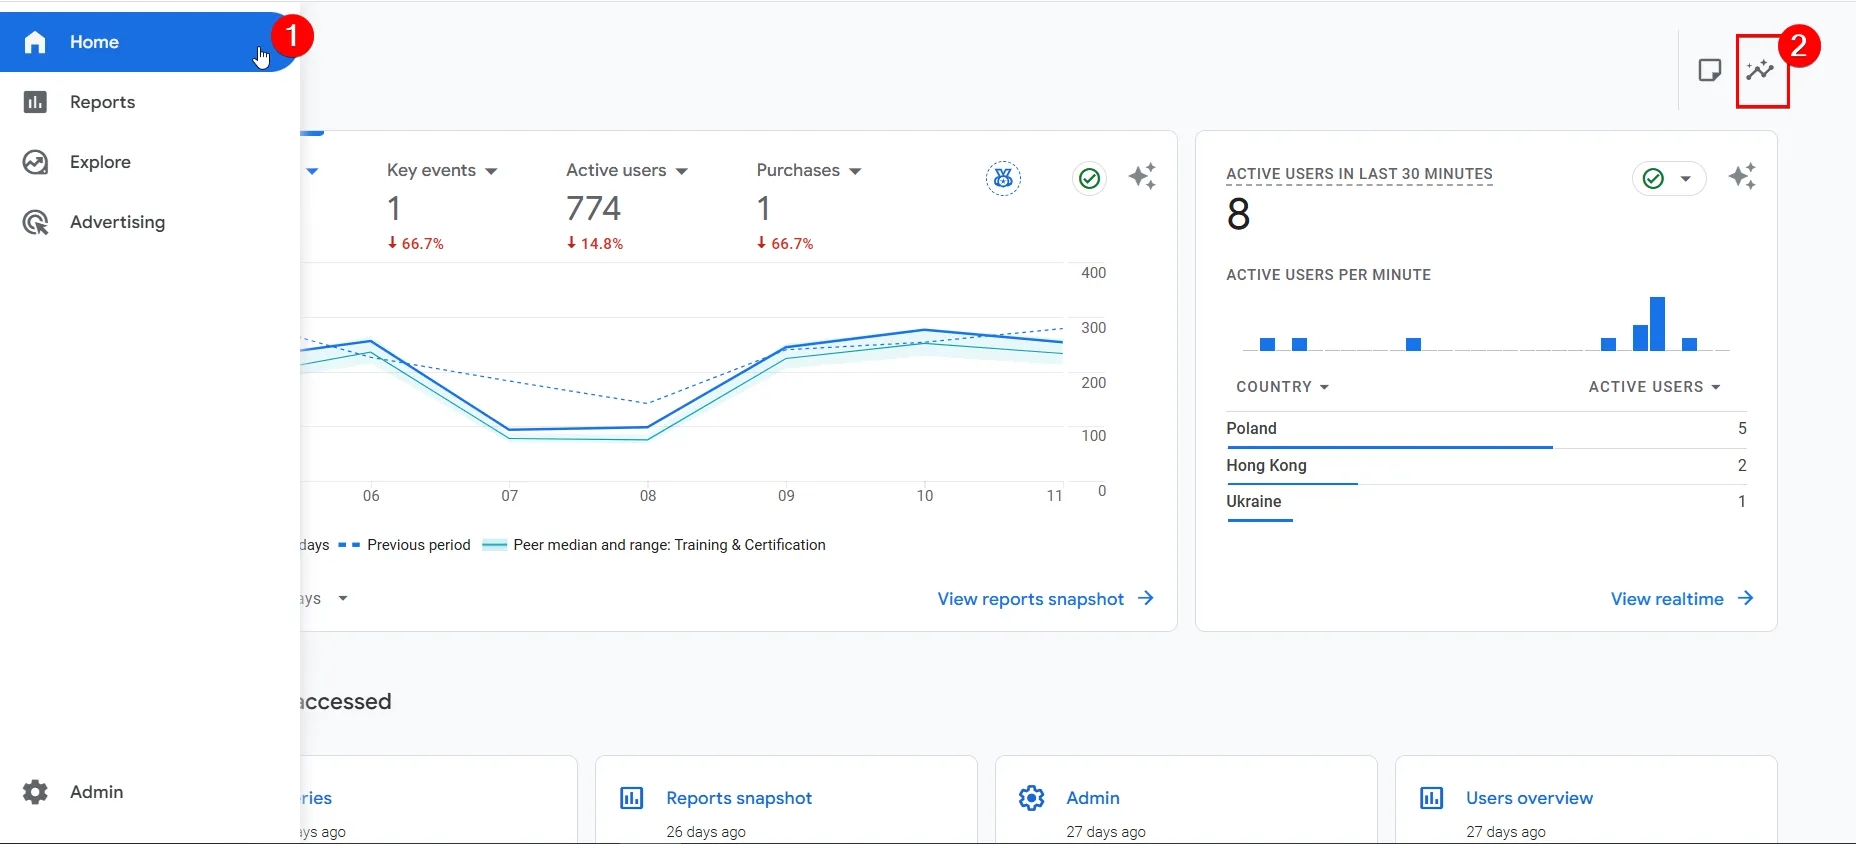
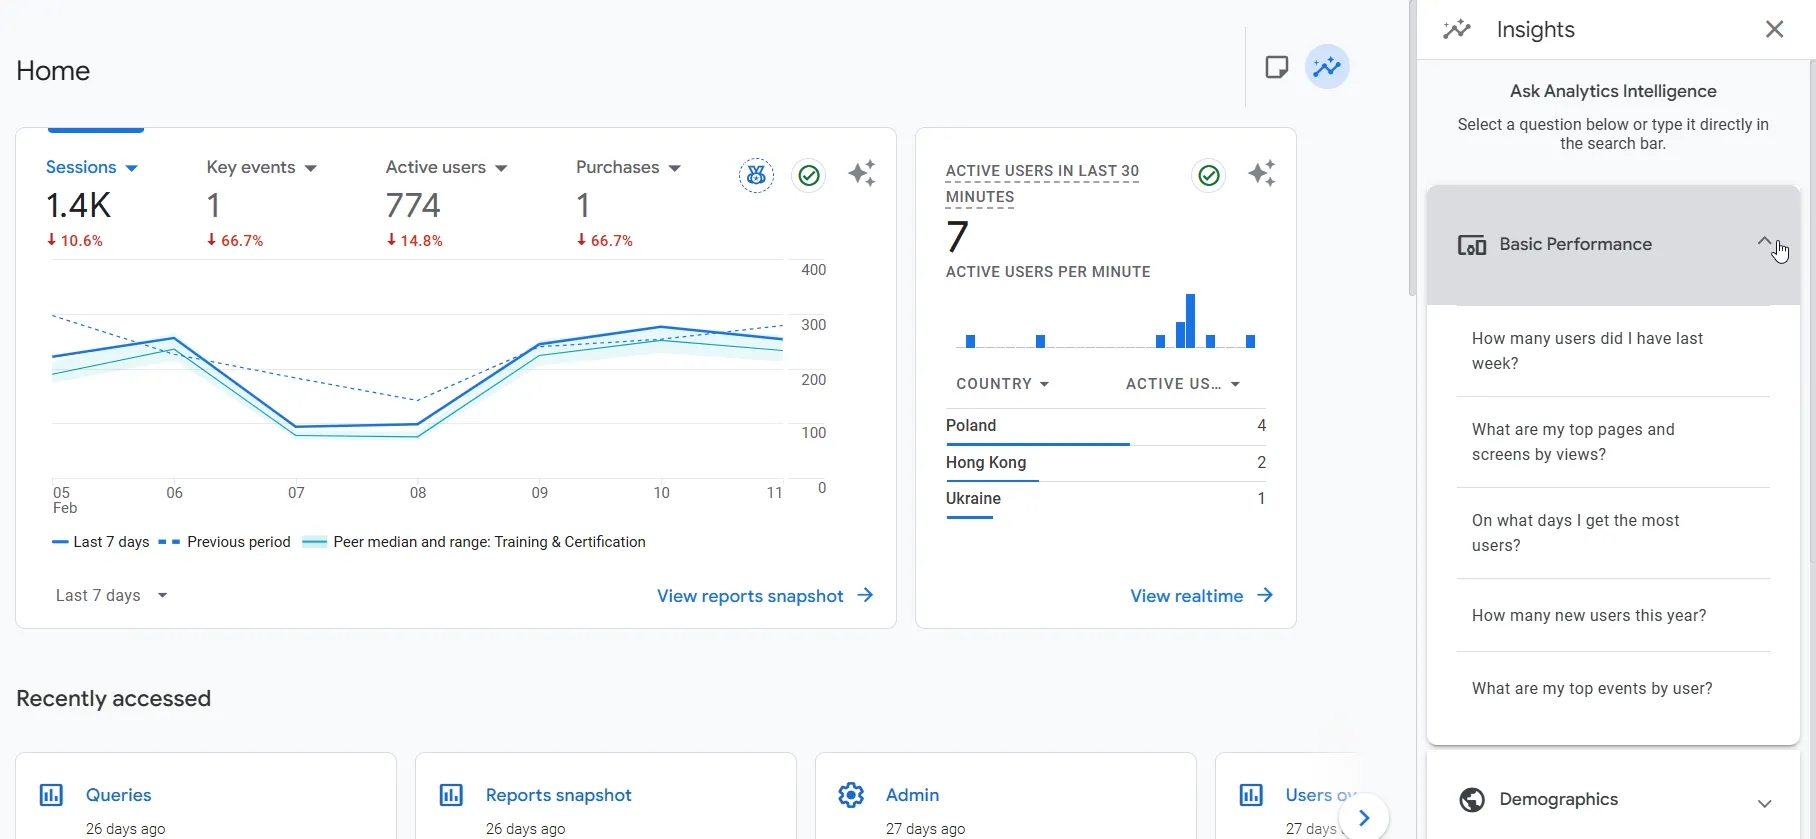
To use Insights in GA4, go to the main Home page and click the Insights icon.
After that, a panel will open where GA4 displays blocks with automatically suggested questions.
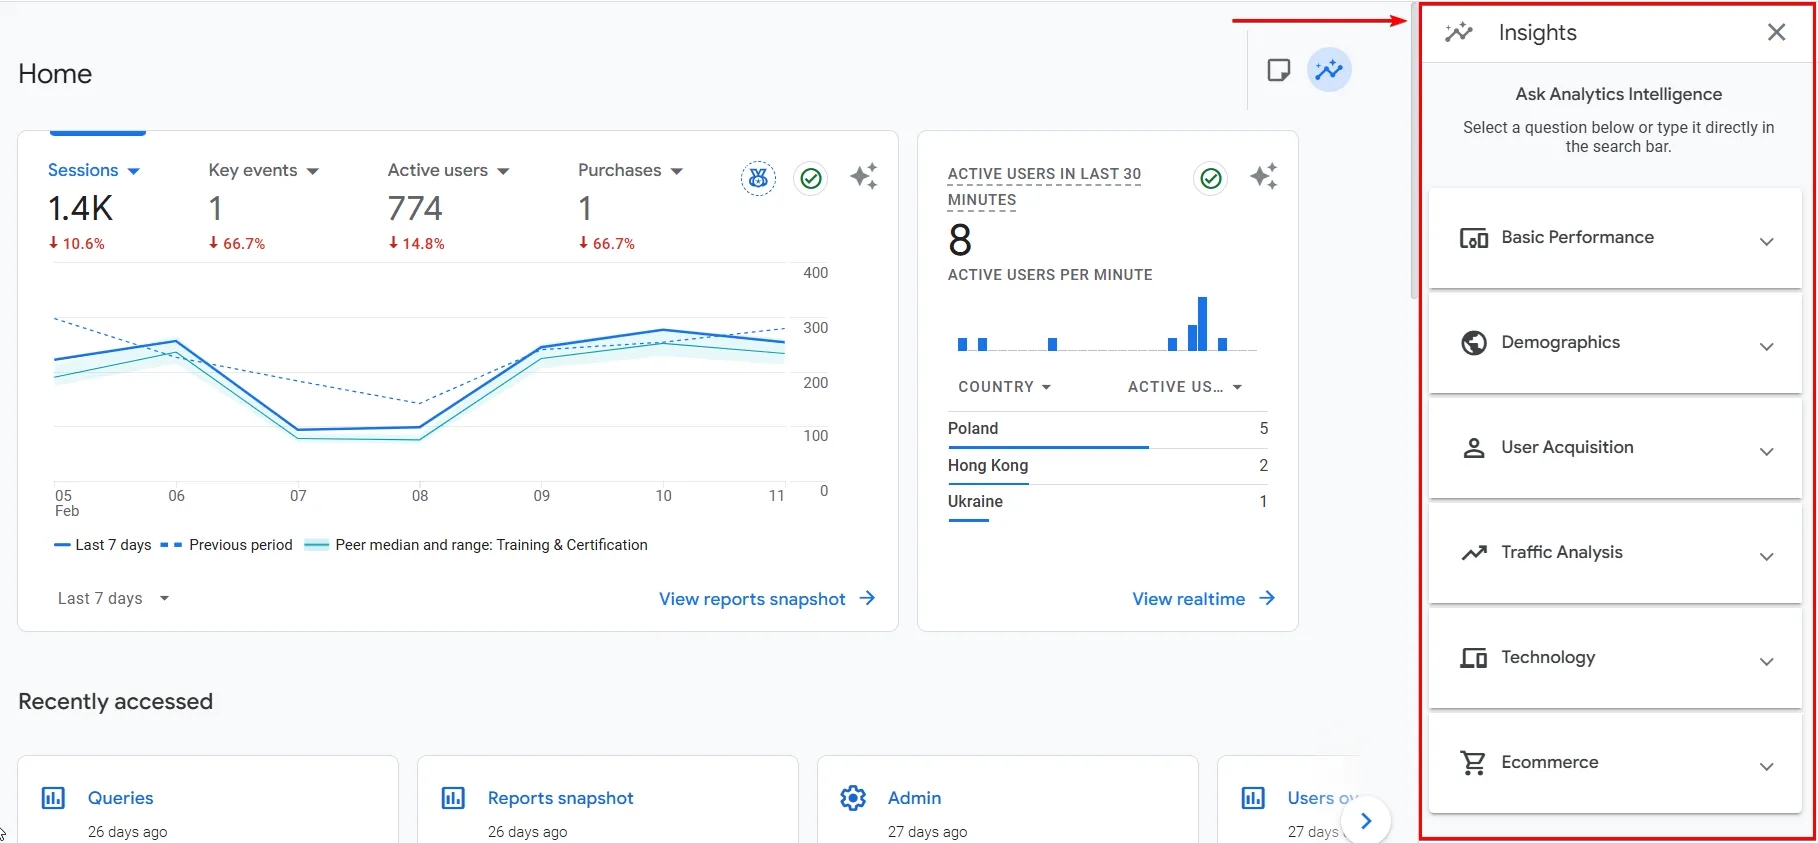
This looks like a set of “categories,” each containing specific questions. I wouldn’t say there’s much depth there, but you can find some basic answers.
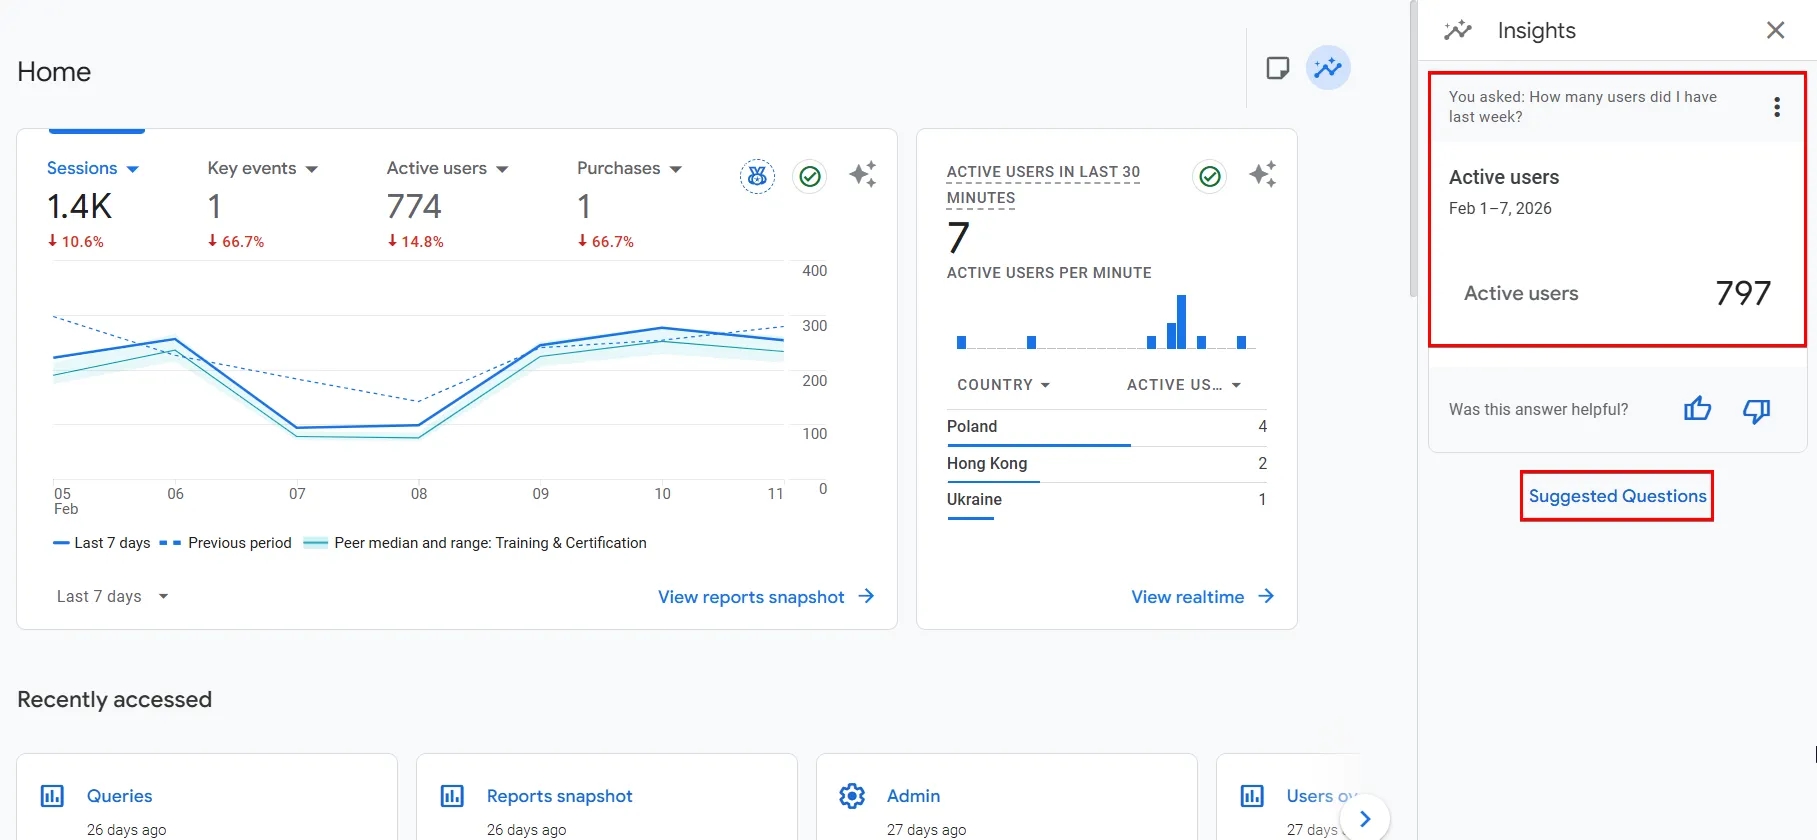
When you click on a question, you see an answer generated based on your data. To return to the list and choose another question, use the Suggested Questions button.
That’s it for the basic overview. Let’s move on to practical solutions.
Custom GA4 Insights settings (How to set up email notifications)
Insights in the form we discussed above are convenient if you want to see a very high-level overview and don’t know how to use the Reports section. But there’s also a second, much more interesting side to it: the ability to set up custom insights and enable email notifications about relevant changes.
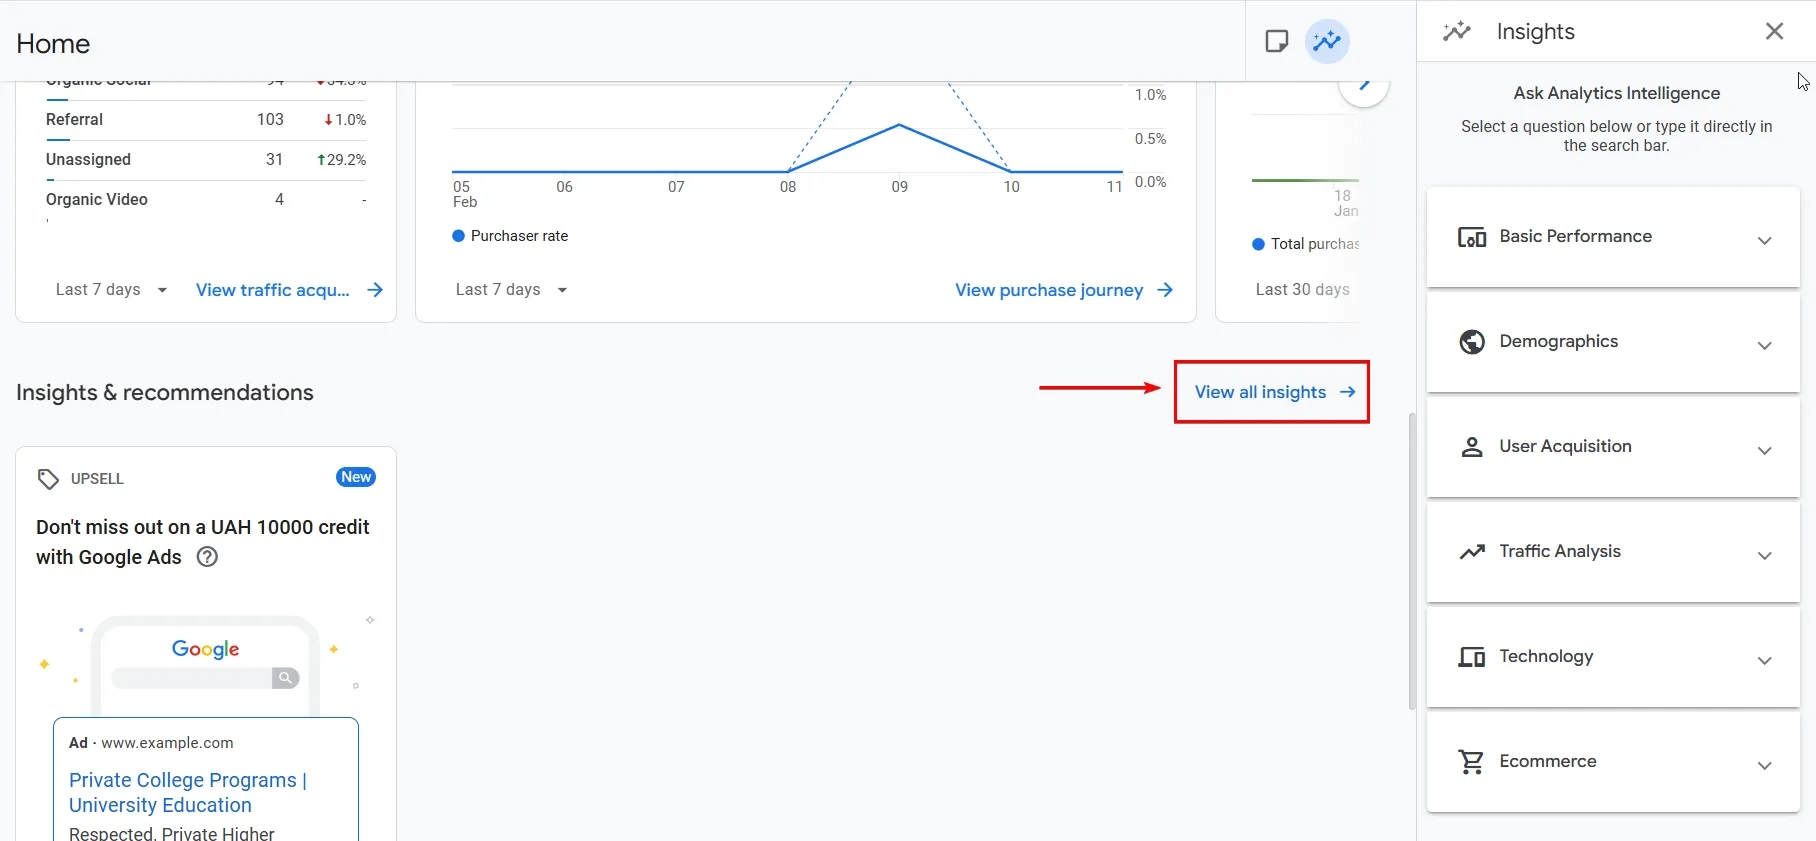
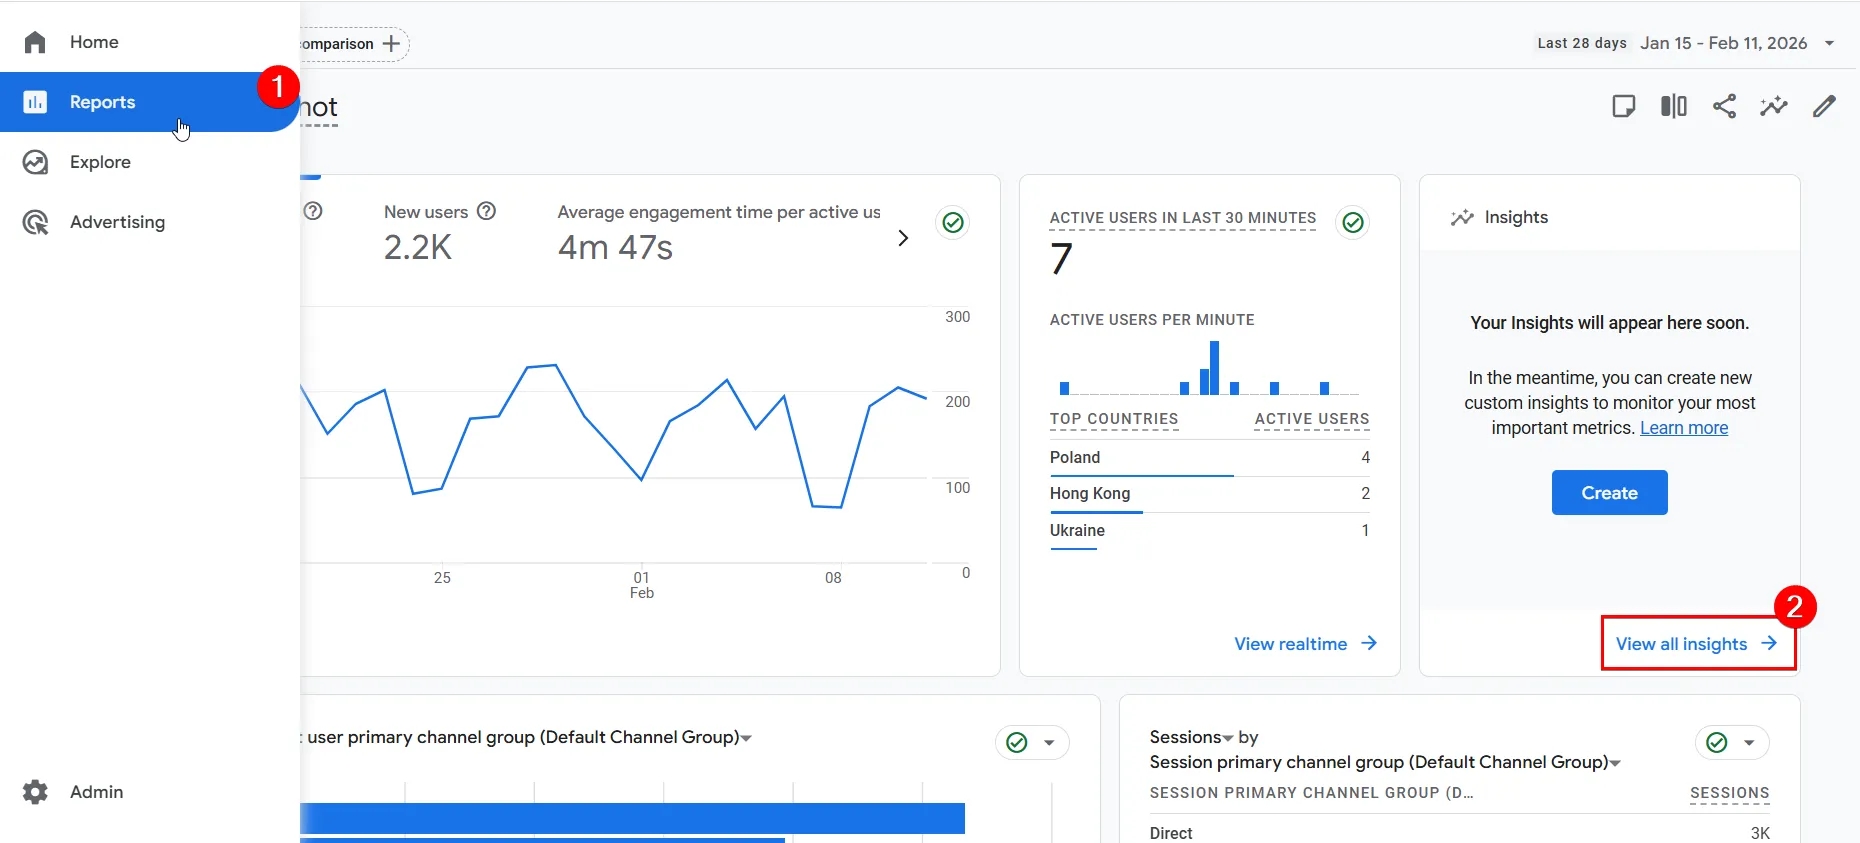
To access custom settings and management, open the All Insights section. You can do this in two ways:
- from the Home page by scrolling down;
- or from an overview report in the Reports section.
After navigating to All Insights, you’ll land on a page where you can create new insights and manage existing ones. From this point on, you have the full set of tools for creating custom checks.
Creating new Insights
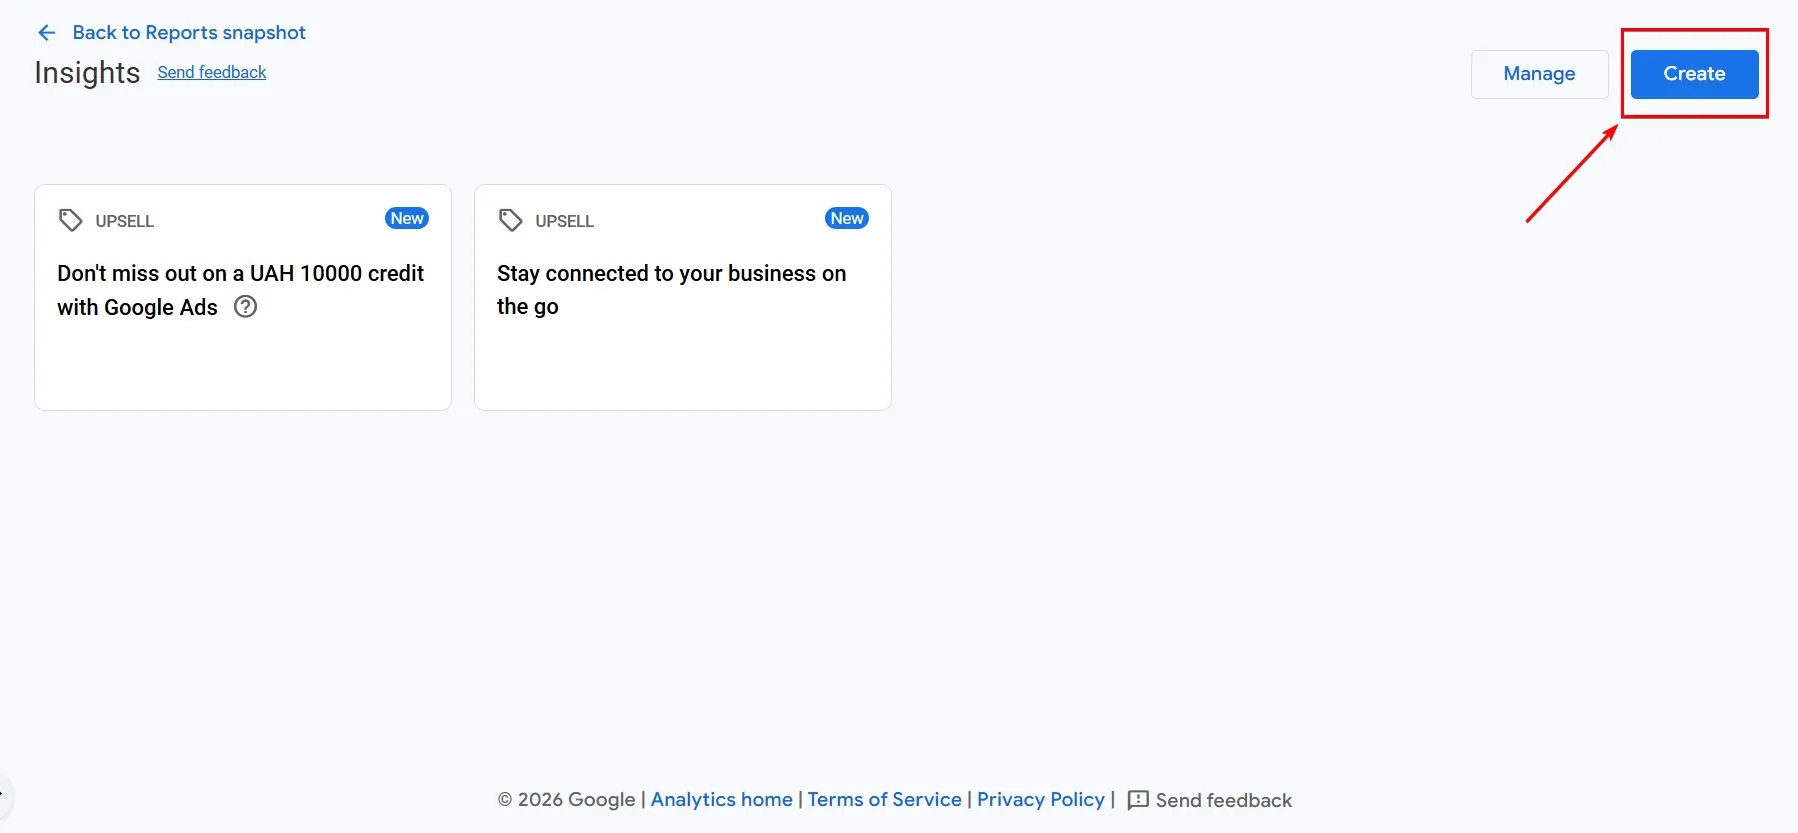
To create a new Insight, first click the Create button.
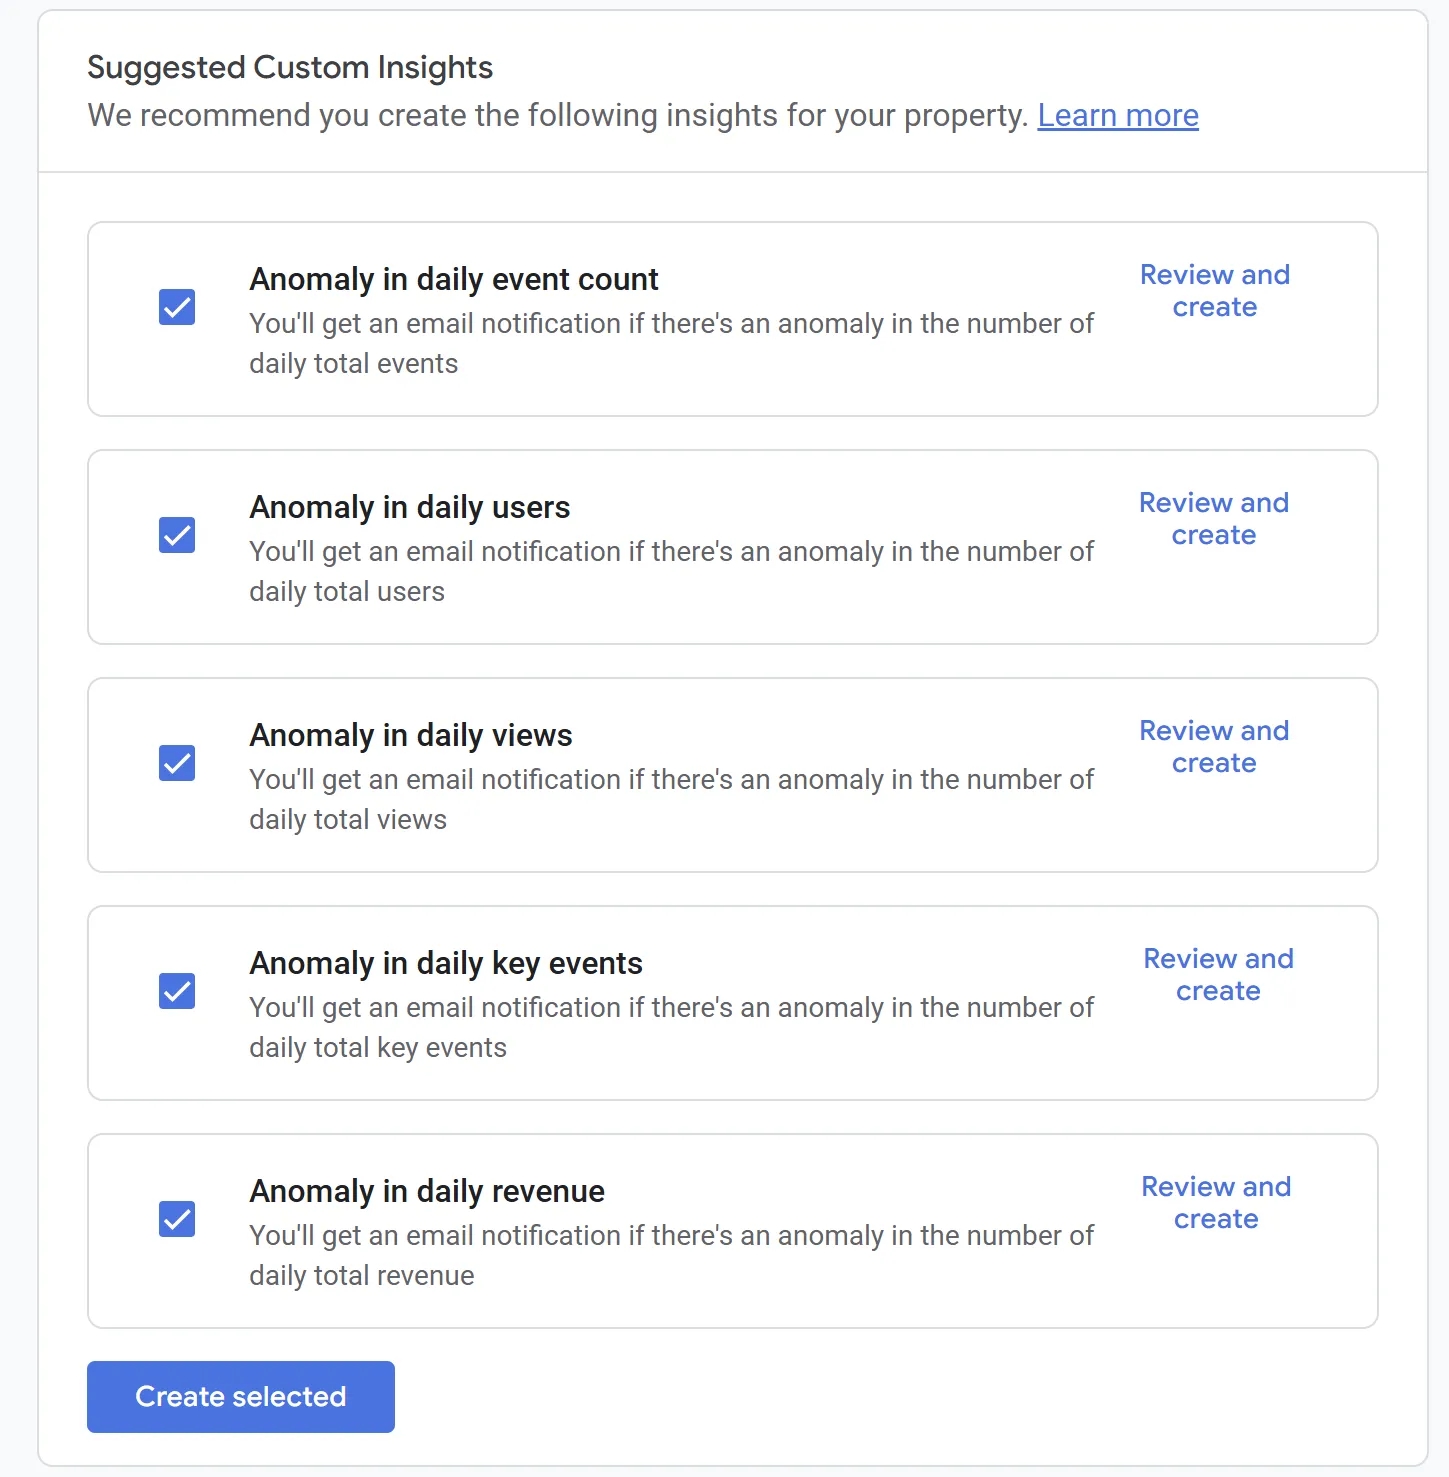
When you open this setting for the first time, GA4 will suggest creating several insights from the recommended list. Each of these options will look for anomalies in the selected metric daily and, if any are detected, send you notifications to the Gmail or Google Workspace account you are logged into at the moment you click the button.
You can either select the ones you need and immediately click the create button, or adjust additional settings if necessary. I’ll explain the setup in more detail below.
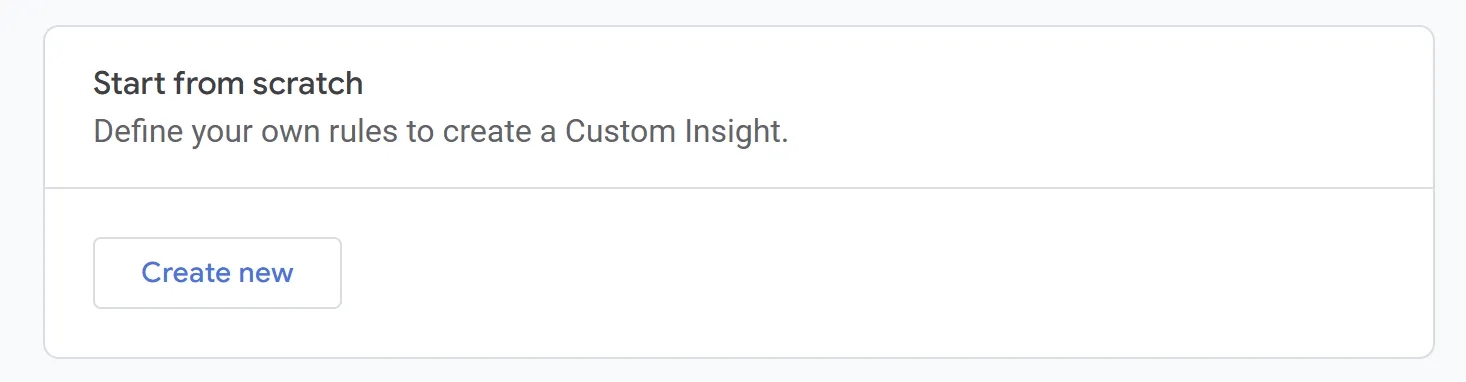
Regardless of whether you use the options suggested by GA4 or not, we’re here for custom notifications. To do this, select Create new.
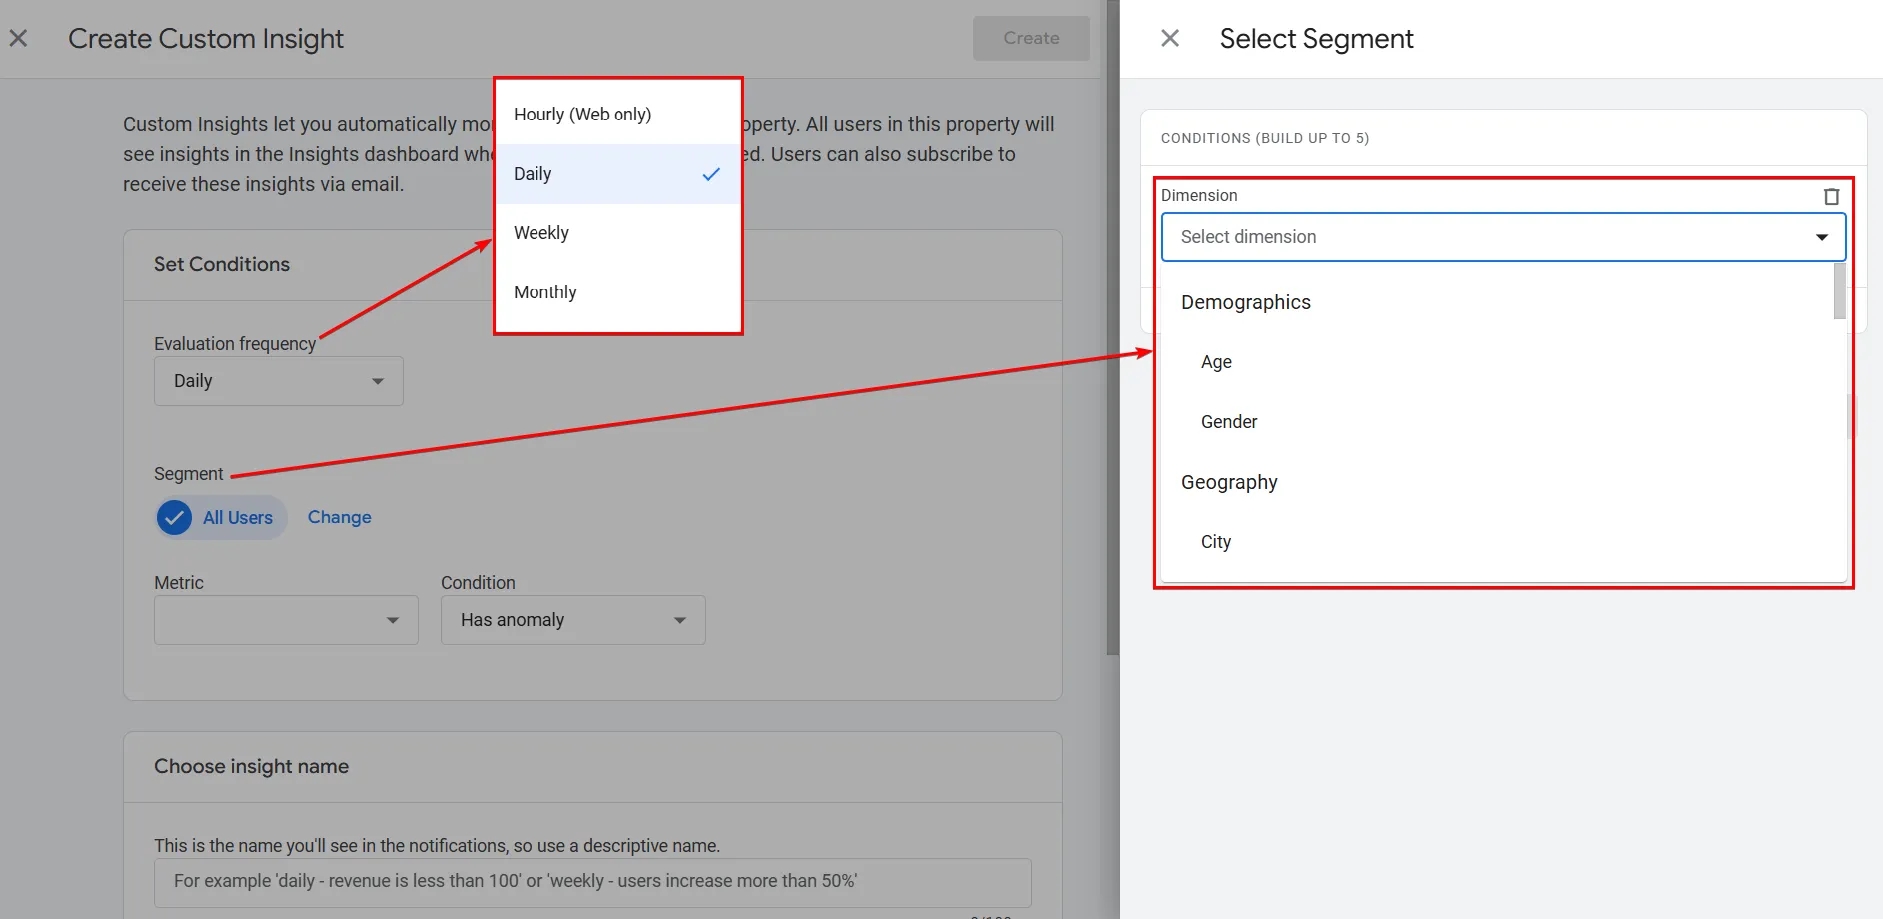
After that, you’ll enter the settings interface. Let’s break it down in more detail:
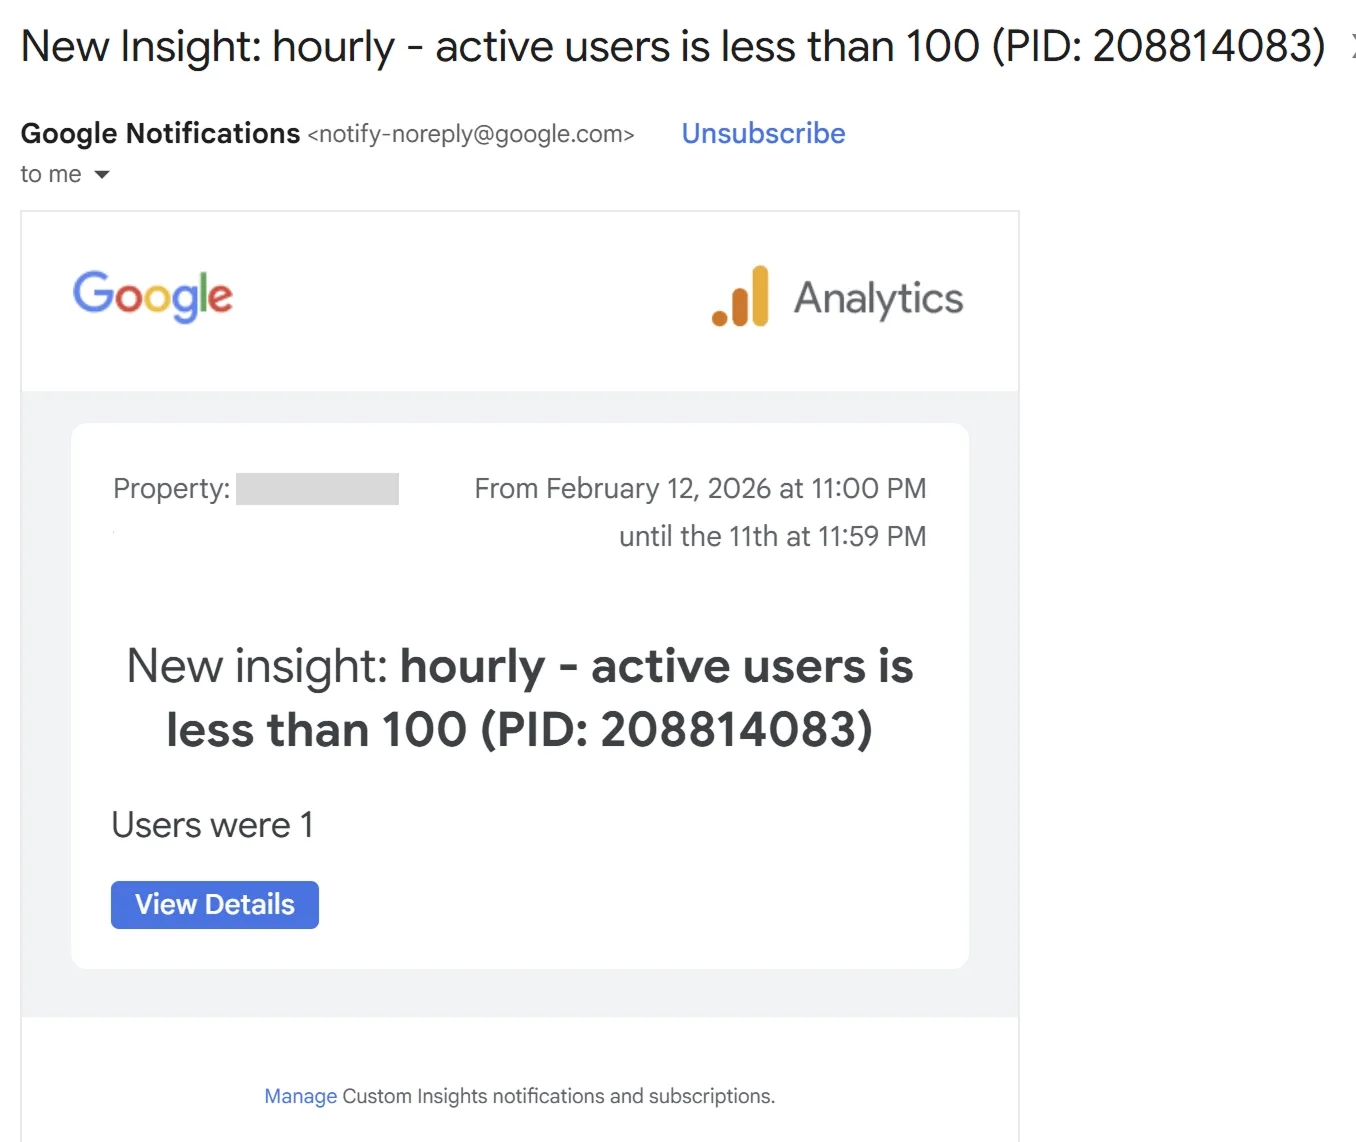
- Evaluation frequency — how often GA4 will check the condition and, accordingly, send you emails if it is not met. There are standard options such as Daily, Weekly, or Monthly, as well as an hourly monitoring option (the screenshot of such an email was shown at the beginning of this article) (works only for web traffic).
- Segment — allows you to narrow the audience if necessary. It’s similar to classic segments, but the basic conditions are quite limited. The standard trio is available: demographics, geo, and technology, as well as filtering by the source of the first visit to the website (why this one — I have no idea, it would be better to have filtering by traffic source) and Date of first visit/session (another interesting condition I haven’t really found a practical use for). And most importantly — the ability to filter by audience membership.
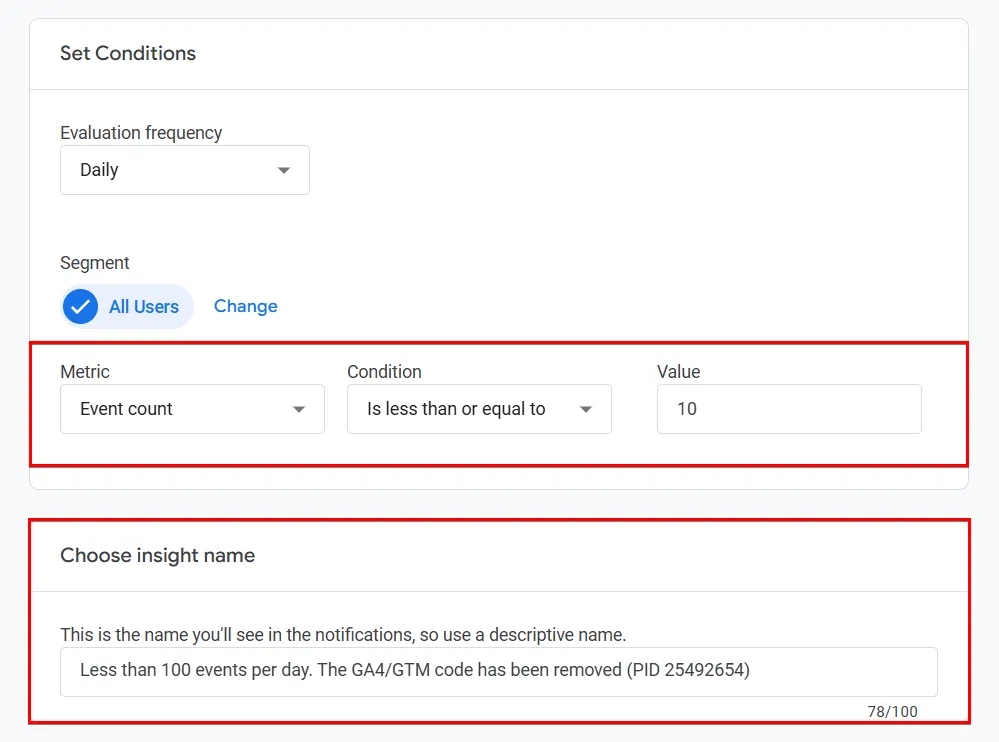
The next step is configuring the data check condition: in the Metric block, you select the metric that will be monitored. At first glance, the list of metrics may seem limited, but combined with audience-based segments, it covers all the cases I’ve been able to come up with. I’ll go into more detail on this later with real examples.
After that, in the Choose insight name block, you set the name of the custom Insight — this is what you will see in the Insights list and in notifications. In the Manage notifications block, you specify the email addresses that will receive a message if the defined condition is triggered.
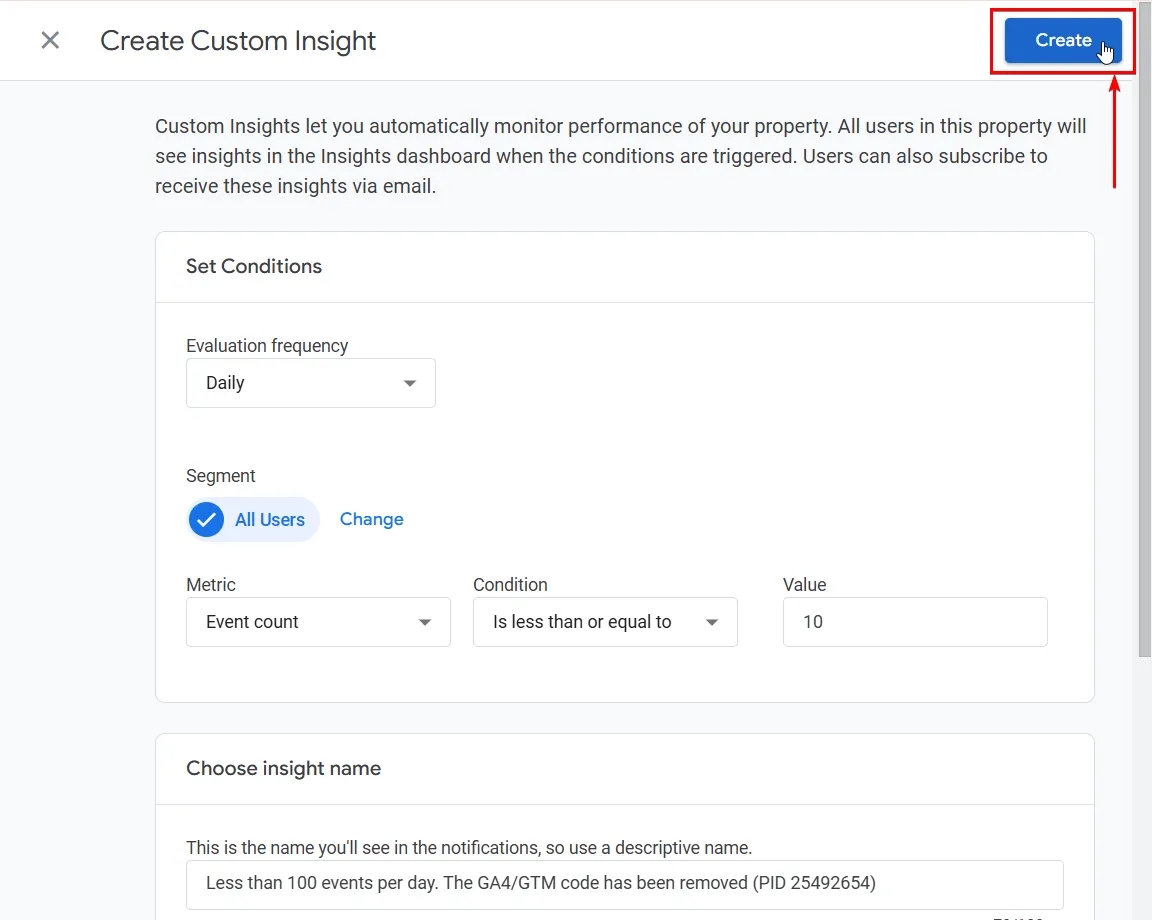
Once you have finished defining the conditions for your custom insight, scroll back up and click the Create button. The custom setup will then be completed, and you’ll return to the insights management section.
Managing custom Insights
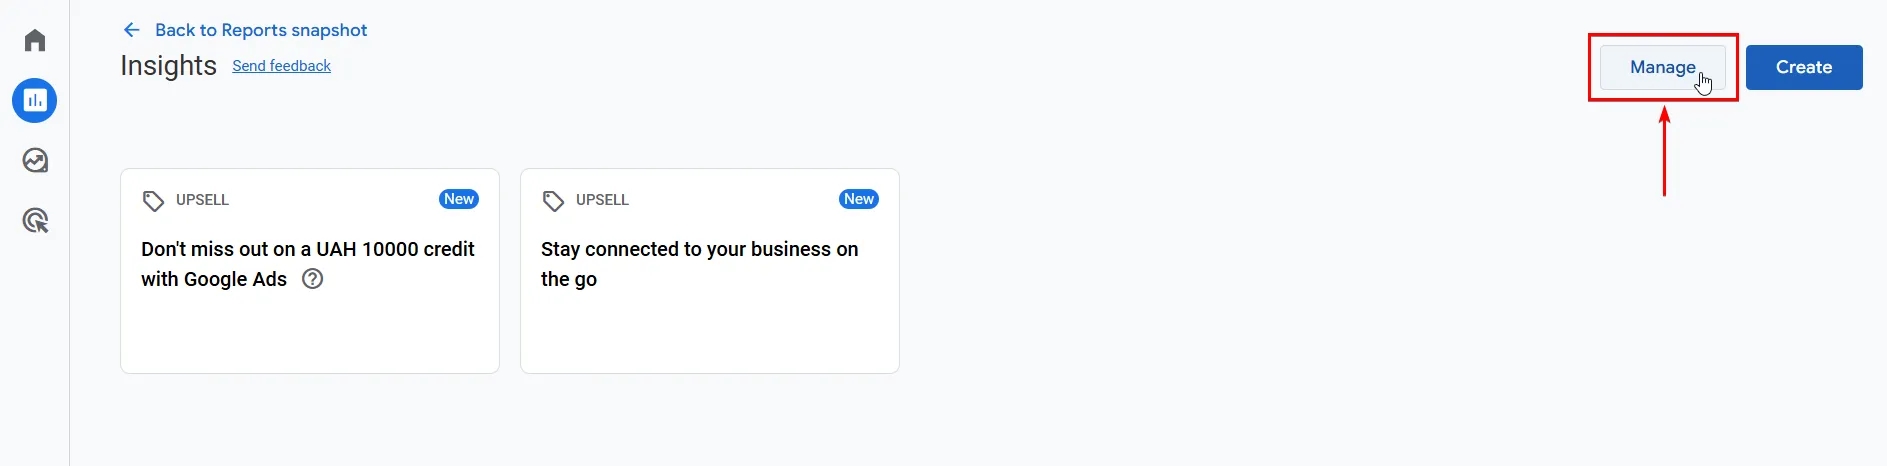
To view and manage custom Insights, click the Manage button.
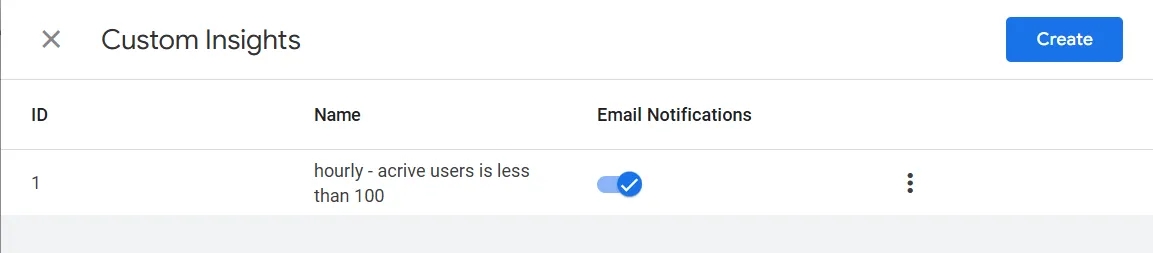
In the window that opens, you’ll see the insights you previously created and can now enable or disable them using the toggle.
By using the three-dot menu, you can delete an insight or edit its conditions.
Alright, now that you understand how the entire process works, let’s go through a few practical use cases.
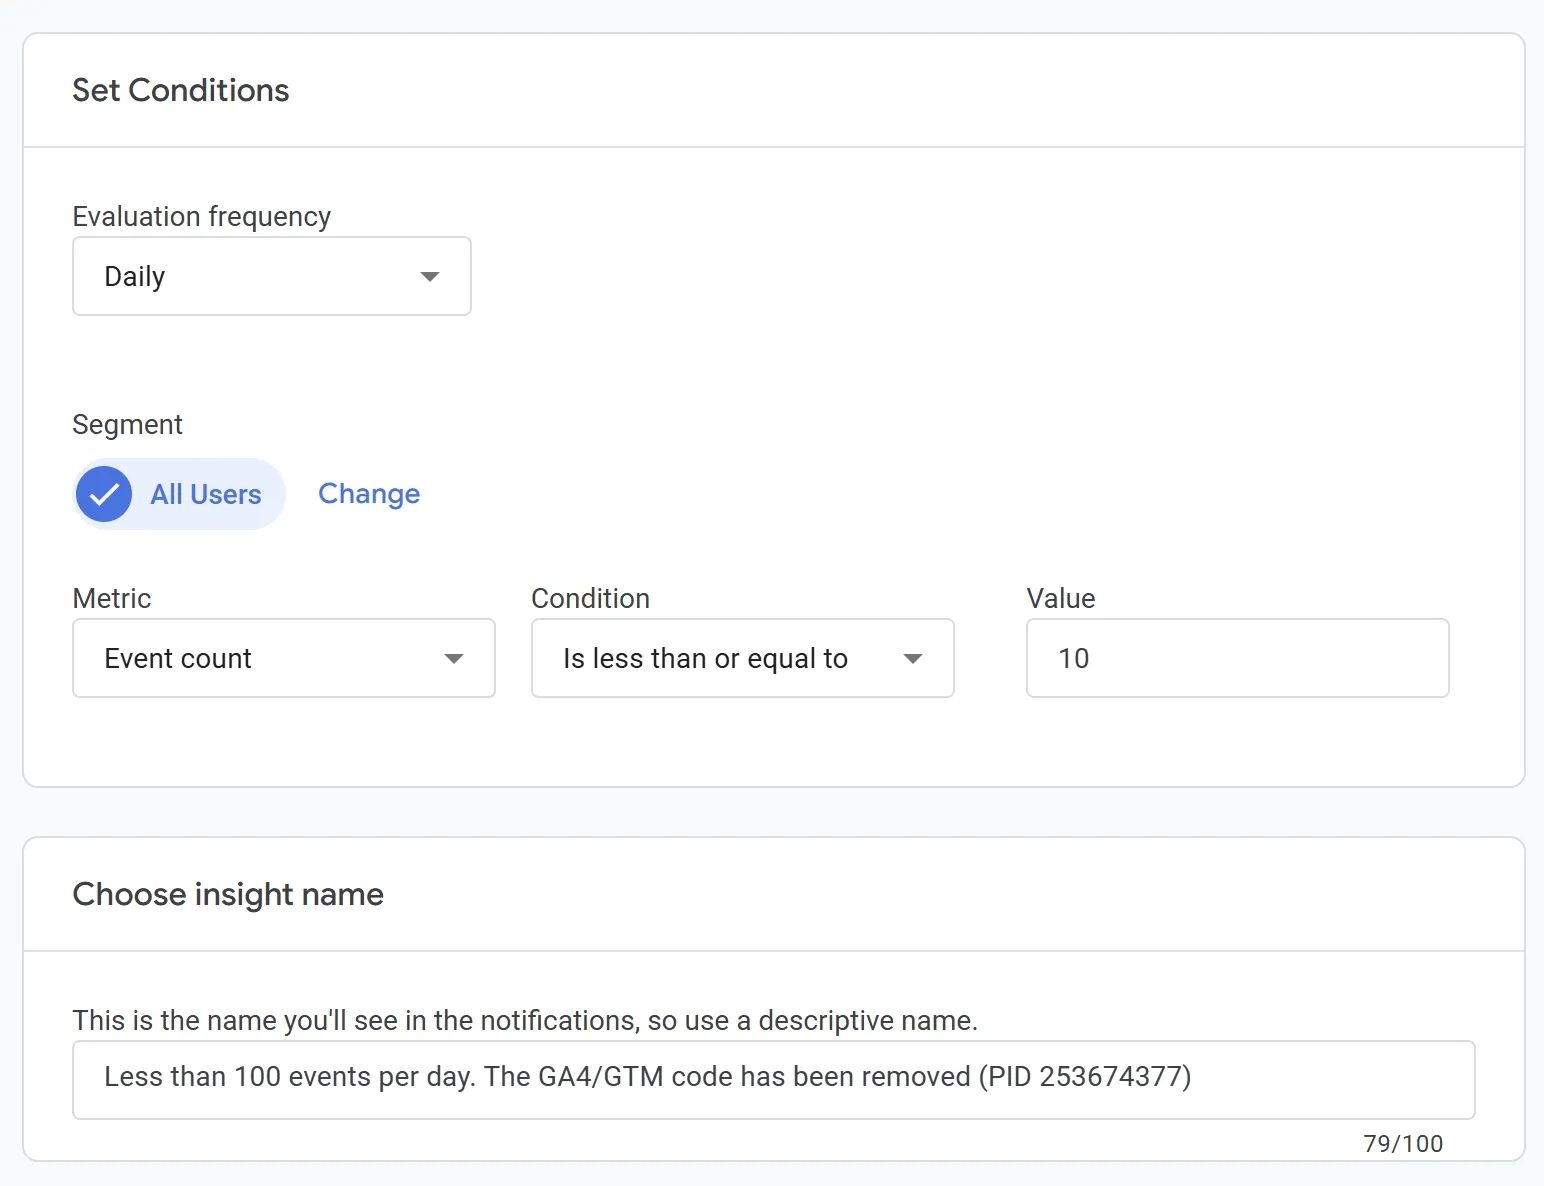
Sending an email notification when the GA4/GTM code is removed from the website
This is one of the most important use cases. How can you tell that something has happened to the code? Obviously, by the absence of any events. I usually set a number different from 1 to filter out edge cases. 10 is a good option.
Tracking issues with purchase tracking on the website
Just because the GA4/GTM code hasn’t been removed from the website doesn’t mean there are no problems. GA4 without purchase tracking for an online store is almost the same as having no GA4 at all. Add a notification for this as well. Again, I recommend specifying a value different from 1 if your project allows it.

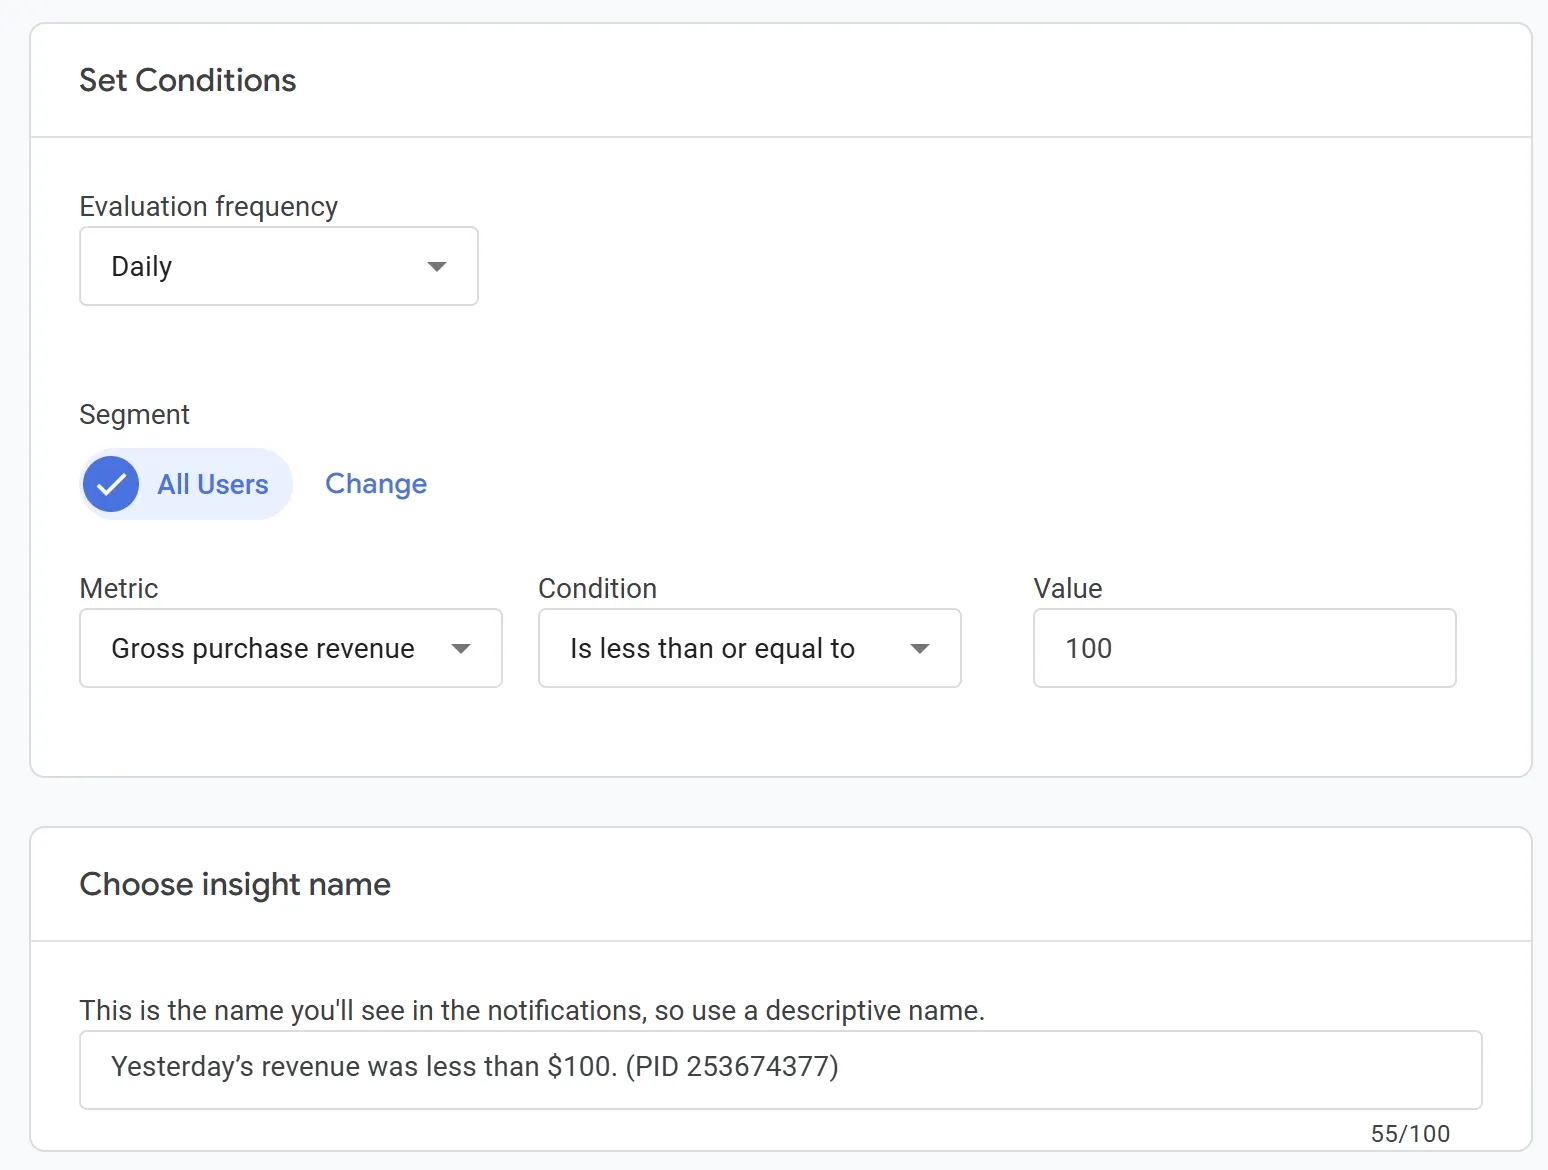
Sending a notification if there was no revenue yesterday
Yes, this is quite similar to the previous case, but sometimes transactions are still being sent while revenue stops being recorded. This way, you’ll immediately understand the scale of the problem. And you don’t necessarily have to send notifications only when revenue is almost zero. You can also set alerts for when it is unsatisfactory. The amount is specified in the account’s currency.
Instead of a conclusion
We all want to live in a perfect world, but reality is different. Yes, at first glance, the Insights functionality may seem not worth your attention, but if you take a closer look and start using its capabilities to the fullest — it will help you react to abnormal situations much faster, situations that often occur in our reality.
Of course, in the examples I’ve covered only a small part of the possibilities, and most of them focus on quickly reacting to tracking issues. But this functionality can be used in completely different ways. It can do a great job of helping you quickly spot what really matters.
For example, you can set up a notification when revenue changes abnormally or decreases by a certain percentage compared to the previous week / year. As a result, you don’t have to start every single day by logging into GA4 and checking whether there are any drops. If something goes wrong — you’ll receive an email. And that means you can start your day with something more interesting.
Of course, this is just one more idea. Don’t be afraid to use your creativity in your solutions.
One more thing. There’s a fine line when it comes to notifications: it’s good when they signal a problem, but it’s bad when there are so many of them that they distract you from your main tasks. Don’t overdo it ;)
Loading comments…